Image Slider

Candy Castle Patterns Sew-A-Long: Step 2

I'm back!   Since I picked out my fabric on the first day of the Sew-A-Long, it was tough waiting the next two days (although I usually take forever to decide so I normally appreciate the longer window).

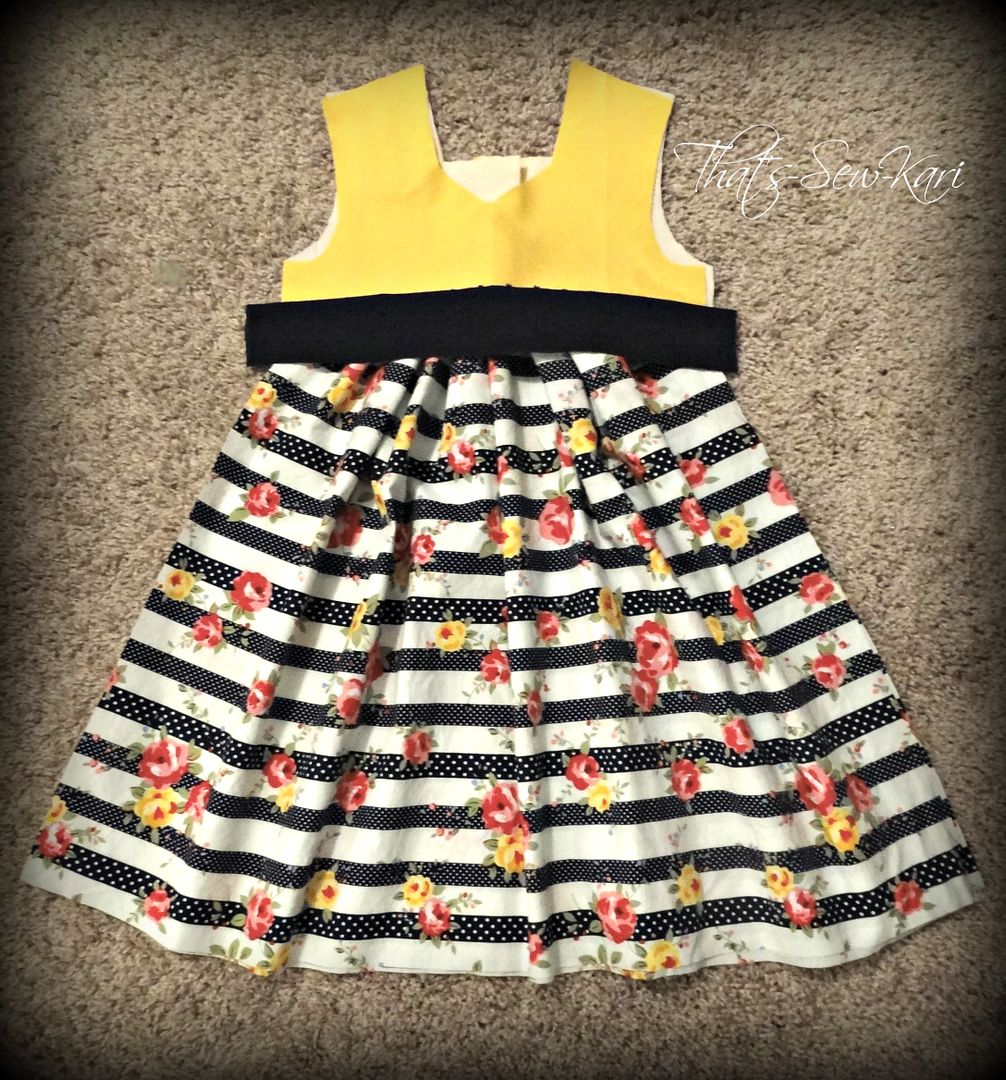
Today, I got to cut out my fabrics and I'm even more in love!!!   I'm such a visual person so even though, I set the fabrics in the order I would see them on the dress, there's nothing like seeing the actual pieces cut laid out like a real dress.   I mean, seriously --- <3

For my brown-eyed brunette 4 year old!

As you can see, I decided to go ahead and make both of my daughter's dresses.   It's not going to be that much extra work and this way, they'll both be done with plenty of time to spare --  AND -- what would be cuter than a sisters photo shoot!?

For my 2 year old: My blue-eyed blondie!

Like I said in my first post,  I chose the Candy Castle Princess Dress pattern, but I am going for a more classic silhouette so I am skipping the top skirt.  I also decided to use the sash from the Peppermint Swirl Dress since it's slightly narrower and I love the sash top-stitched onto the dress along the bottom of it.

If you haven't decided if you'd like to join in, there's still time (click HERE to go to the Candy Castle Patterns Group where all the fun happens)!   Tomorrow, we'll be making a muslin to check the fit (I'll be skipping this portion as I've made each girl both a Candy Castle Princess as well as each a Peppermint Swirl so I'm confident on the fit).

I'll be back on at the beginning of next week with my bodices sewn up!


Happy sewing!!


It's Sew-A-Long Time at Candy Castle Patterns!

Candy Castle Patterns is back with another Sew-A-Long!  This marks the 4th Sew-A-Long since August.

Q: What is a Sew-A-Long?

A:  A Sew-A-Long (SAL) is where a group of people all sew the same pattern at the same time.  A schedule of events is posted at the beginning and each day or so, more steps are added until the garment is completely sewn.  And, of course, lots of chatter and pictures along the way make them extra fun!

This SAL is a bit different because we're sewing along to 3 patterns actually - two dress patterns (Peppermint Swirl and Candy Castle Princess ) and then an additional sleeve pattern (Swizzle Sticks Sleeve Add-on) that is optional.

We've just begun, so our "homework" today is to purchase our patterns and purchase our fabrics!   Well, I owned the patterns already so that was the easy part!   Deciding fabrics is always a lengthy process for me.  I always want to get it just right.  I had lots of choices from my stash and depending on what I chose would help me decide which pieces of the patterns I'd be using.

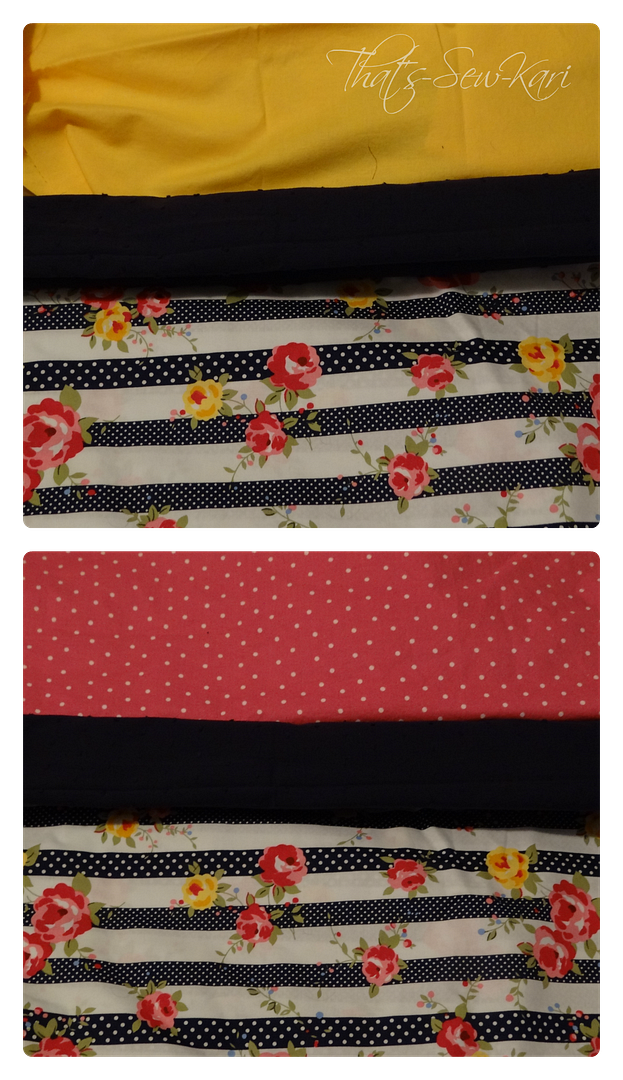
After much deliberation (and pulling out every bit of my stash!), I decided to start on my daughters' Easter dresses.  If I don't, I know it will be almost Easter and I'll be scrambling to make something.  Just before Christmas, I was in Hancock Fabrics and saw a fabric that immediately screamed Easter dress to me!
Top picture is for my blonde-haired 2 yr old and the bottom picture is for my brunette 4 yr old!

I will be going for a simple silhouette here - I'll be using the Candy Castle Princess as my base, but I will be skipping the top-skirt.  I've decided a sleeveless dress would look best (so I will have to save my Swizzle Sticks Sleeves for another dress!) and I picked different colored bodices for each girl.  A navy Swiss dot sash will be the finishing touch.

Today is just the start so there's still plenty of time to join in :) Head on over to the Candy Castle Patterns Group on Facebook to join in!  Oh and through Thursday night, there's a discount on the Swizzle Sticks Sleeve Add-on -- purchase HERE & enter code SWIZZLE at checkout to save 25%.

I'll be back on Friday with my pieces cut out!

Happy sewing!

Project Run & Play: Sew-A-Long Week 1: Winter Wonderland

Last year, I discovered Project Run and Play (which is like a blog version of the hit show Project Runway).  Each season, there are contestants as well as 'at-home entrants'.   Someday, my goal is to be awesome enough to be a contestant, but for now, I'll play along when I have the chance.  

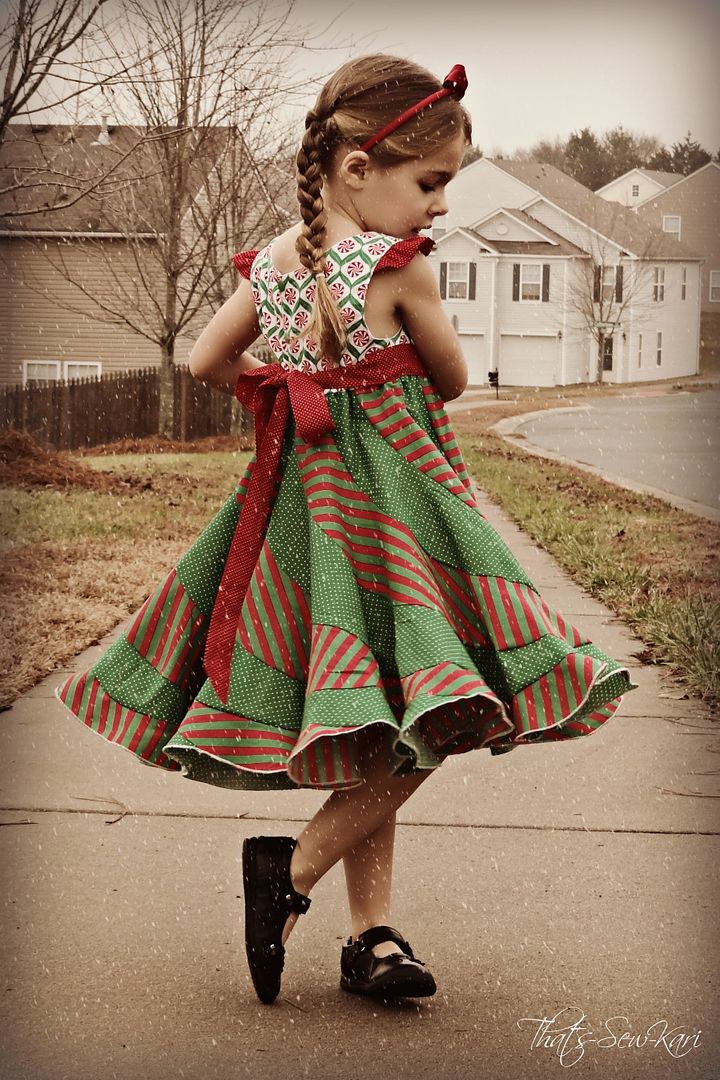
Week 1 is "Winter Wonderland" and I've got the perfect outfits :)  Recently, Candy Castle Patterns released a dress pattern, called the Peppermint Swirl Dress.  I used it to make both Christmas dresses for my girls.

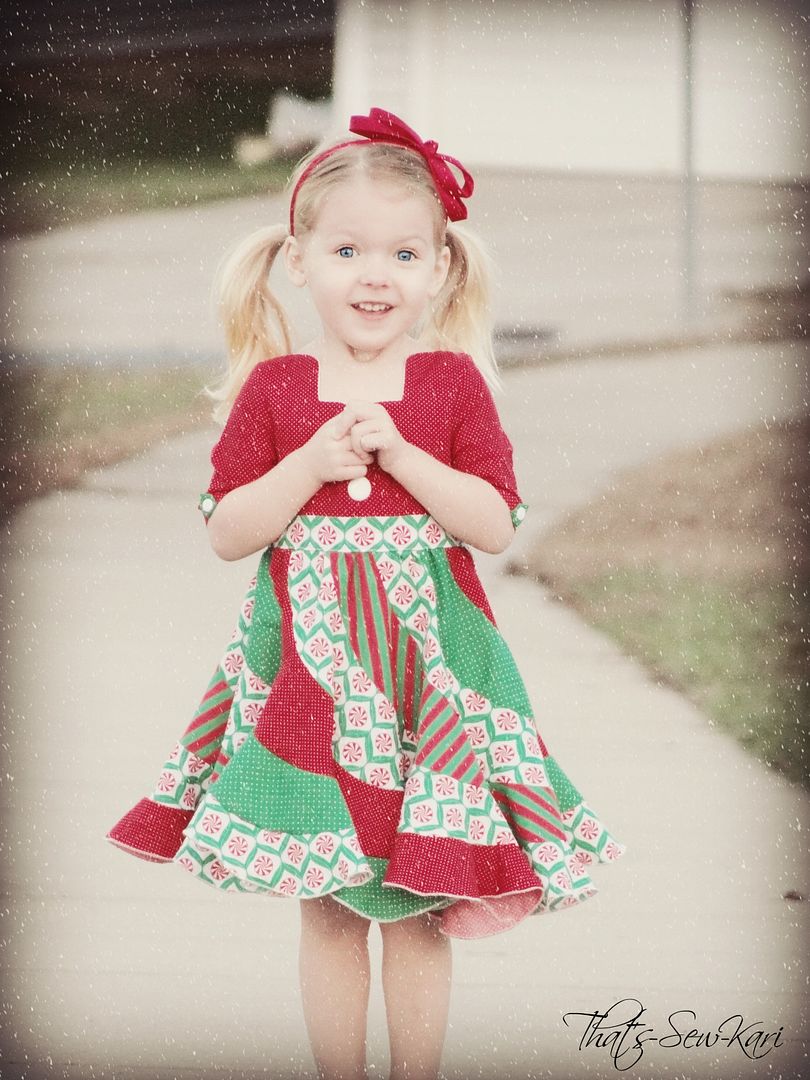
My favorite picture - this was taken on a quick break from running down the sidewalk with her sister.  She stopped to look at me, with a hint of surprise and excitement in her eyes.    I was ready, and waiting with my camera :)

This was actually the second version of the dress I made.  After I finished my first one, my two year old asked me daily if I had sewn her Christmas dress yet.  I was SO glad when I finished...LOL

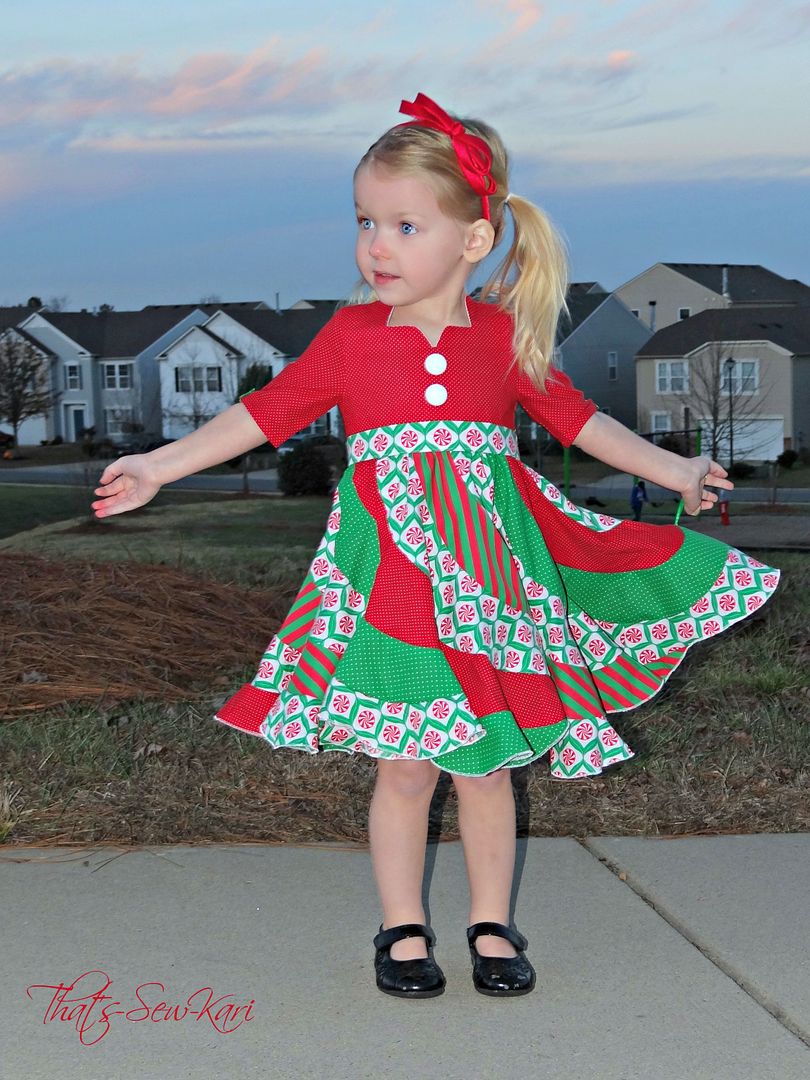
For this version, I added elbow length sleeves from the Candy Castle Princess Dress pattern and used 15 flounces instead of the 14 as the pattern is written.

I had my daughter try it on and head outside for photos.  It was slightly cool that day so I was glad for the added sleeves.   After a few minutes, something MAGICAL happened..... it began to snow!   Well, at least, in my picture above, it appears it snowed!!  HAHA.   (I loved adding in the snow during editing ;)  )

We had to hurry!  That sun was setting quickly.  


*********************************************
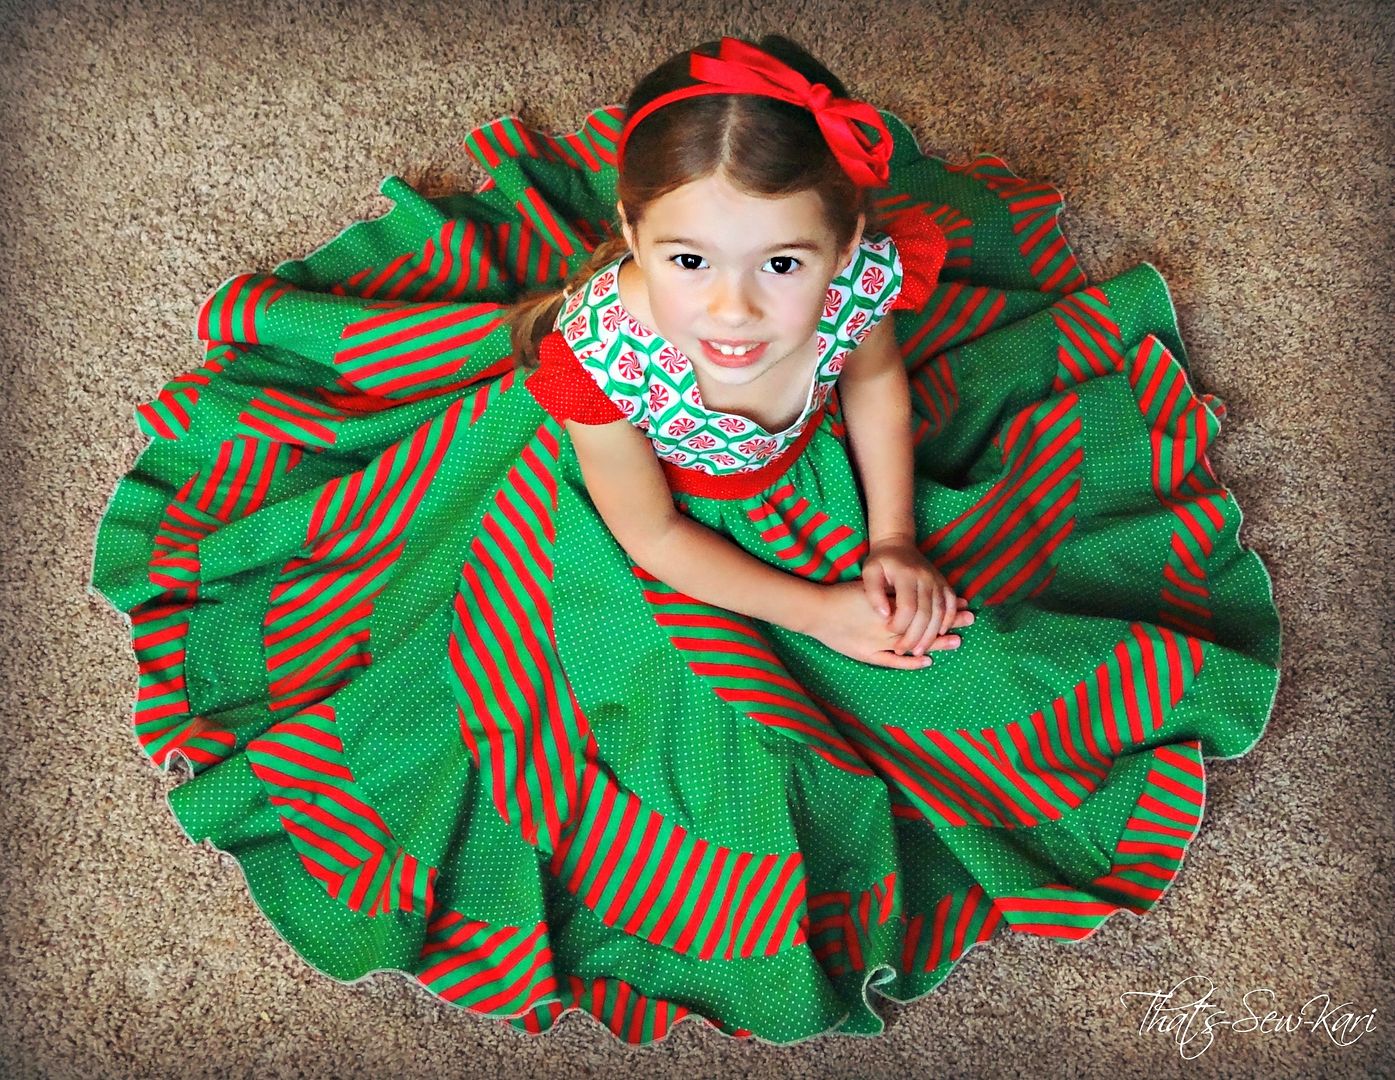
And of course, here is my original Peppermint Swirl.  I blogged all about it HERE


One of my favorite pictures of this particular dress is the aerial shot: 


And of course, no photo shoot is complete without some sisterly love... HA!

"Mom!!!!! She's touching me!!!"
XOXO,


New Year - Sew Many Goals

Happy New Year! It is crazy to think that it's another year gone by already. It seems the older I get, the faster time moves. But, as my husband pointed out, time doesn't actually move faster -- time is constant. Maybe I just get busier each year...LOL

Before sharing my goals for 2014, here's a quick reflection of last year. 2013 was a busy year for me! I started dabbling in sewing in the Fall of 2012 and immediately fell in love. I found it so neat (and still do!)to see simple fabric transformed into something beautiful. I'm not sure that feeling will ever get old. This past year marks my first full calendar year of sewing and with it, came lots of growth. I started the year sewing a simple applique shirt for my daughter's 2nd birthday. By the time the year ended, I was creating entire outfits out of knit fabric, testing lots of patterns for designers, altering patterns to satisfy my creative ideas, sewing dresses for myself(!), selling, and guest blogging for some large blogs. I started the year with just one simple sewing machine and ended the year with the addition of an embroidery machine and also a serger!

I love my progress I have made so I want 2014 to be another important year for me!


The designer I assist asked an important question earlier in the week:  What are your goals/resolutions for the new year??  Well, I'm setting some goals and resolutions for myself and hopefully I can accomplish many of them.
  1. While I want to accomplish more, I want to spend less time during the day doing it.  I've got 2 little girls at home and as last year progressed, I spent more of "their" time doing "my" sewing stuff.  When I started sewing, I only sewed after they went to bed.  Once I started testing, guest blogging, selling, etc.  I had deadlines and often, I would work during the day.   I am trying to make it a point to focus my time and energy on them during the day.  I don't want to look back in several years and wish I could get this time back when I could sit and build Lego towers or color with them.   They need and deserve 100% of my attention.  After all, isn't that why I became a stay-at-home-mom? 
    Love these two little girls!
  2. When I do sew, I want to sew what I already have!  I own so many PDF patterns that I just had to have, yet I've never sewn them!   I even have the fabrics picked for some patterns already.   I am going to try to pull back a bit on testing patterns and try to sew more of what I own.  This one will be hard for me.  I love the testing process (most of the time!!), but it's definitely more time-consuming than just sewing up a garment.   I've already got my eye on several tests this month, though, so we'll see...LOL
  3. I added two new machines last year, yet I have limited knowledge on both.  Last Spring, I bought an embroidery machine and only used it a handful of times and really it was just to embroider a simple name.   This year, I really want to tackle appliques on it as well as piecing fonts together.  In the Fall, my mom surprised me with a serger!!!  I finally got the courage to change the thread color (although I don't know how to thread from scratch), but my machine has extra functions such as coverstitch that I need to learn.  So, my goal is to learn my machines inside and out!
  4. I want to blog more.  I started this blog last March so I could enter my first dress in a sewing competition.  And to do so, I needed a blog.  But, then, I only blogged 10 times ... the entire year.  I think I guest-blogged nearly as many times.   I think, in my mind, my blog entry has to be some grandiose idea.   And if you can't tell, I am rather wordy so I always think it's going to take forever to blog.   So my goal is to have at least one blog entry a week :)
  5. I want to improve my photography.  One of the requirements of pattern testing (and well, blogging) is seeing the finished garments on your child.   While it's not required to have professional-quality photography, I do like to do my best.   I still remember the pictures from my first test.   They were not good.... even a little bit.   BUT, then I figured out how to best photograph my children.  I currently have one of the better point-and-shoots by Sony, but half of my pics are immediately discarded because my camera is just too slow to capture the moment.   My girls DO. NOT. POSE. so the moments are fleeting.   I am currently saving up for my first DSLR (which is going to take awhile!) and then I am going to make sure I learn it.  
So, there you have it... my goals/resolutions for 2014.

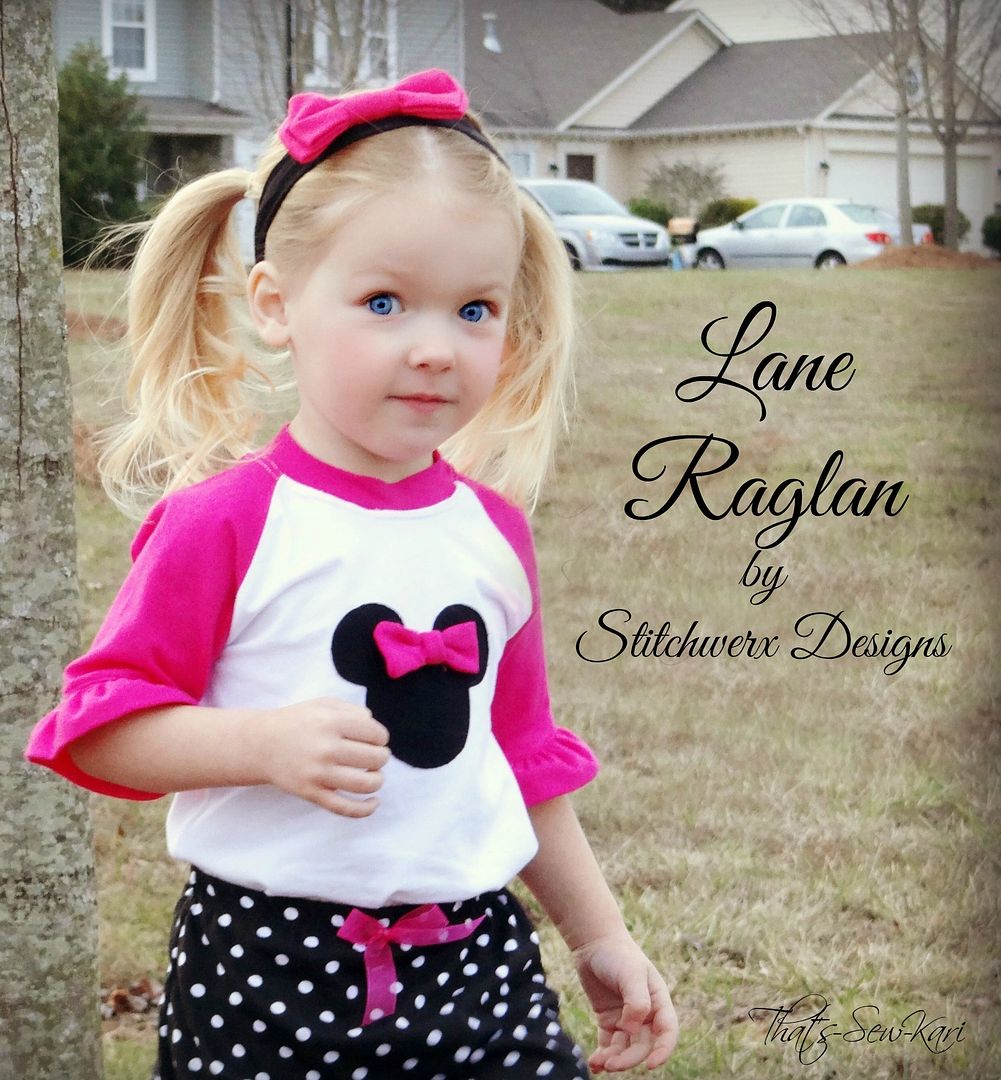
PATTERN REVIEW: Lane Raglan Tee & Tunic and the Essential Leggings by Stitchwerx Designs

Today, I am here with an in-depth review of the two newest patterns to hit Stitchwerx Designs' pattern shop -- the Lane Raglan Tee and Tunic & the Essential Leggings!


It's not often that I get the chance to sew something so versatile, so comfy, and so essential in my daughters' wardrobes.   Don't get me wrong, they love the dresses I've made them, but the Lane Raglan Tee & Tunic and Essential Leggings by Stitchwerx Designs are great for everyday play.   I am on the newer side of sewing knits so I have usually "cheated" and bought my girls their play clothes...until now!

I first met up with Kim of Stitchwerx Designs when she asked me to test her Rosemary & Thyme Pants mid-summer. They turned out super cute and my testing experience with her was really great.  I was bummed when her latest round of pattern testing fell during a visit from family.  I'm always looking to expand my knowledge in the world of sewing knits and knew her thorough patterns could teach me a thing or two.  Kim came up with a great idea - instead of testing, would I be willing to review the patterns after their release?  

And since you are reading this, obviously my answer was YES!  

Without further ado..... let's start with the Lane Raglan Tee & Tunic.


Lane Raglan Tee & Tunic
  • Suitable for boys and girls
  • Size range: 9 mos - 10 years
  • Tee or Tunic length
  • 3 sleeve lengths (short, 3/4, or long)
  • Optional cuffs for the 3/4 & long sleeves
  • Optional lower band instead of traditional hem
  • Pockets for tunic length
  • *Knit only (2-way or 4-way stretch with at least 35% stretch)
  • Suitable for a Confident Beginner
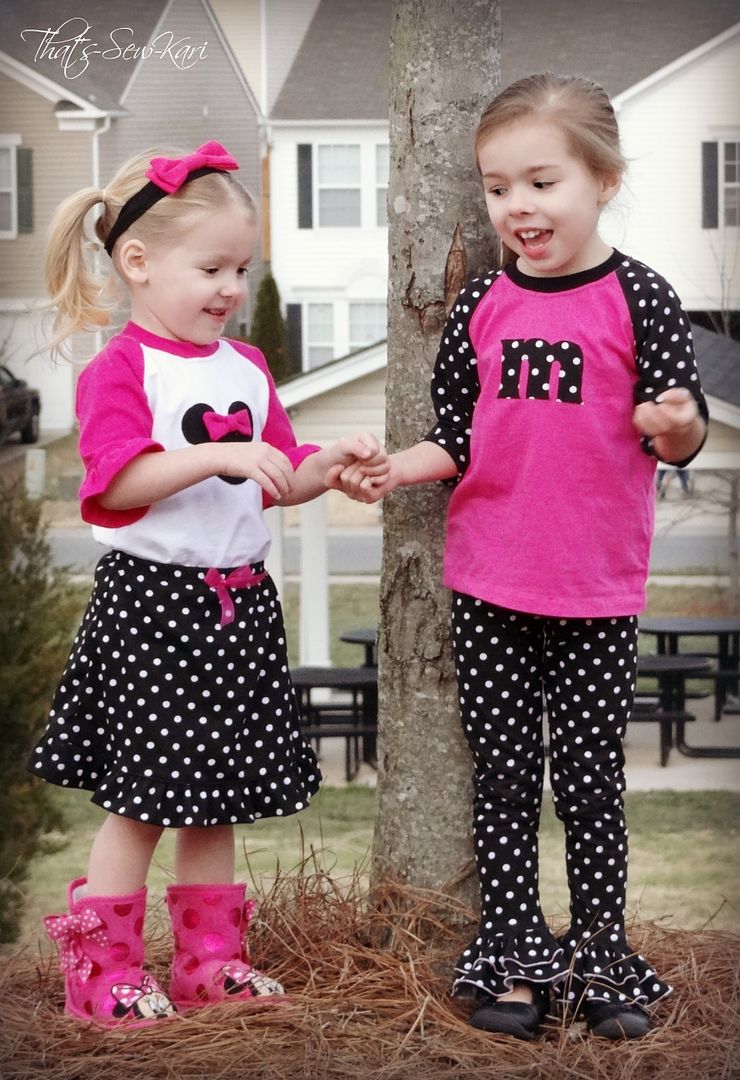
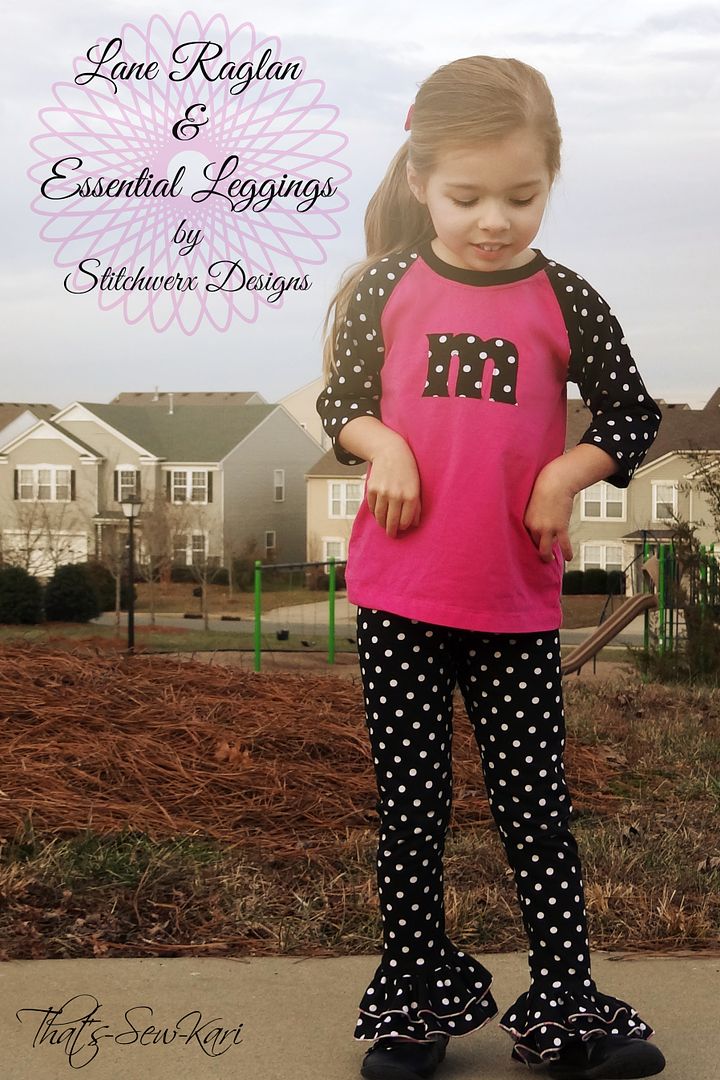
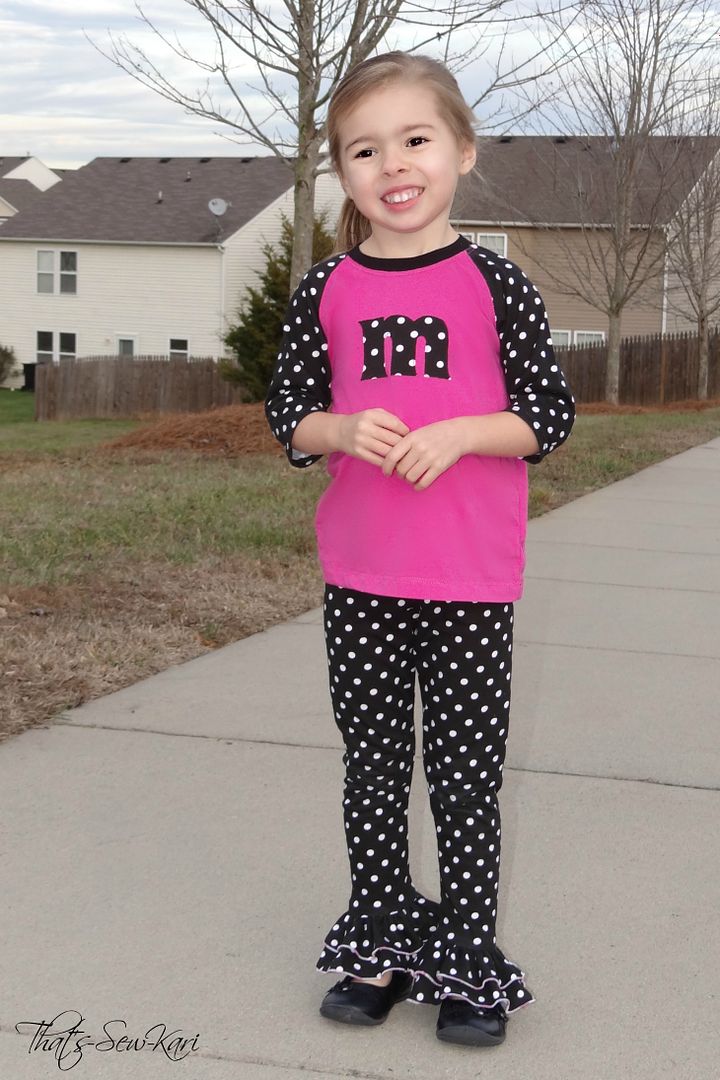
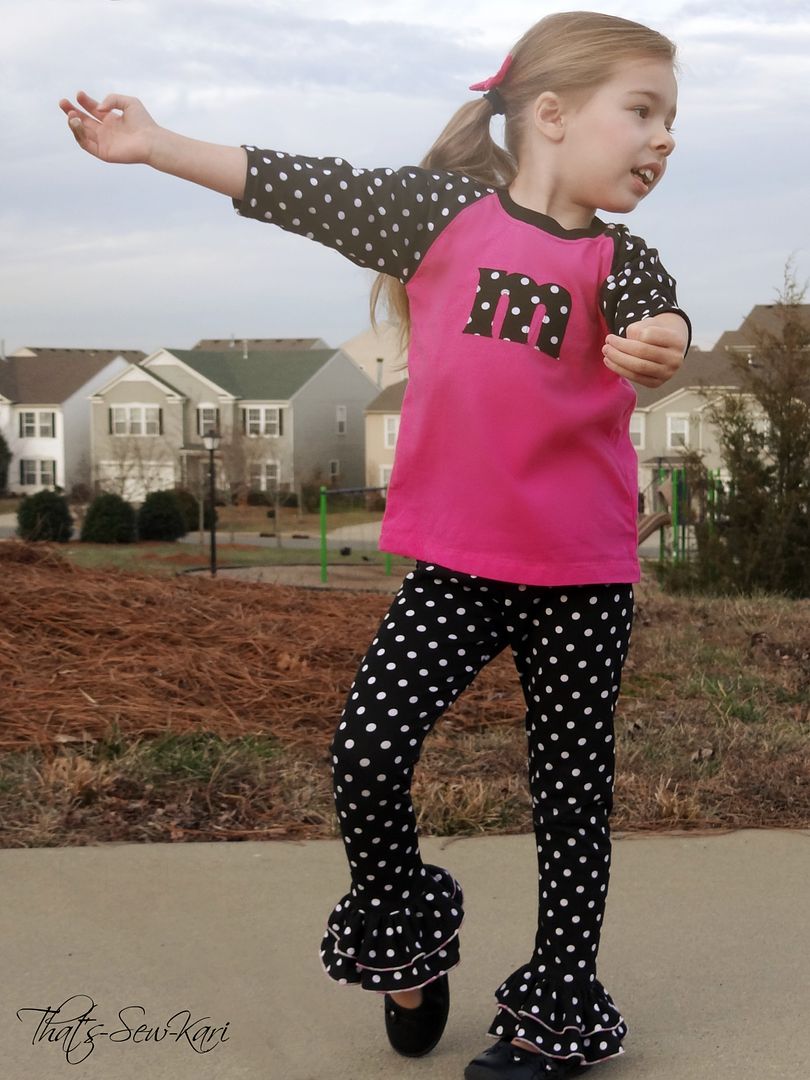
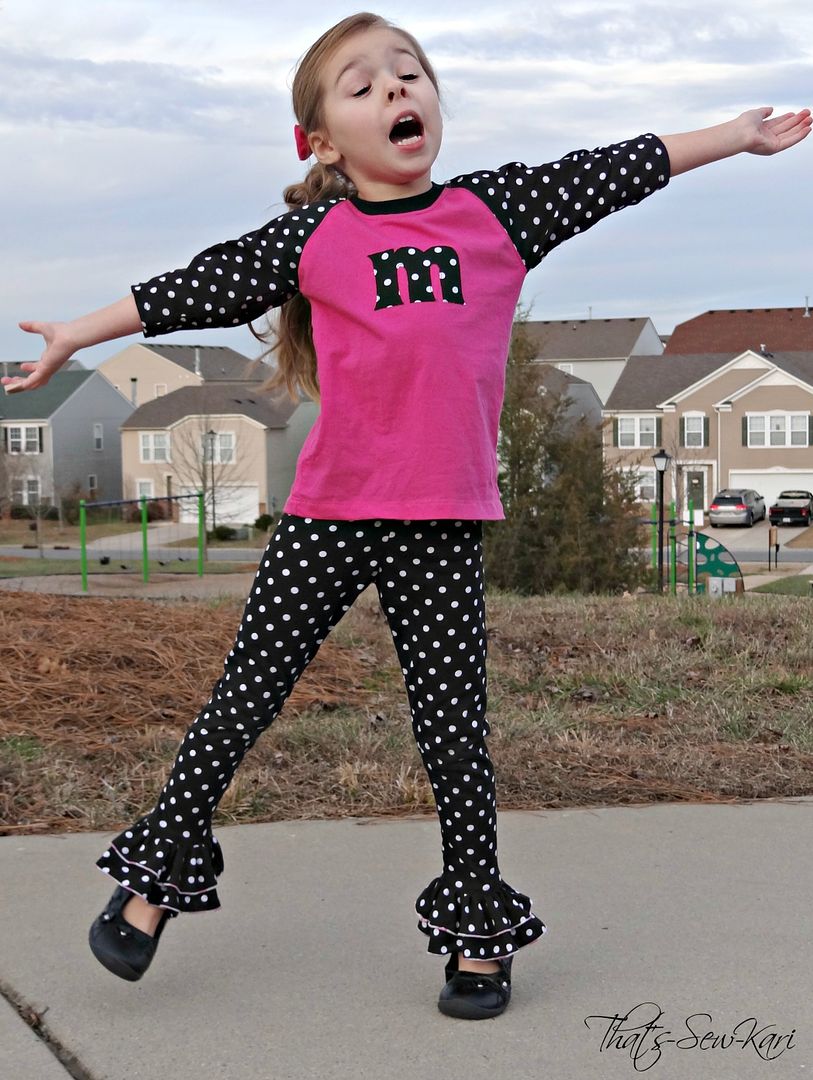
When I first started designing my 4 year old's outfit, I new I wanted to incorporate some pink and her initial -the front of the Lane Raglan is great for applique work.  I used some Jersey knit (I used a Lycra blend for the neck) from Hobby Lobby that had *just enough* stretch to it to work with this pattern.  I decided to make the Tee length so she could choose whether to wear leggings or jeans with it.  And I thought that the 3/4 sleeve length would be the most versatile to take us throughout the year.

Backside of Lane Raglan Tee and Tunic


The great thing about sewing clothes for your children is you can tailor the fit!  My 4 year old is one skinny gal.  At just 30 lbs, but 40.5" tall, she's very thin.  The pattern has a great size chart which include measurements for chest, waist, hips and height as well as finished lengths for both the tee and tunic version.  I chose to make the Size 3T with the length of Size 4T to accommodate her height.  The fit is spot-on!  No more baggy shirts :)  

One happy girl!

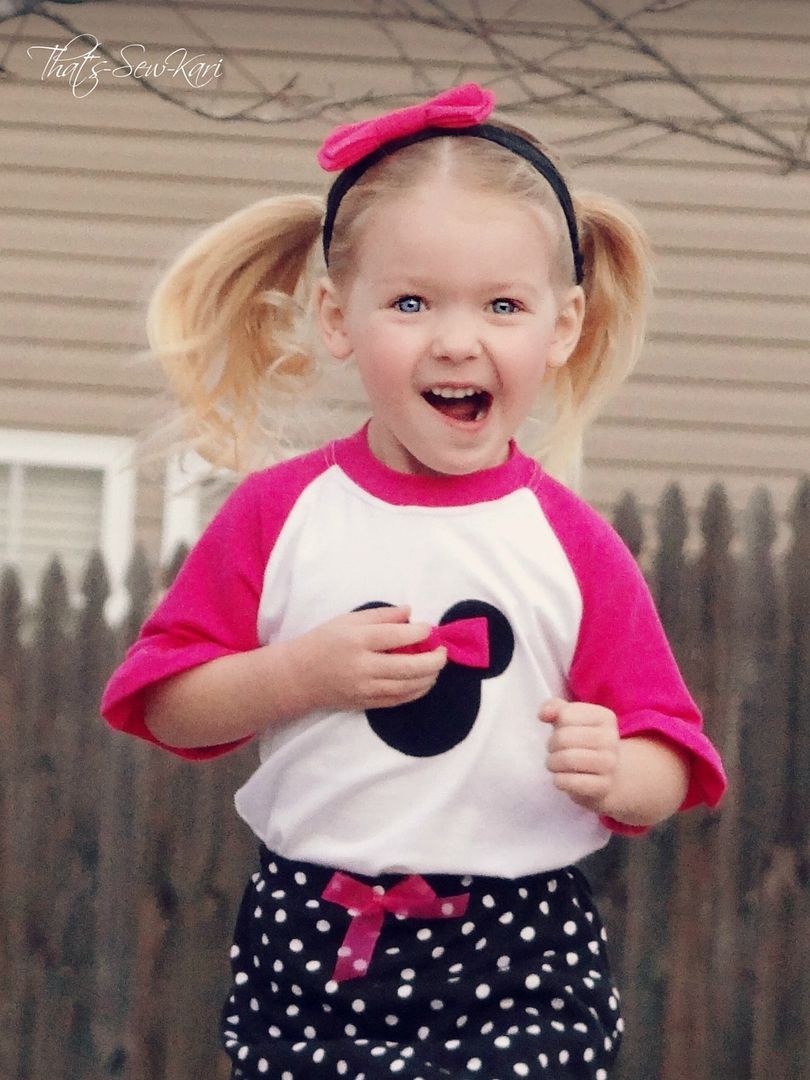
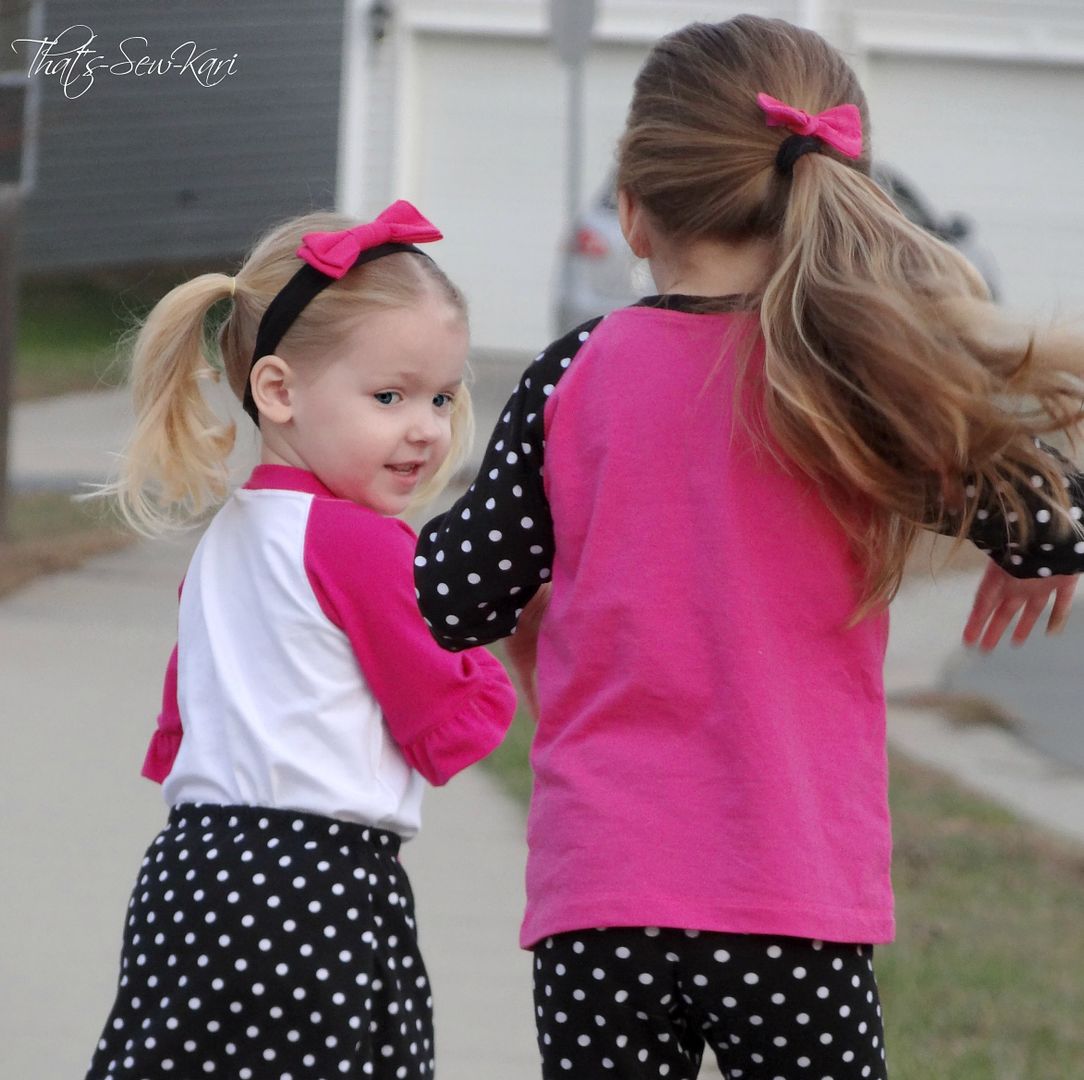
Of course, my 2 year old would feel left out if she didn't get a new shirt!  And, I needed a new shirt to match a new skirt I just made her for a different pattern review (coming soon!).  She loves all thing Minnie Mouse and I knew the front of the shirt was perfect for a Minnie Mouse applique.  Because I apparently make skinny kids, I looked up her measurements on the included sizing chart and determined she needed 18 mos with the length of 2T.  I decided to do short sleeves, but added a fun ruffle at the bottom of each sleeve (not included in the pattern).  I made this shirt using a cotton/Lycra blend from the clearance tank tops I scored from Walmart at the end of the season.  Bonus:  I made sure I placed the pattern pieces just right on the tank top to reuse the original hem!  She was positively giddy about her new shirt!

You think she likes it?!

Although my serger does have the coverstitch function, I used the faux coverstitch with my twin stretch needle on my regular sewing machine as described in the pattern.  I, unfortunately, didn't have matching serger thread to try the coverstitch (and I was scared to rethread....HA!).

The pattern is very thorough with lots of tips to help you through, especially if you are new to sewing knits.  I did run into a snag with the first neck binding I sewed.  I forgot to stretch it as I top-stitched.... and well, pictures had to be rescheduled!  The pattern does not include a cutting guide for the neck binding piece (gives width only) , but does show you how to get a proper fit since it (the length measurement) could vary depending on how much stretch/recovery your knit has.  I was a bit unsure of what 20-25% stretch looked like while I was placing the neck, so I fit it without stretching and then found the 3/4 mark and then added an inch for seam allowance.  Perfect fit.

Close up of neck binding


This brings me to my review on the Essential Leggings!


Essential Leggings
  • Suitable for boys and girls
  • Size range: 0-3 mos - 10 years
  • Capri or Ankle Length
  • Optional cuffs or Single/Double Ruffles
  • Simple Elastic Waistband
  • Separate Rise for the back of the pants
  • Inner-leg Seams only
  • *Knit only (2-way or 4-way stretch with at least 35% stretch)
  • Suitable for Confident Beginner
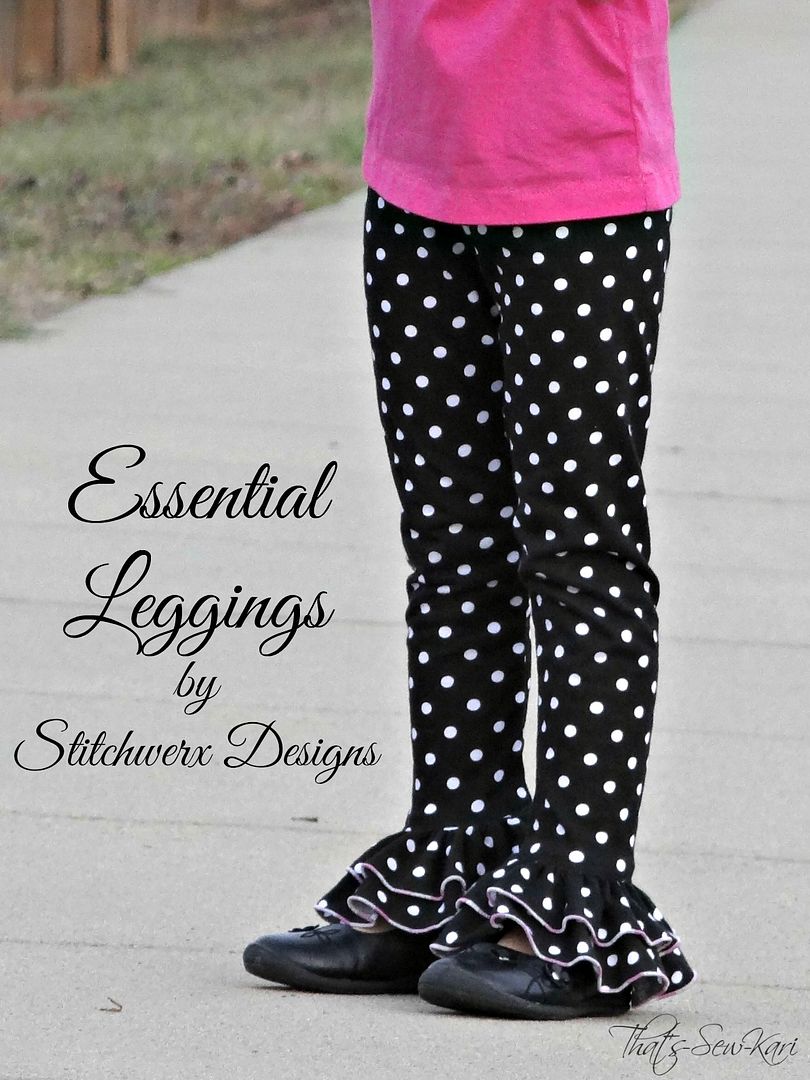
These legging are so easy to make!  I chose ankle length with a set of double ruffles.  I have 2 girly-girls and you can never go wrong with adding a ruffle or two!  I used the same Jersey Knit from Hobby Lobby for these leggings.  After consulting the size chart included in the pattern, I cut out the size 3T with the length and the rise of 4T.  For the bottom of my ruffles, I used my serger for a rolled hem, but you can either skip the hem (as knit doesn't fray) or do a traditional hem if you prefer.  

I'll let the pictures speak for themselves as the fit is about as perfect as you can get!  My next pair, I will make with a Lycra blend since the Jersey doesn't have the best recovery and the knees may become a bit saggy.  BUT, my daughter loves them!

Ballerina moves not included in pattern :)

Separate rise for the back: perfect fit!


If you've never sewn a Stitchwerx Designs pattern, here's what you can expect: 

What to expect from a Stitchwerx Designs pattern
  • Table of Contents to help you navigate the pattern
  • Thorough Measurement Chart to determine the best size option
  • Pattern Pieces are nested, color-coded, and broken into size groups and Seam Allowance is included (Cutting chart for cuffs/hem bands)
  • Pattern Pieces are notated with Pattern Name, Designer, Direction of Stretch and Seam Allowance
  • Pattern Assembly Guide and Layout Guide on Fabric
  • Pages of Tips and Helpful Hints with Sewing Terminology
  • Step-by-Step Instructions with clear photos
  • Photo gallery to give you inspiration

Both of these patterns are a great addition to your pattern library -- I foresee some new pjs, sweatshirts, tunics and lots more tees and leggings in my future!  

Perfect for running and playing


ADDED BONUS:  These patterns are still in the special bundle pricing of just $10 through Dec 22nd! You can find the bundle HERE on Etsy.    Don't delay!

TA-DAAAAA!


| MERRY CHRISTMAS |
  Kari

Christmas Comes Early to Candy Castle Patterns!!


Squeeeeee!!!!!  I am bursting with excitement today.  It feels like Christmas for Candy Castle Patterns fans.

Today is not only the release of the highly anticipated Peppermint Swirl Dress, but also the debut of the new Candy Castle Patterns website!

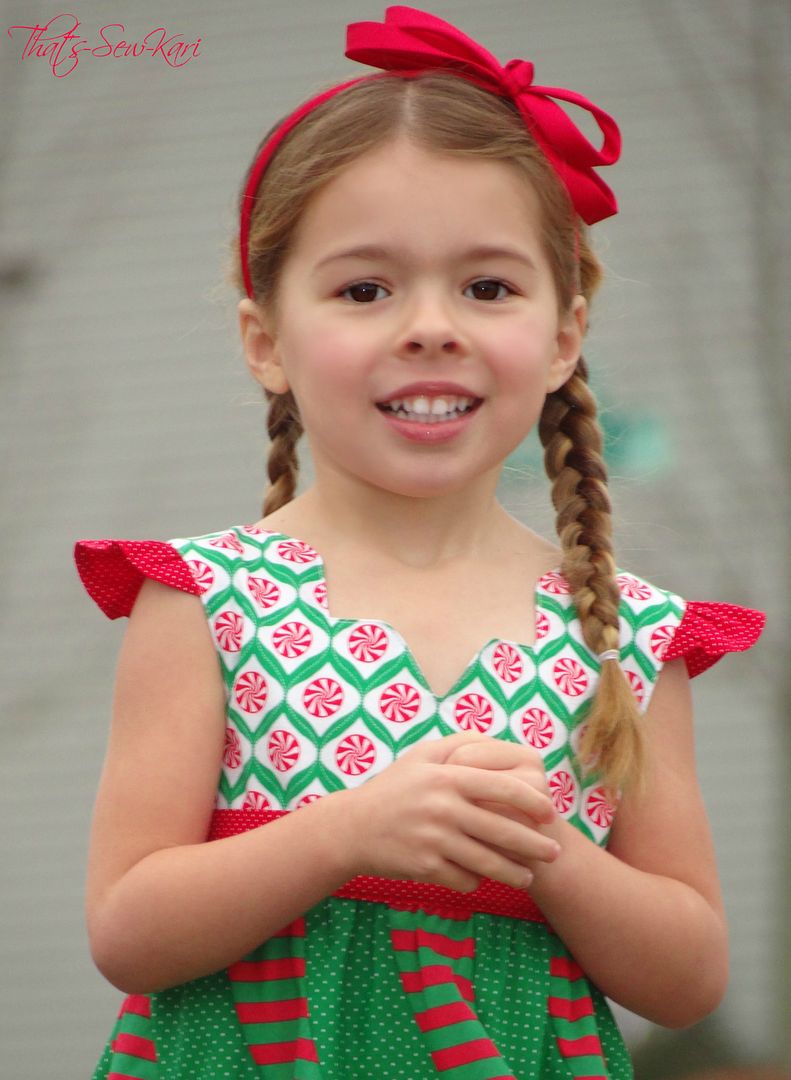
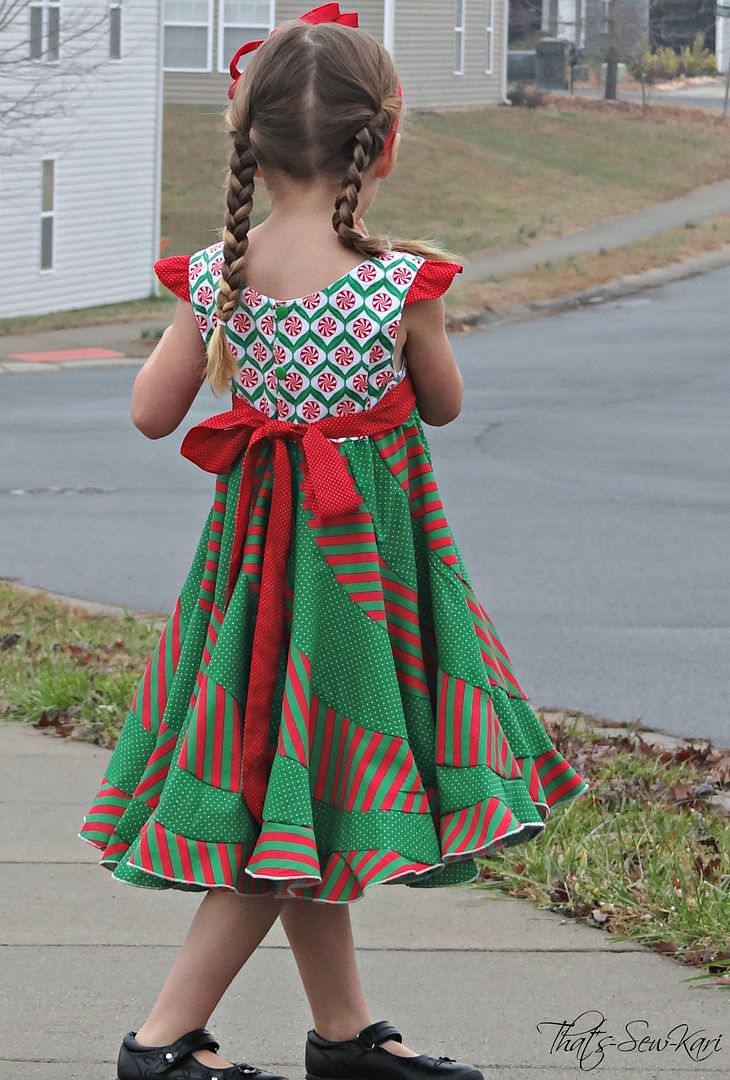
About a month or so ago, in the Candy Castle Patterns Group, we were shown a sneak peek of the Peppermint Swirl Dress.... and it was love at first sight!!  This showstopping dress has a gorgeous petal neckline, flutter sleeves and flounces upon flounces in the skirt for maximum twirlablity!

Close up view of petal neckline and flutter sleeves


Immediately, my mind was swirling with ideas.  The skirt contains 14 flounces (or more if needed for your color scheme) which is the perfect number of flounces for a rainbow dress.  I was set on this idea for weeks, until I ran across "Peppermint" fabric at the store.   I HAD to have it!!!  It is perfect for Christmas and my 4 year old needs a super fun dress for school Christmas parties.

I even made it snow here in the South!


Here's an overview of the pattern:
  • Contains sizes 6m through girls' 10
  • Offers both a slim and regular bodice
  • Pattern pieces are color-coded and nested as well as a 2.5" test square to ensure proper printing
  • A printing guide which tells you which pages you need to print, based on bodice type and skirt size chosen
  • Both a measurement chart and yardage chart is provided
  • A choice of flutter sleeves, sleeveless, or you can use any sleeve (long slim sleeve, 3/4 sleeve, or short, puffy sleeve) from the Candy Castle Princess Dress pattern!
  • Step-by-step instructions with clear pictures to guide every seamstress through the process, no matter what your sewing level is
  • 3 hemming options (rolled hem, bias tape hem, or traditional hem)
  • Inspirational gallery with lots of photos from the testers who worked so hard to ensure the best fit
  • Help, if needed, in the Candy Castle Patterns Group
Back view: I used 3 Kam snaps in lieu of buttons

Sewing this dress isn't nearly as hard as it looks!  I think it took me about as long to cut as it did to sew.  If you stack your fabrics on top of each other, you can cut even faster.  I actually cut my pieces one at a time.  No pins required for sewing the flounces together or for hemming!! Ahh, such freedom :)  If you have a serger, it does make construction faster, but totally not necessary.

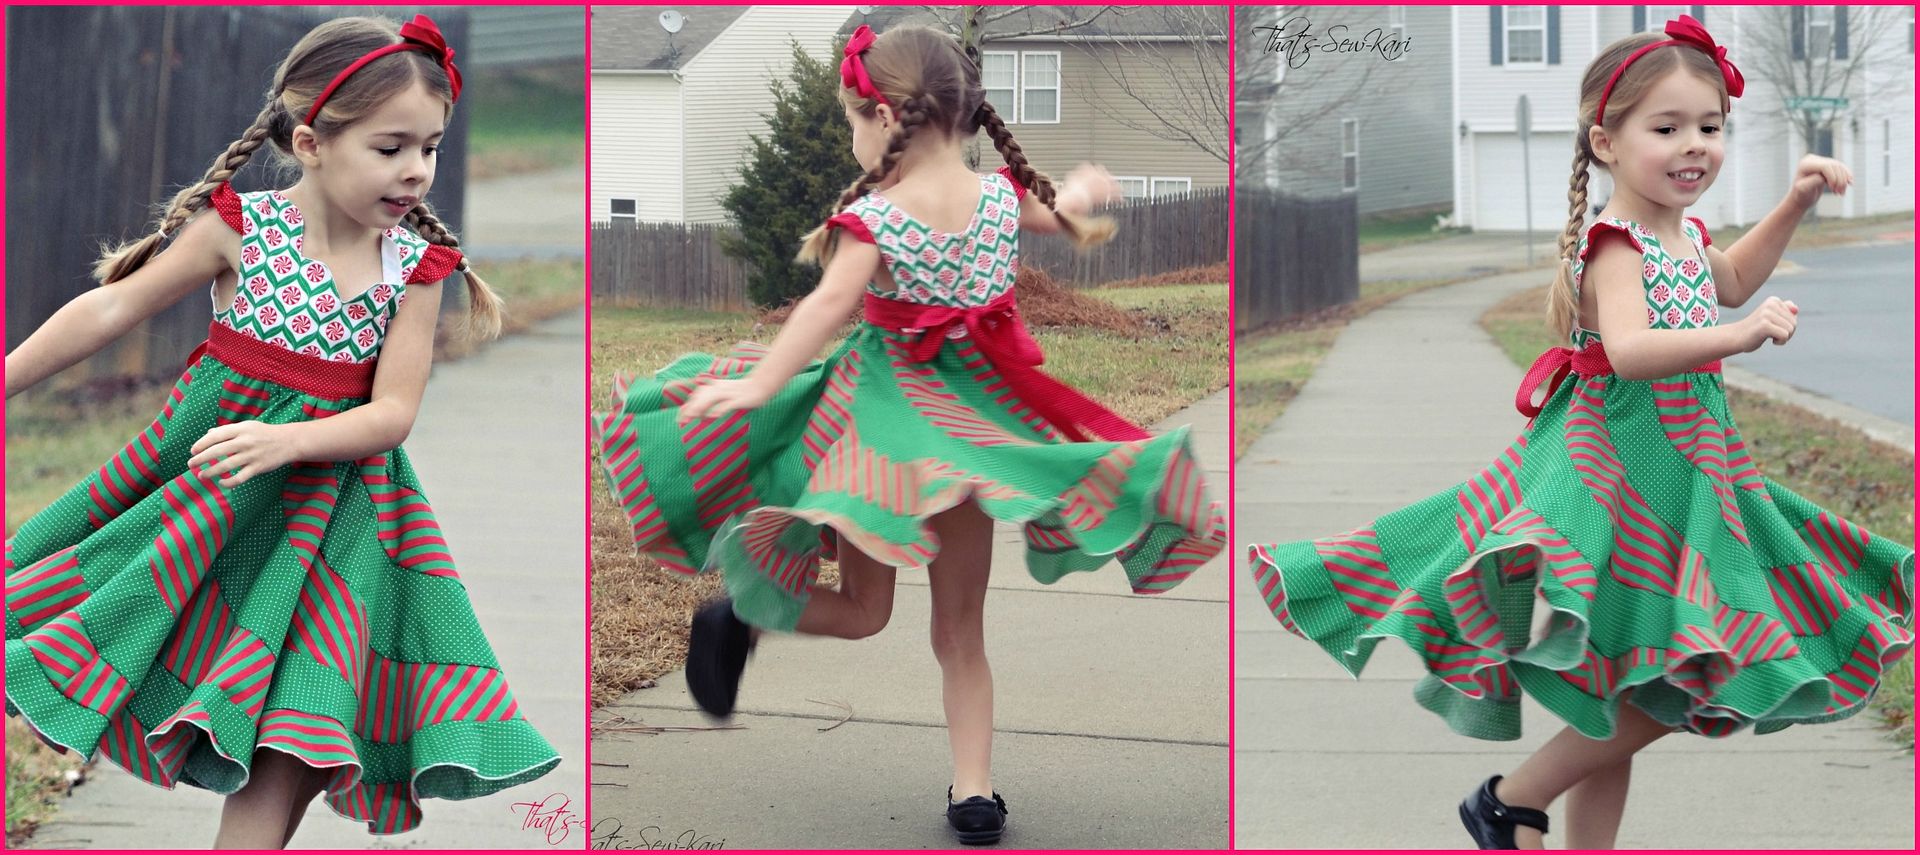
Oh, and the twirl!!!  YES, look at the twirl!   If you can believe it, this is a 22-FOOT hem on this showstopper (this is the size 3)!  Just marvel in all its glory!

She didn't want to stop twirling!!!


To celebrate its debut, Candy Castle Patterns is offering a sale (RARE!) when you purchase at least one additional pattern.  Use the code peppermint during the checkout process at www.candycastlepatterns.com to save 20% when your purchase is at least $15.  Don't delay, though, because the sale ends Sunday, December 8th at precisely 11:59pm MST. 

Happy shopping and happier sewing!!!  

Come show off your creations in the Candy Castle Patterns Group


Next up is a matching one for my 2 year old who is sad that hers isn't sewn yet... and then rainbow ones!!

| XOXO |

Kari

Custom Post Signature

Custom Post  Signature