Image Slider

Sew-A-Bration of Womanhood: Dance Like No One's Watching


CAN'T. STOP. TWIRLING.

Oh, what my neighbors must think of me....LOL

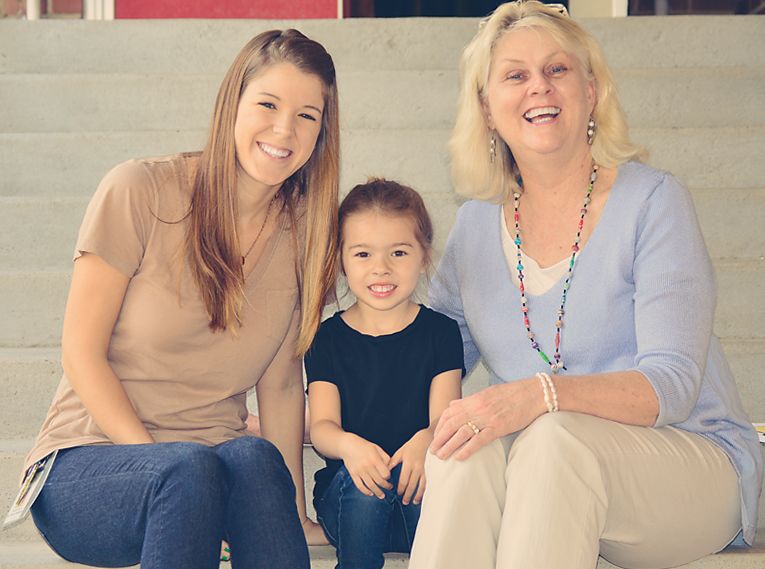
I am thrilled to be a part of the Sew-A-Bration: Honoring Our Common Threads Blog Tour, hosted by Call Ajaire and the Shaffer Sisters.  This blog tour has been a month-long celebration either sewing for yourself or for the other great women in your life.  It's not often that I take part in some self-care sewing and every time I do, I wonder why am I not doing this more often?!?!

Oh wait, I know why.  So I'm a frugal money-conscious person.  I rarely buy fabric unless it's on sale and even then, my girls are tiny so I can make a yard go a long way.   Sewing for myself, however... Even though I am petite, it's rare to get by on less than 2 yards.  Because of this, it's hard for me to take the plunge to sew something just for me.   I have to love a pattern to commit that much fabric to it.  

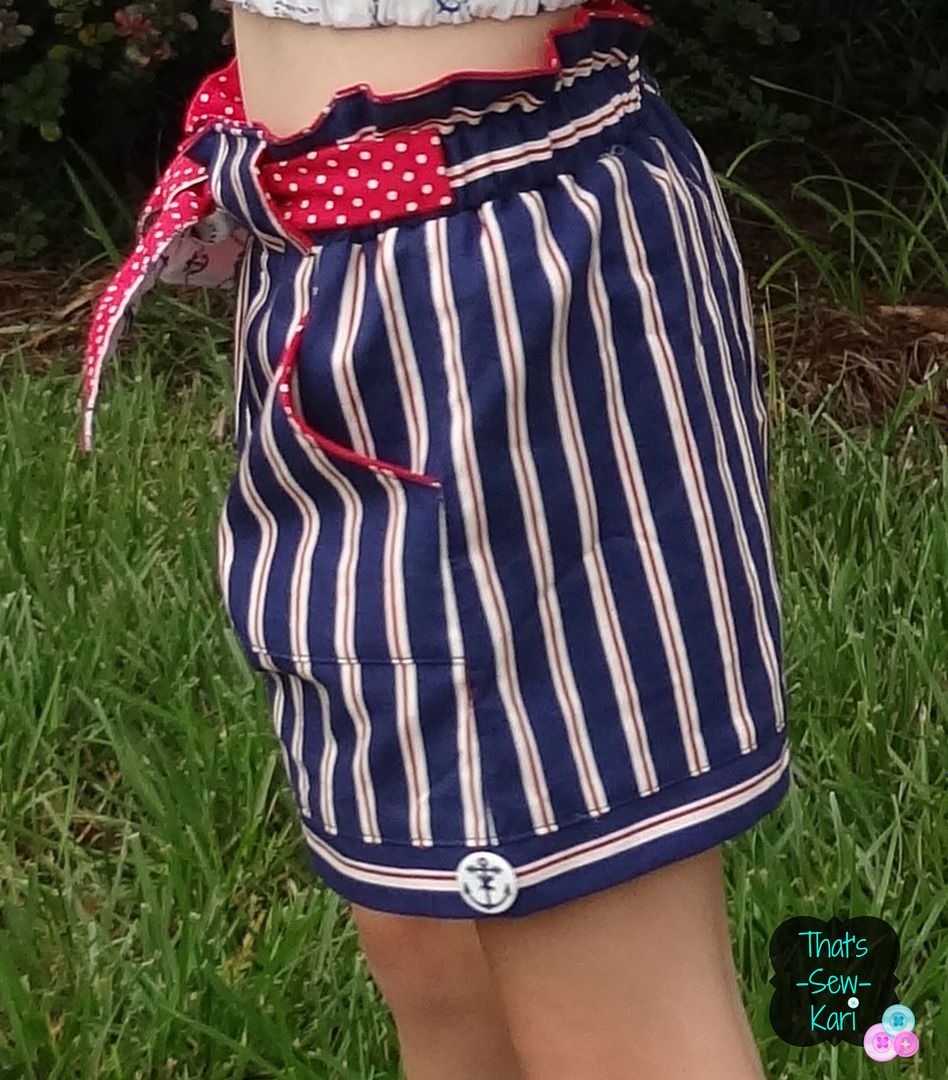
Fabrics were selected from Hobby Lobby

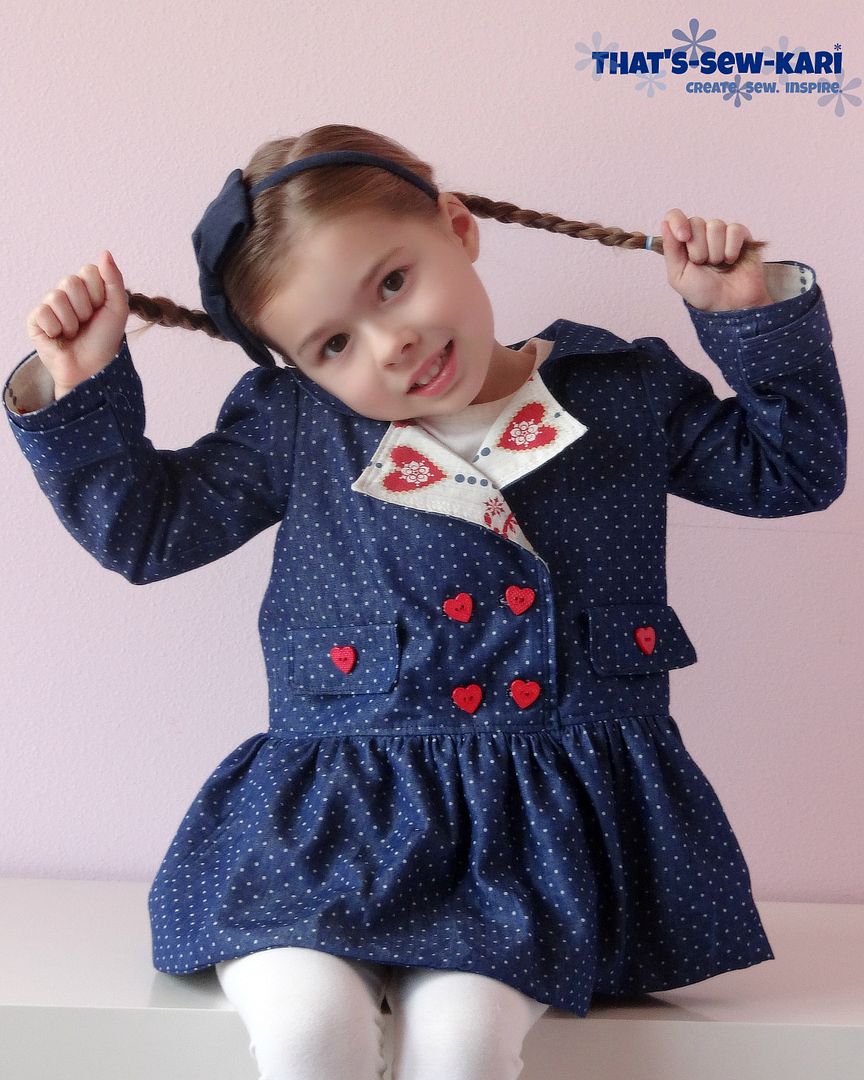
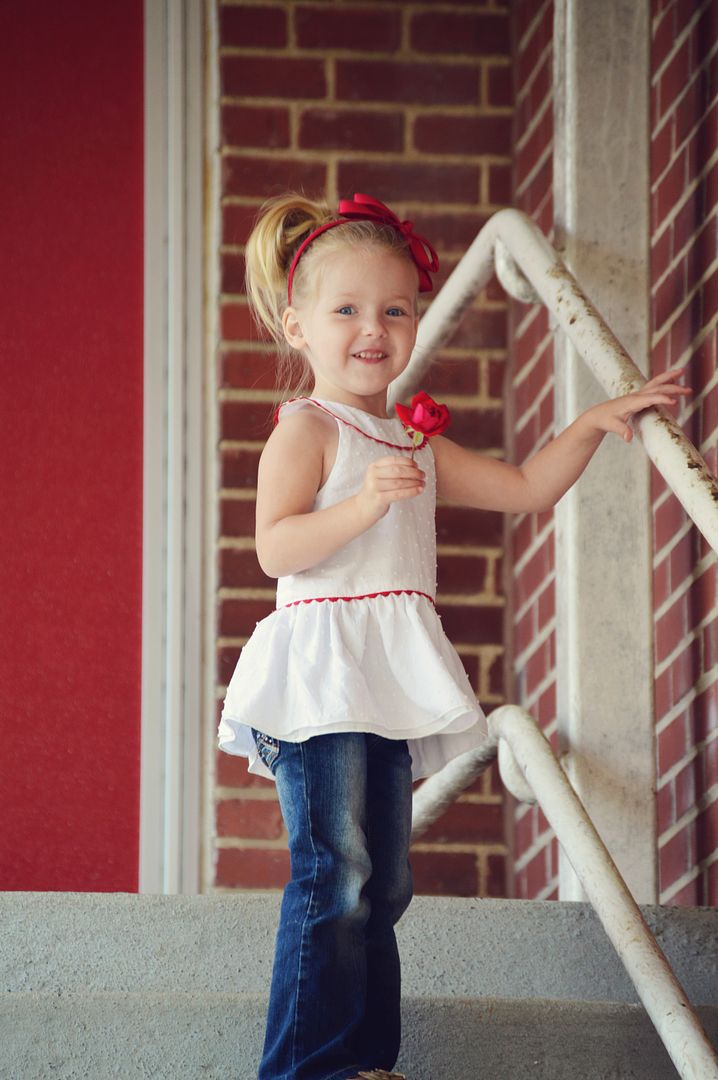
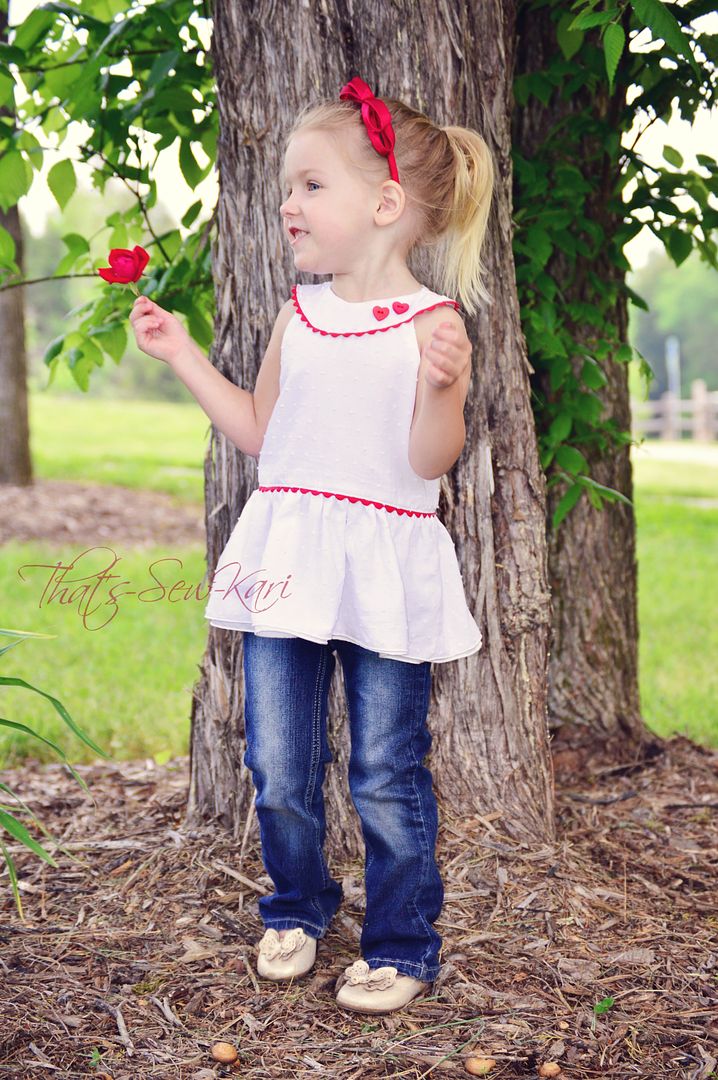
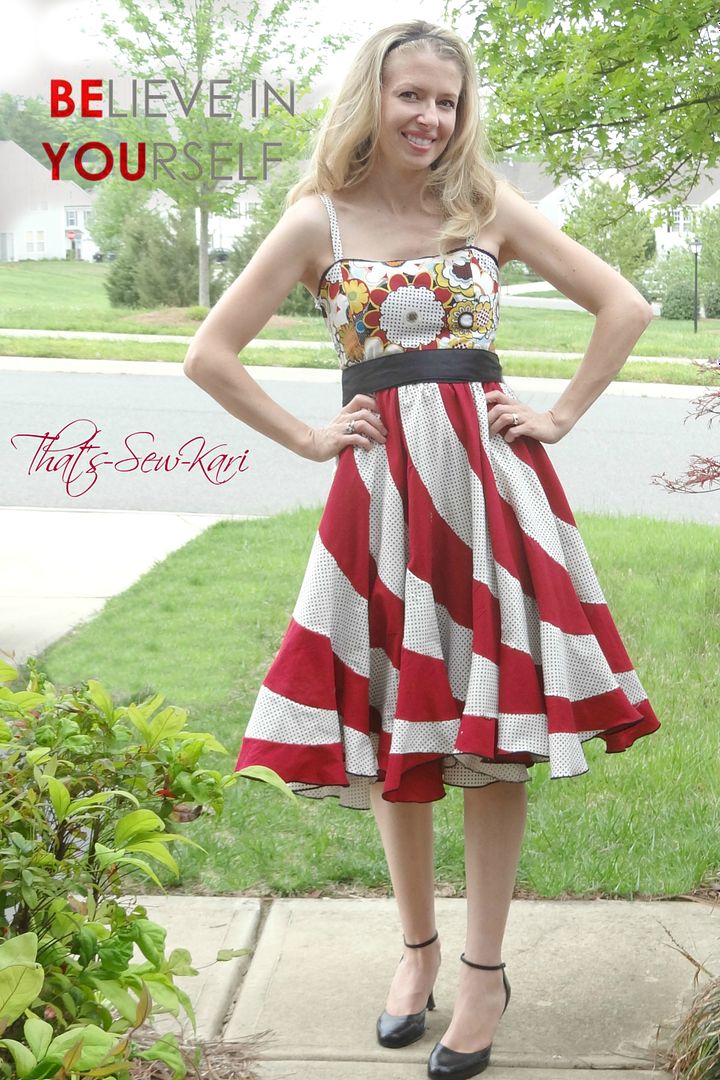
When the tester call came through for the Ladies Peppermint Swirl Add-On (to the Cherry Cosmopolitan Dress), I really wasn't sure how the dress would look on me.   I've made each of my girls a Peppermint Swirl Dress in their sizes and they are showstoppers, but would I love it for me?!

Talking with my husband, he thought it would look great on me -- "very classy" was his description.   So, I took the plunge.  
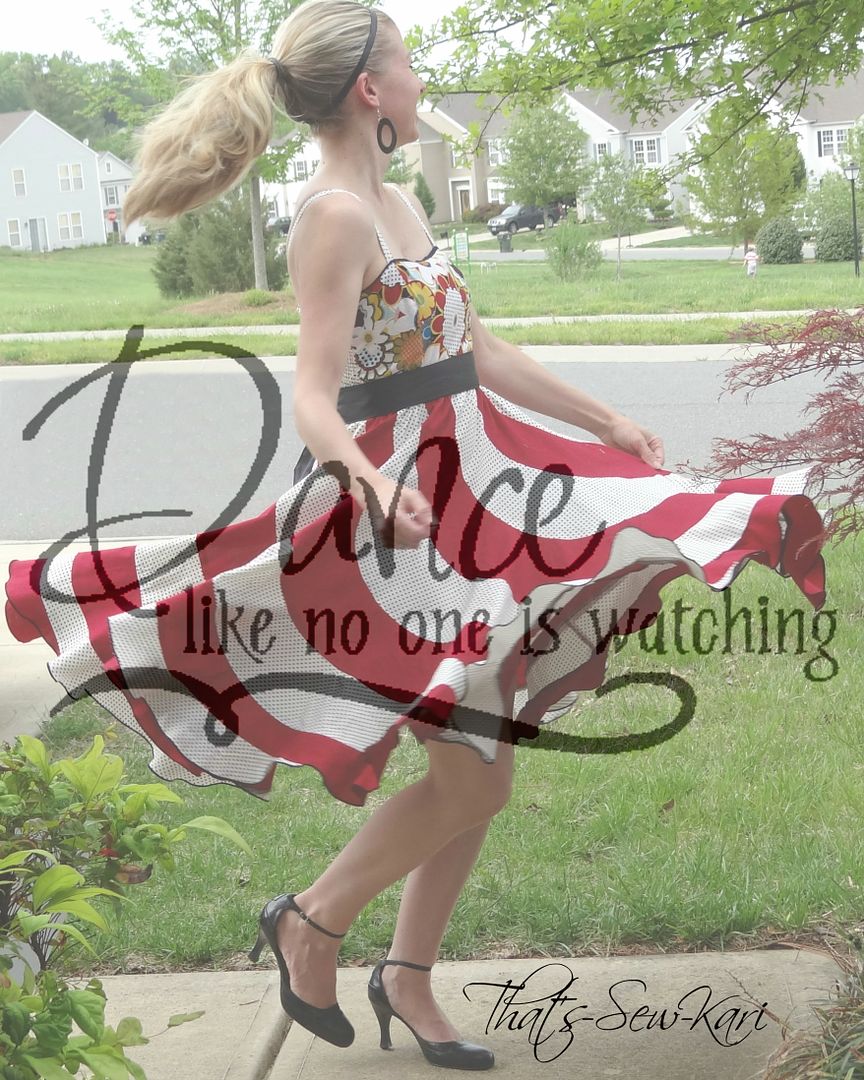
JUST LOOK!!


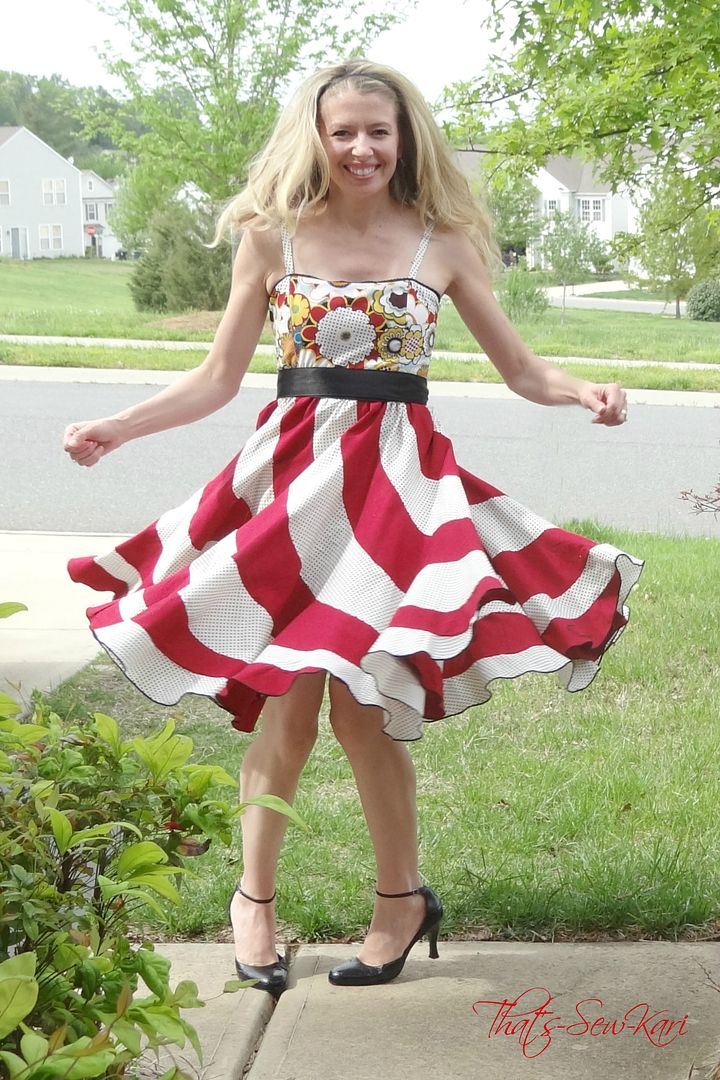
My 5 year old snapped this photo mid-twirl and honestly, it sums up my feeling about this dress and about sewing for myself.  I am positively giddy and nothing about this photo is staged!  I'm telling you, it doesn't matter your age, every woman needs to feel the power of the twirl.  It's like something magical happens after you put this dress on -- your stresses in life disappear and your world becomes carefree.  I am already envisioning my next one.

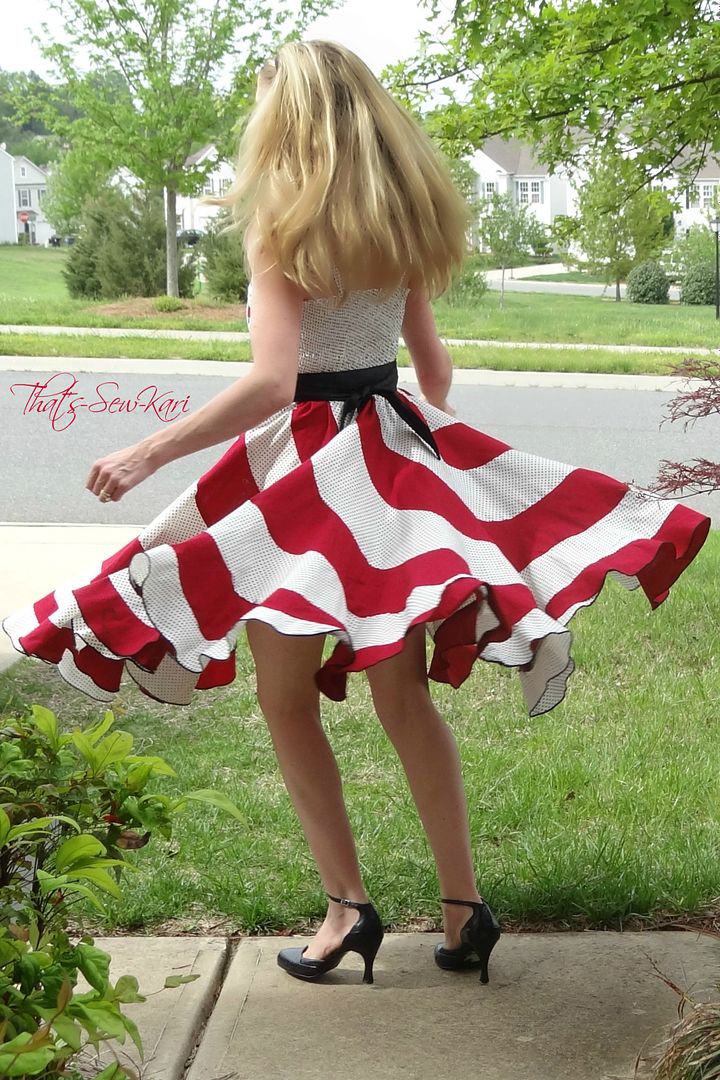
Look how a 33-foot hem twirls!!

I mentioned above that I'm petite.   Shopping for clothes has always been difficult for me because of this.  At 5'1" and just 100 lbs, I'm not exactly average.  Sewing for myself allows me to tailor items so they fit me how I want them to fit.  It celebrates who I am - all 61 inches.

Sewing for myself also celebrates the talents with which God has blessed me.  I went through most of my life, not knowing what my true talent was.   I'm SEW glad I found it!

Shirred back helps you achieve the perfect fit!

Today, I celebrate being a woman, a mother, a wife, a daughter, a sister, a friend.  I celebrate me.  I am who I am and happy to be me!


It took me a long time to learn this concept and have confidence in myself.


How will YOU sew-a-brate yourself?


Links to all Sew-A-Bration Bloggers

The Life Of A Compulsive Crafter | Serger Pepper | House of Estrela | sewVery | Our Busy Little Bunch

TUTORIAL: Brownie-Goose Summer Sailor REMIX


Brownie Goose Summer Sailor Shorts - Remix Edition


 <- From this


                To this ->


**** ORIGINALLY AIRED ON WELCOME TO THE MOUSE HOUSE ON JUNE 29TH, 2013 ****

Hayley has invited me (okay, I may have invited myselfhaha) to share my remix edition I did of the Brownie-Goose Summer Sailor Shorts.  Now, unless you’ve been living under a rock, you’ve heard about these shorts.  And if this is the first you’re hearing about them, don’t worry! I was living under the same rock just 3 months ago.  This pattern was my very first PDF pattern purchase.  It was | at first sight!  In fact, it’s the only shorts pattern I own.  I thought people may start to notice, though, if I made my girls 50 pairs of sailor shorts in different fabrics, so I had an idea!

What if I took this great pattern and did a little remix?  First, I had to decide what look I wanted.  My girls really | pockets on their shorts to collect lots of treasures so I knew I had to have pockets.  Now, I’ve added functioning pockets already to a previous pair of BG Summer Sailors, but I wanted a different look.  I also knew I wanted the shorts to be a bit shorter.  I also wanted more of a brown paper bag type of waist with belt loops and a belt!  Wow, that’s a lot of changes.  But, I look at PDF patterns as almost a blank slate.  So I got to work.

These are the changes I made to an already fabulous pair of shorts:
1.) I shortened the pattern a bit.
2.) I made raised pockets with a faux piping effect. 
3.) I flipped the bottom cuff down instead of up
4.) I made a brown paper bag type waist with belt loops.
5.) I created a fabric belt.


Let’s get started, shall we?    

1.)     I shortened the pattern a bit.

I really wanted these shorts to hit about mid-thigh on my daughter so I cut out the correct size width-wise (in my case, size 3), but I cut the length at the 6-12m size.  Since I was leaving the cuff on the bottom flipped down, I knew that would add a bit of length as well.

2.)  I made raised pockets with a faux piping effect.

To make these pockets, I took my pocket pieces I made from my first tutorial (adding functioning pockets to the Summer Sailor pattern) and rounded the corner to make it more appealing.  I cut out 2 pieces for each pocket, one in my main fabric and one in my lining.  Pick a lining you want people to see because this is what creates the faux piping effect.  

Take 1 of each piece and place them right side together.  Sew the whole way except for the side seam leave that open to turn your pocket. 


Before turning right side out, notch along the curved edges to along your seams to have them lay nicely.  

Turn right side out.  Head over to your iron and slightly shift your pocket so that your lining peeks out on the concave side (the side your girl will stick her hand in!).  

Iron into place.  Topstitch that edge. 

Repeat with other pocket. 

Okay, now that you’ve got your two pockets with faux piping, let’s figure out placement!  Take your front shorts pieces and lay them out in front of you.  I shifted my pocket upwards leaving 1 ¾ inches above the shorts and sideways leaving about ½ inch over the side.
 I am using my pocket tops to double as belt loops! Genius, huh?

Once you’ve got your pockets where you want them, sew them onto the shorts front along the convex edge (convex, concave - never thought I’d use those words again ever.  Haha)
VERY IMPORTANT: Leave the top half inch or more unsewn.  You will thank me later when you go to sew your waist!


Continue using your Brownie-Goose pattern tutorial.  Stop before you get to the bottom cuffs.


3.)   I flipped the bottom cuff down instead of up and shortened it.

When I first set out to make these shorts, I wanted a scalloped cuff.  Well, that turned out disastrous.  Seriously horrid.  I knew I wanted to have cuffs that turned down instead of up.  Unfortunately because of my attempt at the scallops, I was running low on material.  So instead of the 4” tall cuffs in the pattern, I cut out 2” tall cuffs. 

Okay, once you have your cuff pieces cut out, fold them in half width-wise, right sides together.  Before you sew them, sew your shorts in both the rise and crotch area   Then, measure your leg openings.  With that measurement, mark your seam line on your cuffs.  Sew the ends together.
Turn right side out and fold in half wrong sides together, matching the raw edges.  Repeat for other leg cuff. 
Now, grab your shorts and slide the cuff over the bottom of your shorts, lining up the seam of the cuff with your inner leg seam.  Match the raw edges and pin into place. 

Sew using a ¼” inseam.  Finish edges with serger, zig zag or overlock stitch (and I HIGHLY recommend the overlock foot if you are without a serger!).  Take your shorts over to the iron and flip the cuff down, and press the seam upward.  Topstitch 1/8” from edge on the shorts panel.

4.)  I made a brown paper bag type waist with belt loops.

Okay, almost done! Let’s make that waist!  Flip the tops of your pocket pieces down and pin out of the way. 

Follow the pattern instructions to get the required length for your size and sew accordingly.   Don’t forget to leave an opening for your elastic!  (If you want to use your pocket lining as the inside portion of the waist, cut 2” wide strips of both your main fabric and lining.  Sew, right sides together, proceed as normal.)

To create the brown-paper bag effect, sew a seam all the way around your waistband 3/4” to 1” up from your bottom seam depending on your width of elastic. 


Topstitch 1/8” from the top of the waist as well to give a finished look.  Now, let’s sew on the belt loops before adding the elastic!  Flip your pocket tops back up.  They should line up with your waistband.  Sew the bottom of the belt loops by stitching along the seam where the waist meets the shorts. 


Then, sew the top of the belt loops meeting up with the topstitching already in place.  If your loops are too long, fold them under at the top before stitching. 


The first pair I made, I eyeballed it correctly.  This time, I overshot it just a smidge. 

If a back belt loop is desired create a square out of lining and fabric (sew RST, flip out, topstitch... yada, yada, yada) to make a rear belt loop and sew into place.  

Now, you are ready to add your elastic!  Measure your child’s waist and subtract 1 ½”.  Cut elastic to match. Thread it through the casing and sew the overlap.  Close up the waist band/shorts opening.  Finish raw edges and iron in place.  Adjust the elastic so it is gathered evenly!

Woo hoo!! Aren’t your shorts just the cutest?!   If you don’t have a favorite belt to match and would like to make a fabric one, stick around for just a few more minutes!

5.)  I created a fabric belt.

The first pair I made of these shorts, I had a belt/tie going all the way around the waist, but I have since decided I’m not a fan of the belt all the way around.  Since my daughter is 4, it’s probably not the safest anyway.  BUT, I love the look so I created a faux tie to utilize those belt loops I added. 

First, decide your length.  It will vary depending on the size shorts you made.  You want them long enough that you can tie into a square knot.  Size 3 was around 12 inches for the faux belt.   I would at double it for a full belt (always measure first!).  Cut out your pieces (4 for faux and 2 for continuous) and place right side together.  Take one corner and fold down at a 45 degree angle. 


Repeat on the other tie (end if you have a continuous).  Leave an opening to turn right side out.  I used the straight ends and then just tucked in my seam allowance, ironed and topstitched all the way around closing it up.  


(If you made a continuous belt, thread through the loops and enjoy! You’re done!)  If you made a faux belt like me, we need to secure it to the side seams of your shorts.  I folded my ends in on the wrong side to meet.  Then wrong side facing up and finished straight edge pointing toward the front of your shorts, pin into place.  Sew. 


Flip the belt forward and sew another line down just for reinforcement.  


Repeat on opposite side. 


Thread through your front loops and tie in a square knot (Right over left, left over right)

To quote the wonderful Amy Norris of Brownie-Goose “YAHOOOOOOS!!” 


Close up of details  -- pocket & belt loop, button detail on cuff,
square knot, and back view


If you'd like to find me on Facebook, go HERE!


  To visit her Etsy shop, click HERE.  I just | her patterns!


 - | Kari 

CraftingCon Blog Tour: Summer Snow White


Mirror, mirror on the wall...who's the geekiest of them all?

Wait, what?!

I am a bit geeked out to be a part of CraftingCon's "Is My Geek Showing" Blog Tour!!  I do have to admit, I know nothing about some of the other monthly themes (like Hunger Games, Harry Potter, Dr Who, Divergent... need I go on?!).  Apparently I live under a rock...haha.   BUT, I do happen to be very geeky on Disney Princesses who are extremely popular with my two girls - especially since this one (pictured) shares a name with one of the princesses.  I have done a few OTT (over-the-top) princess costumes in full satin (Sofia and Cinderella), but I was challenged to come up with an "everyday" Princess-inspired outfit - one that could be worn to the supermarket or the playground without being in full costume.

I present Summer Snow White!


I recently had the opportunity to review the Soleil Dress by Selvage Designs for Pattern Revolution and I love it!!  I thought this pattern would be the perfect canvas to transform into Snow White.  It's a sleeveless knit dress so it's super comfy.  Oh, and have you seen the back?


The cutout in the back is one of my favorite features!  Of course, there is a closed-back option as well.


I did have to make a few modifications in order to add a few of Snow White's details.

  • Ric rac down the center of the bodice - easy peasy
  • Ribbon stripes to the binding on the arms - not terribly hard
  • Added front peter pan collar - traced the neck hole on my fabric and winged it...LOL

I had this idea as soon as I got the pattern, and I was impatiently saving it for this blog tour.  I'm so happy I am finally able to share it with you!!


Oh, and in case you were wondering --- totally playground approved!!  Later, we headed over to Chick-Fil-A for some lunch and of course, little Snow White was a BIG hit!


Did I mention that I upcycled a couple of women's tank tops and a t-shirt to make this dress?  Yep, I purchased all of the supplies at my neighborhood Walmart where you can find knit lycra blend tank tops for just $2.97 (of course, now I discovered Purple Seamstress Fabrics ;) )

Visit Pattern Revolution to read my full review

Visit Selvage Designs to purchase the Soleil Dress pattern


Wait until you see the rest of the blog tour stops!!


Two Novembers | Swoodson Says | Manafest | Sew Maris | GYTC Designs | Calm and Carrion | Create 3.5 | Crazy Crafty Haute Mama | Paisley Roots


P.S.  I'll be back with CraftingCon in September -- I'm one of the competitors in the Disney Princess Sewing Contest!

#soleildress


I am an affiliate for Selvage Designs so purchasing through my link gives me credit for sending you :)

The End of Chapter: Adventures in Speech


I'm taking a break from blogging about sewing to share some exciting news.

Today is a BIG day for my 5 year old.  Today, she GRADUATES the Speech Program through our local school system.   I have an immense amount of pride in the determination my daughter has shown over the last few years as well deep gratitude for her Speech Teacher, who truly is nothing short of amazing.

Here's our story (as condensed as I could make it ;)  ):

Our journey in Speech Therapy started years ago -- I knew before 18 months that there was something amiss with our daughter's speech, or lack thereof.  At age 2, our pediatrician agreed we should get our daughter evaluated by Early Intervention. At age 2, our daughter had about 5 words that were intelligible.  The rest were merely sounds - most of them missing key consonants.  She did, however, mimic tones and inflection surprisingly well so I began saying words with different inflections and then I would memorize her trying to mimic me.   It was her own little language and we were her first students.  She also made up her own signs in order to try to communicate with us.  She had so much to say; she just could not get her muscles in her tongue and lips to cooperate with her brain.

Video shortly before her 2nd birthday.

It's tough to see one of your own struggle with something we seemingly take for granted.  For months, I blamed myself -  Was it my fault? Was it because I was induced or that she lost oxygen during her birth?  Did I not read enough with her as a baby?  I admit, I was somewhat jealous of those around me with kids the same age who were saying the funniest phrases or heck, could efficiently communicate basic needs and desires..  Of course, I kept it mostly to myself and would sometimes vent to my husband.  Once she got evaluated, I grew optimistic, but knew it would likely be a long journey.  My daughter, though, never once questioned why no one could understand her or why she talked the way she talked.  She has always been my little social butterfly and didn't let a little thing like lack of communication stand in her way of making friends.  Sometimes the greatest lessons are ones taught by our children.

Having not been through Early Intervention before, I wasn't quite sure what to expect.  Within a couple months of little to no progress, I scoured the Internet in hopes of a 'miracle'.   I read articles of kids taking Fish Oil Supplements and seeing noticeable results in as little as 6 weeks.  Having nothing to lose, I began her on Fish Oil Supplements (under the supervision of her pediatrician) and surprisingly had a bit of a word explosion about 6 weeks later.  There's no way to know, however, if she would have encountered the same results without taking the supplements, but I will always remember that is the month she actually spoke her first sentence.

"Whew, it cold outside."

She did make progress during Early Intervention and I am grateful for the resources.  I wrote this status on Facebook on her last day in EI: "Today marks the end of Marissa's speech therapy through Early Intervention. When she started, she had only 5 intelligible words, couldn't use her lips or tongue to form most consonants, deleted the end of every word, and didn't have the words to convey her own thoughts. Marissa can now carry on a conversation, has so many intelligible words, stopped deleting the end of most words, and only has a few consonants left to work on. I am so proud of all of her hard work and determination! I can't wait to see what a difference school will make."


Waiting for her teachers on her first day in the school speech program.
April 2012

 Within the year, she aged out of Early Intervention and transferred into the local school system.  Her first day, she was so excited for "school", she didn't even look back as she walked inside with her classmates.  Our school system has a very cool speech program -- the kids (usually 5 or so per class) go for 75 minutes twice a week and it mimics a typical preschool day.  The main teacher is a Speech Therapist and there is also an assistant.  The past two school years, my daughter was lucky to have the same Speech Teacher.  Her teacher, Mrs. Barbara is exceptional -- each class, we left with a progress report for that day as well as what sounds/words to focus.  I could physically see the areas in which she struggled or excelled.  And my daughter enjoyed making projects with the assistants -- first Ms. Judy, and this year, Miss Sheridan.

Starting a new school year - Fall 2012

Her teacher had a gameplan with regards to which letters to target and it was great to see my daughter progressing through each step of the way.   Last summer, at age 4, she could finally pronounce her name properly!  You see, her name has an /s/ sound towards the end and previously she would omit the sound all together in the medial and final positions and would substitute the /s/ sound in the initial position.   This is another day I won't forget.

Learned about Community Helpers - Fall 2013

Today marks yet another important day in this journey.   My daughter has caught up to her peers in regards to speech and will be starting Kindergarten in the fall.  I have tears of joy as I didn't know if this day would ever come.   My daughter was a fighter on the day she was born and she has been a fighter ever since.  She is one determined little lady and I am so proud she calls me "Mommy".

Congratulations, Miss M -- YOU DID IT!!!

Her teachers, Miss Sheridan and Mrs. Barbara


Little Lizard King Blog Tour: Sweetheart Dress


I am soooo excited to be on blog tour with Little Lizard King! I was told to be creative with the pattern I was given... and I really hope the team at LLK doesn't regret uttering those words to me. HA!

I'm here to share my take on the Sweetheart Dress which features a round neckline yoke, fitted bodice, and gathered skirt. A button enclosure adorns the back.


As soon as I started brainstorming for ideas, a sweet Spring top popped into my head and I just had to see if my vision could come to life.  As much as my 3 year old loves her dresses, sometimes jeans & a top are more practical.  Although, I'm not sure how "practical" all white is on a toddler. HA!

Enough backstory, right?! Let's dive into the pattern!


I'm sure you've heard me say this, but my girls are SKINNY so I often have to mix a couple of sizes because they need the narrow width, but are height-wise on par with their peers .  This is one of these reasons we sew, though, right?  I can customize a perfect fit each time.  I do recommend a muslin each time you start a new pattern.  Each time I think I can skip one, I'm proven wrong.  So my first attempt became my muslin and I made the necessary changes and sewed this one up during an afternoon.

I must say, though, the pattern measurements are accurate - just be sure to follow them!


For my fabric, I chose a lightweight white dotted Swiss with a white batiste lining.  Because the dotted Swiss is so lightweight, I opted to add a second layer for the skirt portion and cut that one slightly longer than my top layer.  A pop of red ric rac, two red heart buttons on the yoke, and 4 red buttons on the back made it complete.

Added bolero is from Nonie's Baby (Ellie inspired) 

Because the skirt measurements were not provided for shirt length, I merely used total length measurements provided and subtracted the intended length I wanted and then reduced the skirt height by that answer... did you follow me?


And to make it even easier for me to put on her in the morning, I left the back open and just added buttons down to where the skirt portion is attached.  Sometimes, wrangling a fitted bodice onto a wiggly 3 yr old takes longer than I'd like.  If buttons aren't your "thing", you can always use snaps instead.  I make my buttonholes on my embroidery machine so it's not much more than pushing a button (well, you have to line it up, I guess).

Thanks for stopping by and if you haven't checked out the rest of the stops so far, here are the links!

Snickerdoodle Stew - Blue Ribbon Winner Dress
Paisley Roots - Sweetheart Dress
Stitched by Crystal - Blue Ribbon Winner Dress
Leighlee - Blue Ribbon Winner Dress
Lily Shine Boutique - Sweetheart Dress
Sewing in BeTween - Blue Ribbon Winner Dress
and browse the multitude
of cute patterns available!

Join the LLK Cafe on Facebook
and chat with other LLK enthusiasts
and stay in the "know" on new patterns
and upcoming sales!

Liz has so graciously offered
one lucky winner at each blog stop
a $35 gift certificate to Little Lizard King!
Enter below!

a Rafflecopter giveaway


Custom Post Signature

Custom Post  Signature