Image Slider

The Sis Boom Jenny- Something Just for Me


Sewing Up Sis Boom:
The Jenny Dress
...and fun new series coming to Pattern Revolution


If you are anything like me, your kids always come first -- even in sewing.   I am so guilty of this!  I sew so many clothes for my two girls that I often forget about me.  One of my very first projects was a purse for myself.  After that, I was long forgotten.... LOL

That is, until I found Sis Boom Patterns -- written by the super-precise Carla H. Crim of Scientific Seamstress.   There are so many patterns available in her shop that there's no excuse NOT to sew something for yourself.  It's a great feeling when you find patterns that fit you perfectly and can't wait to wear out in public!

I first found Sis Boom patterns last summer when the Scientific Seamstress was having a Jamie/Marissa Dress Sew-A-Long.  I had just finished sewing my first Scientific Seamstress pattern (The BeBop Bishop Top and Dress) and I was thoroughly impressed with both the pattern/tutorial and the outcome of the garment.  Jeanine, the trusty assistant to Carla, talked me into sewing for myself.  How could I say no??  After I finished the Jamie, I was beyond sold.  My girls were telling me I looked like a princess and begged me to wear my dress on our errands that day.  

My 2 year old said: "How pretty you are!"

Let's talk about Jenny, shall we?

Source: Scientific Seamstress on Etsy
I don't normally post directly from the listing, but honestly, you can't sum up this dress more perfectly than that!

Side view: Side zipper - so easy!

I was lucky enough to test this pattern (prior to release) and it went through rigorous testing to ensure the best fit for everyone.   Since this is a fitted dress (with zipper!!!) and not all women are created equally, this pattern offers multiple options for fit within each size.  Let's face it, on my 5'1" frame (and I'm sure I'm being generous), I would not fit very well into something that was designed for someone with a 5'6" frame.  For example, Jenny offers 3 cutting lines for the height of the center panel which allows me to sew Petite size :)  There are also multiple cutting lines for the bust-line and hemline.  You can truly customize it to fit perfectly on you! (I highly recommend making a muslin before cutting into your expensive fabric.)

Here's a quick rundown of what to expect from Sis Boom/Scientific Seamstress Patterns:
  • Generous size range
  • Highly-detailed, thorough instructions with professional line drawings
  • Pattern pieces are separated by size (un-nested) which means you only need to print your size!
  • Easy-to-assemble pattern pieces
  • Multiple sizing options within each size, making it a perfect fit for you
  • Measurement charts and diagrams on how to measure correctly so you know which size you need
  • Professional results 
  • Help whenever you need it in the Scientific Seamstress Lab Group on Facebook

Back view

Bottom line: This pattern (and the other Scientific Seamstress/ Sis Boom patterns I've sewn) is great!    I am impressed with the professional quality of this PDF pattern as well as it's outcome.   I have a few more Sis Boom patterns just waiting for me -- I need to pencil in some time to sew just for me on my calendar!

 www.sisboom.com
www.sisboom.com


www.scientificseamstress.com/

Speaking of penciling in some sewing time just for myself... Pattern Revolution is getting ready to kick off a month-long series, "Sew Yourself Some Love" starting February 1st!  Be sure to stop by frequently to check out all of the projects that the talented ladies behind the blog come up with -- including me :)  I'll be guest-posting on February 11th (which also happens to be my daughter's 3rd birthday!) with a fun skirt review!

www.patternrevolution.com

Since this series is to encourage sewing just for yourself, be sure to join in the "Linky" parties and Sew Yourself Some Love! You deserve it!!

Building a Better Wardrobe Giveaway
Linky Party

*Photo compliments to my 4 year old :)  I might have a budding photographer on my hands!

Candy Castle Patterns Sew-Along: It's All Coming Together

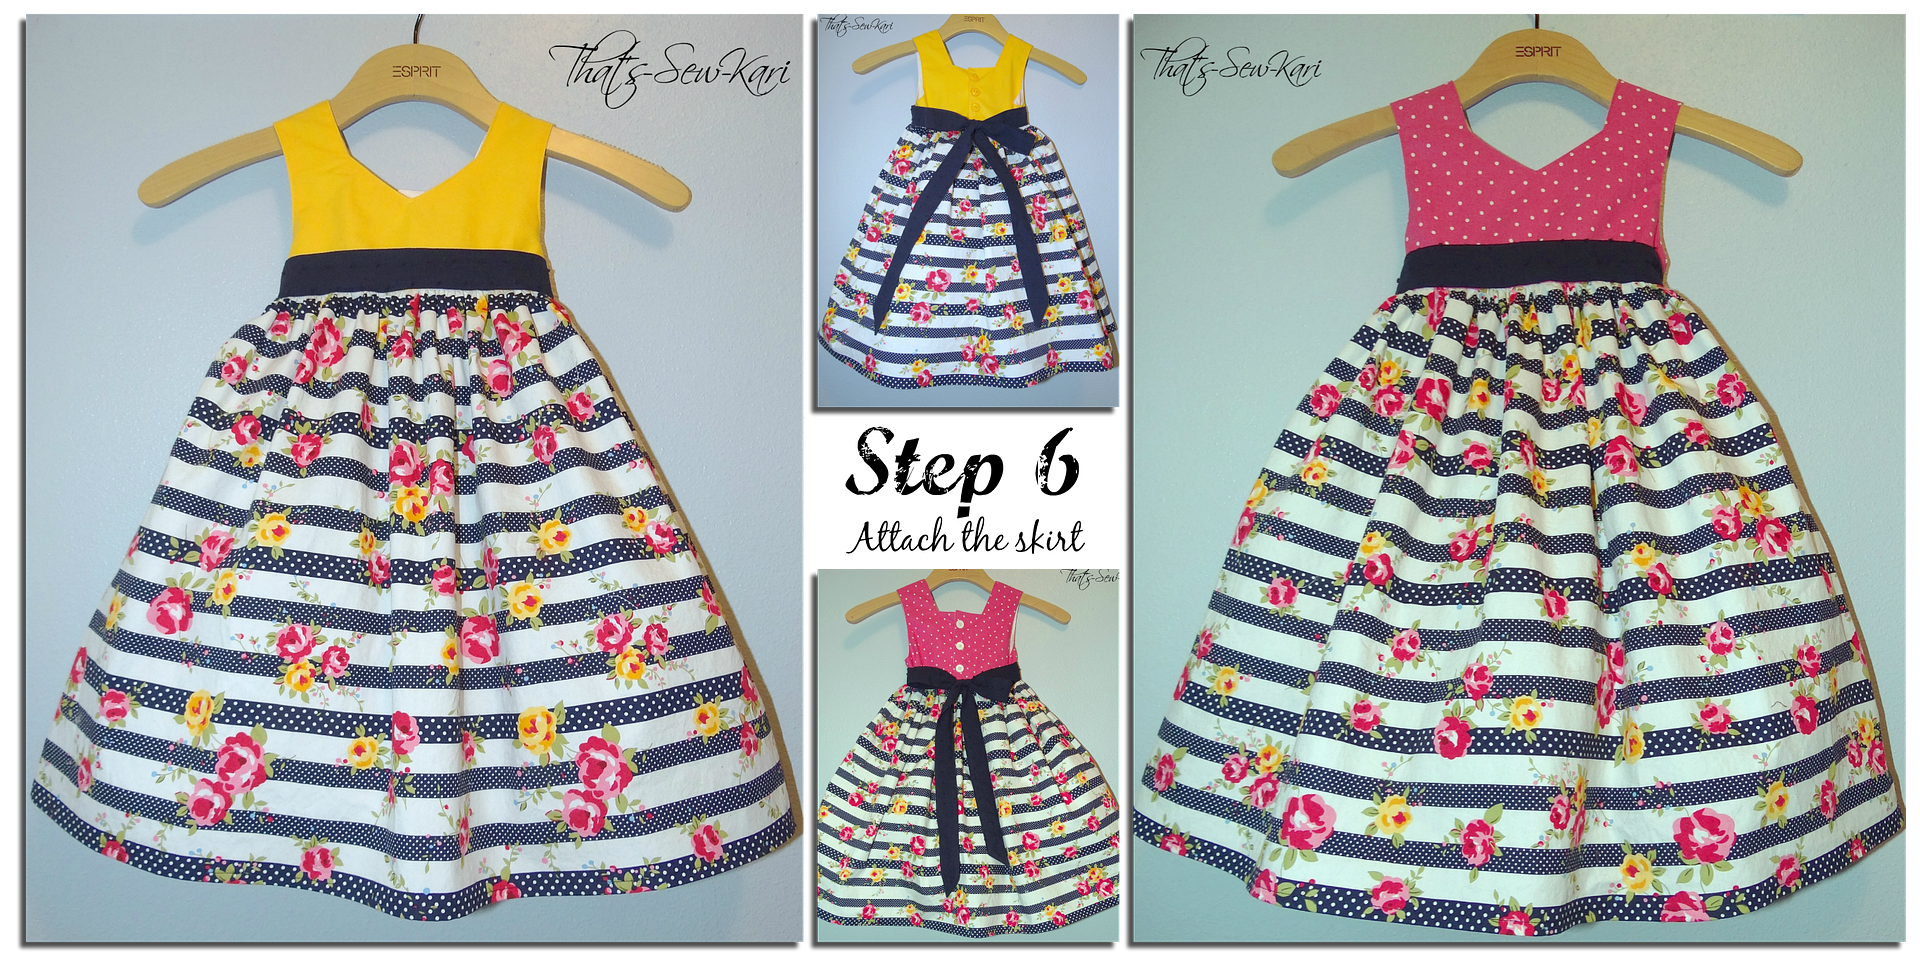
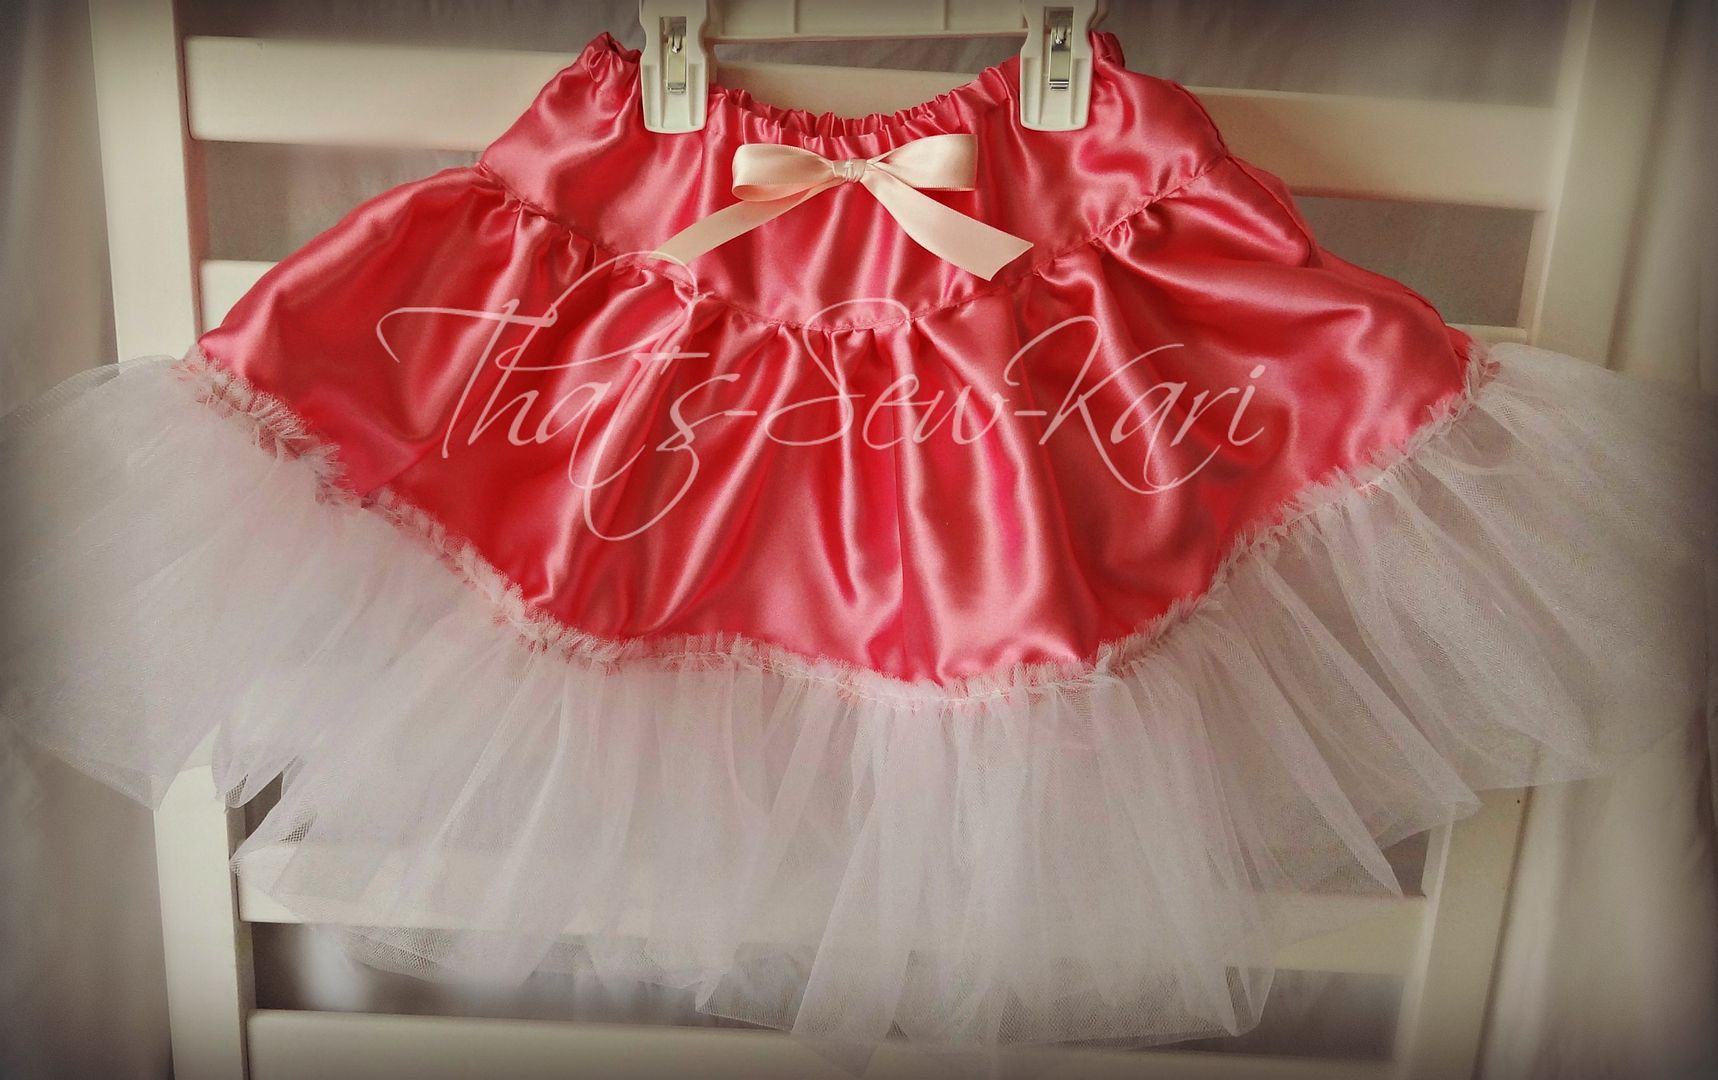
Step 6: Attach the Skirt


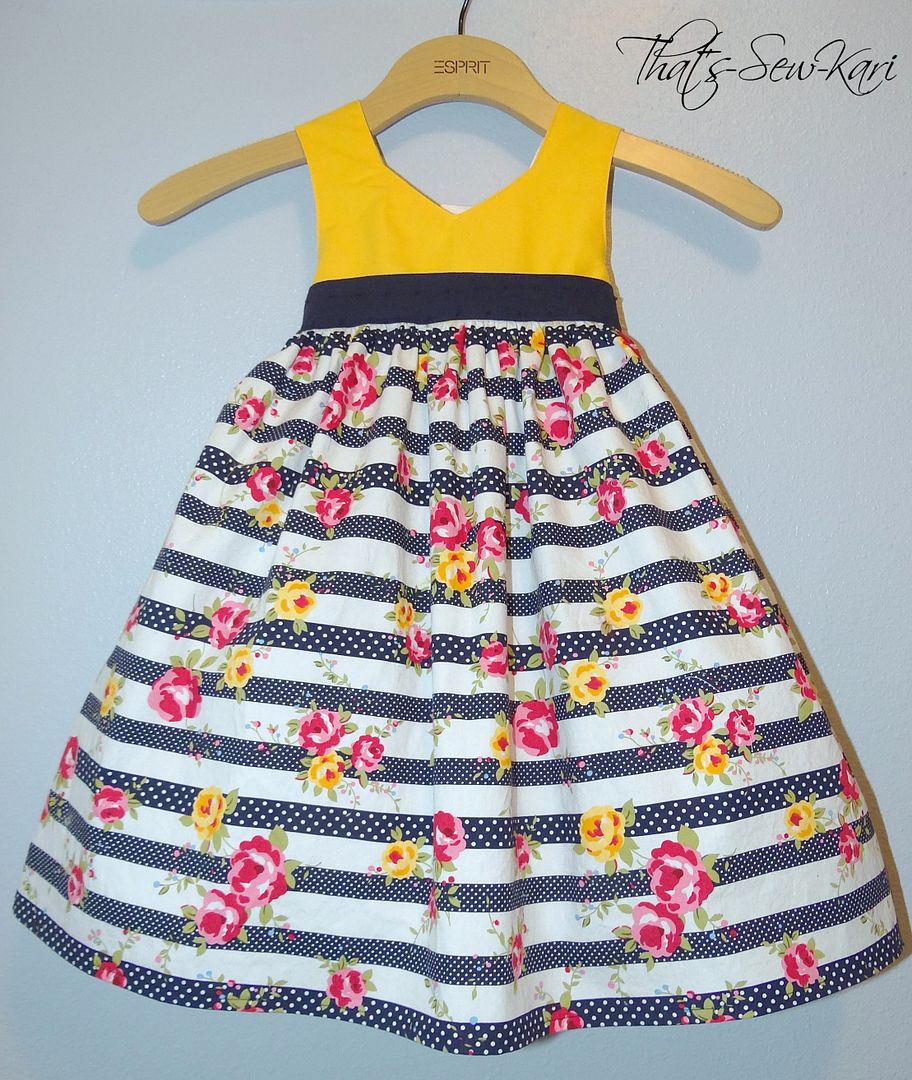
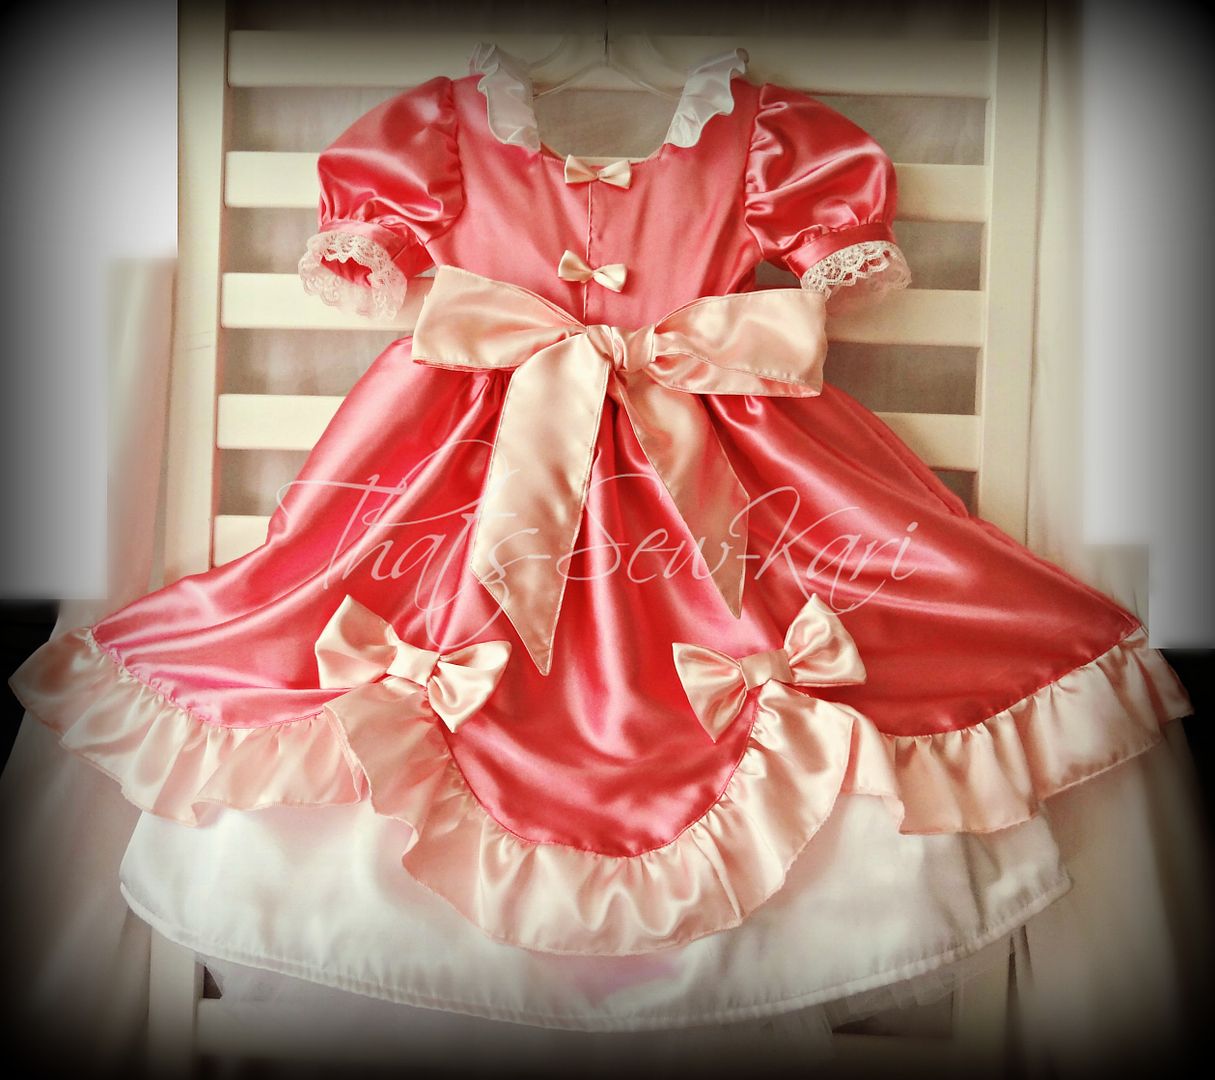
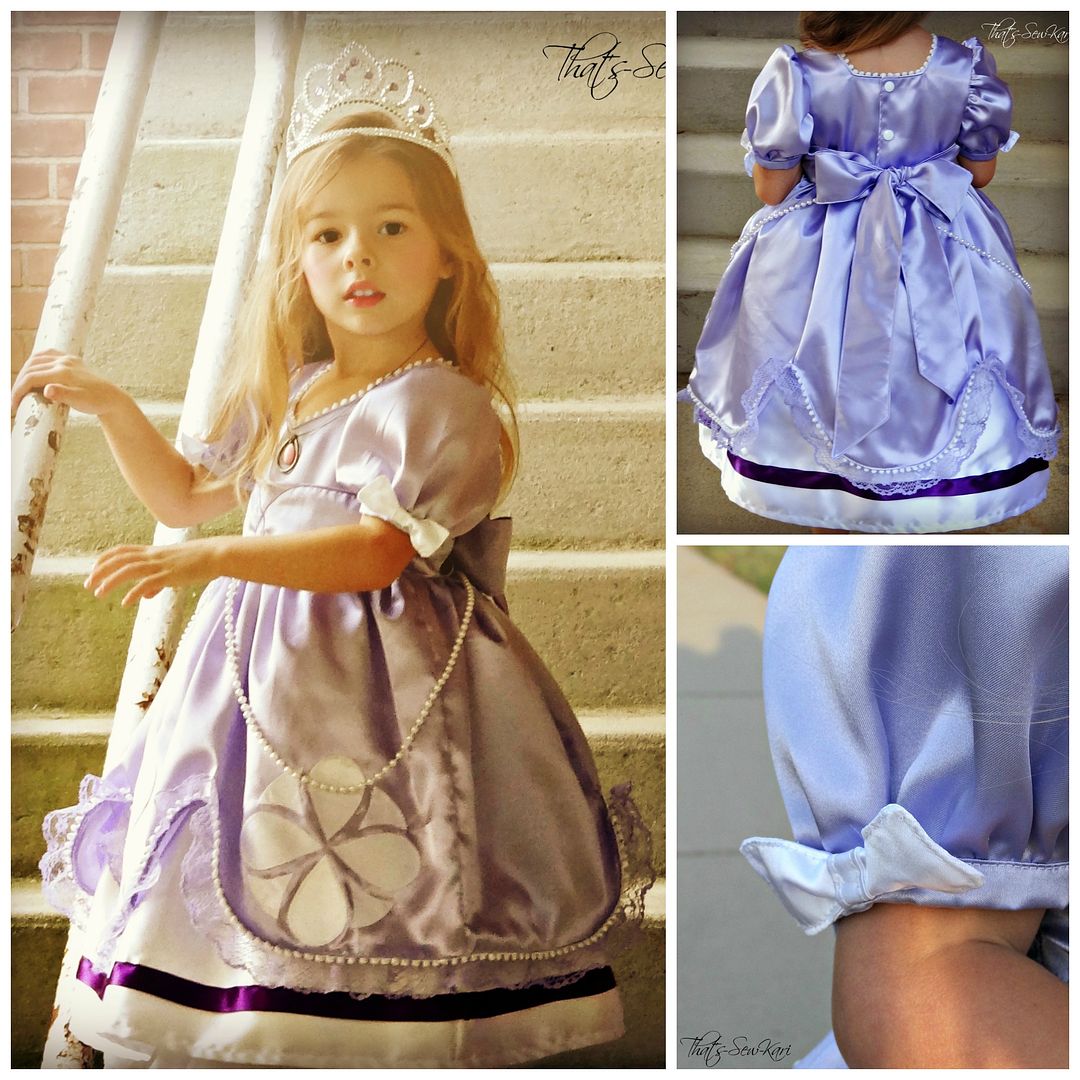
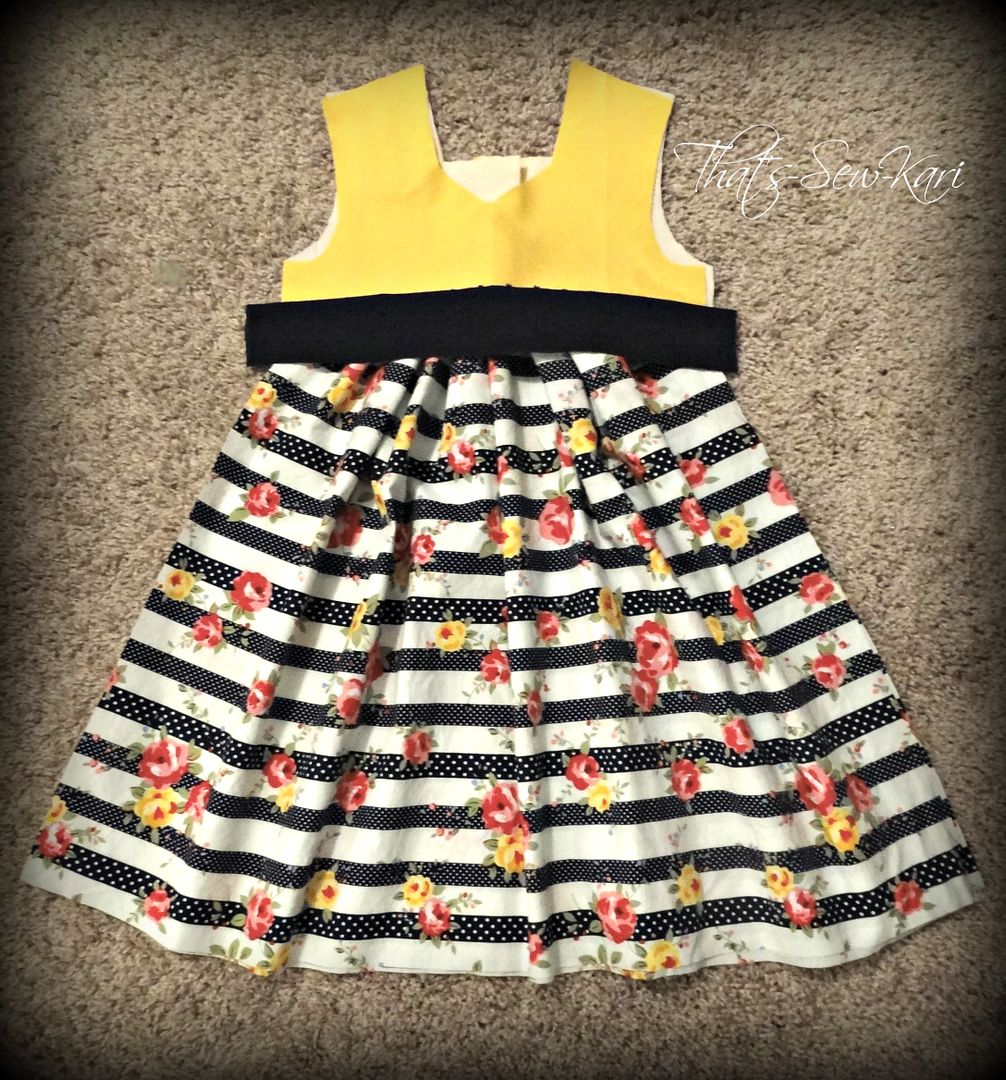
Omigosh!!  The dresses (Pattern: Candy Castle Princess Dress (top skirt omitted) with sash from Peppermint Swirl Dress) are almost finished!!!  I am almost totally in love.  I say almost because, well, I am super OCD picky with how my projects turn out.  And, there's a small detail that I need to fix.

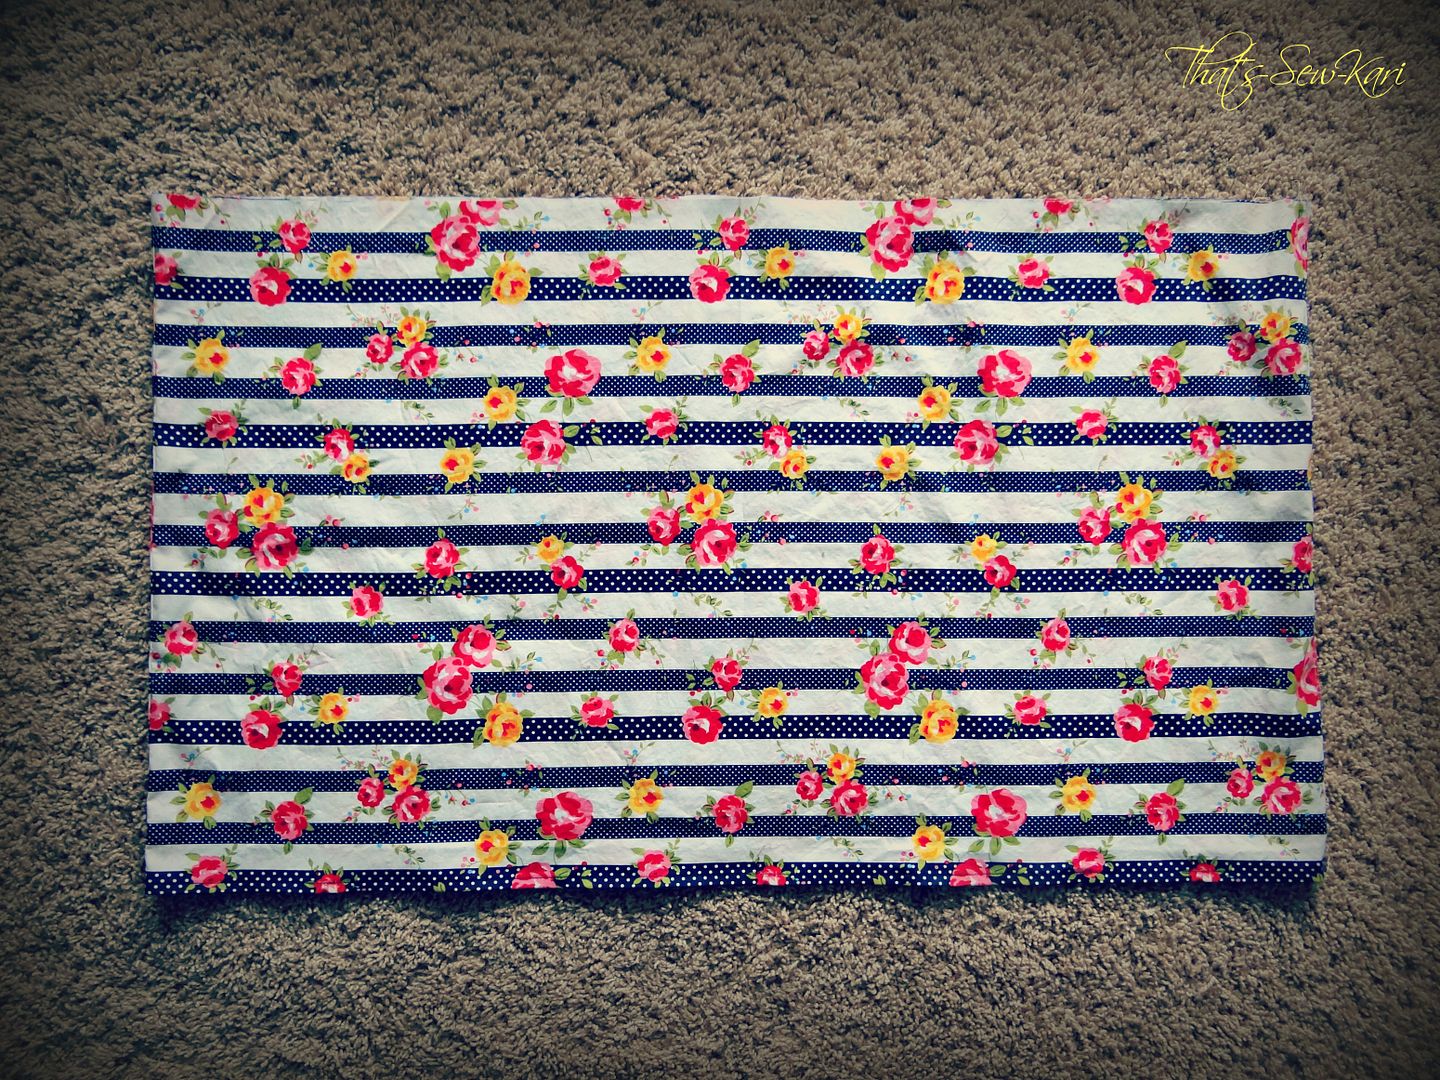
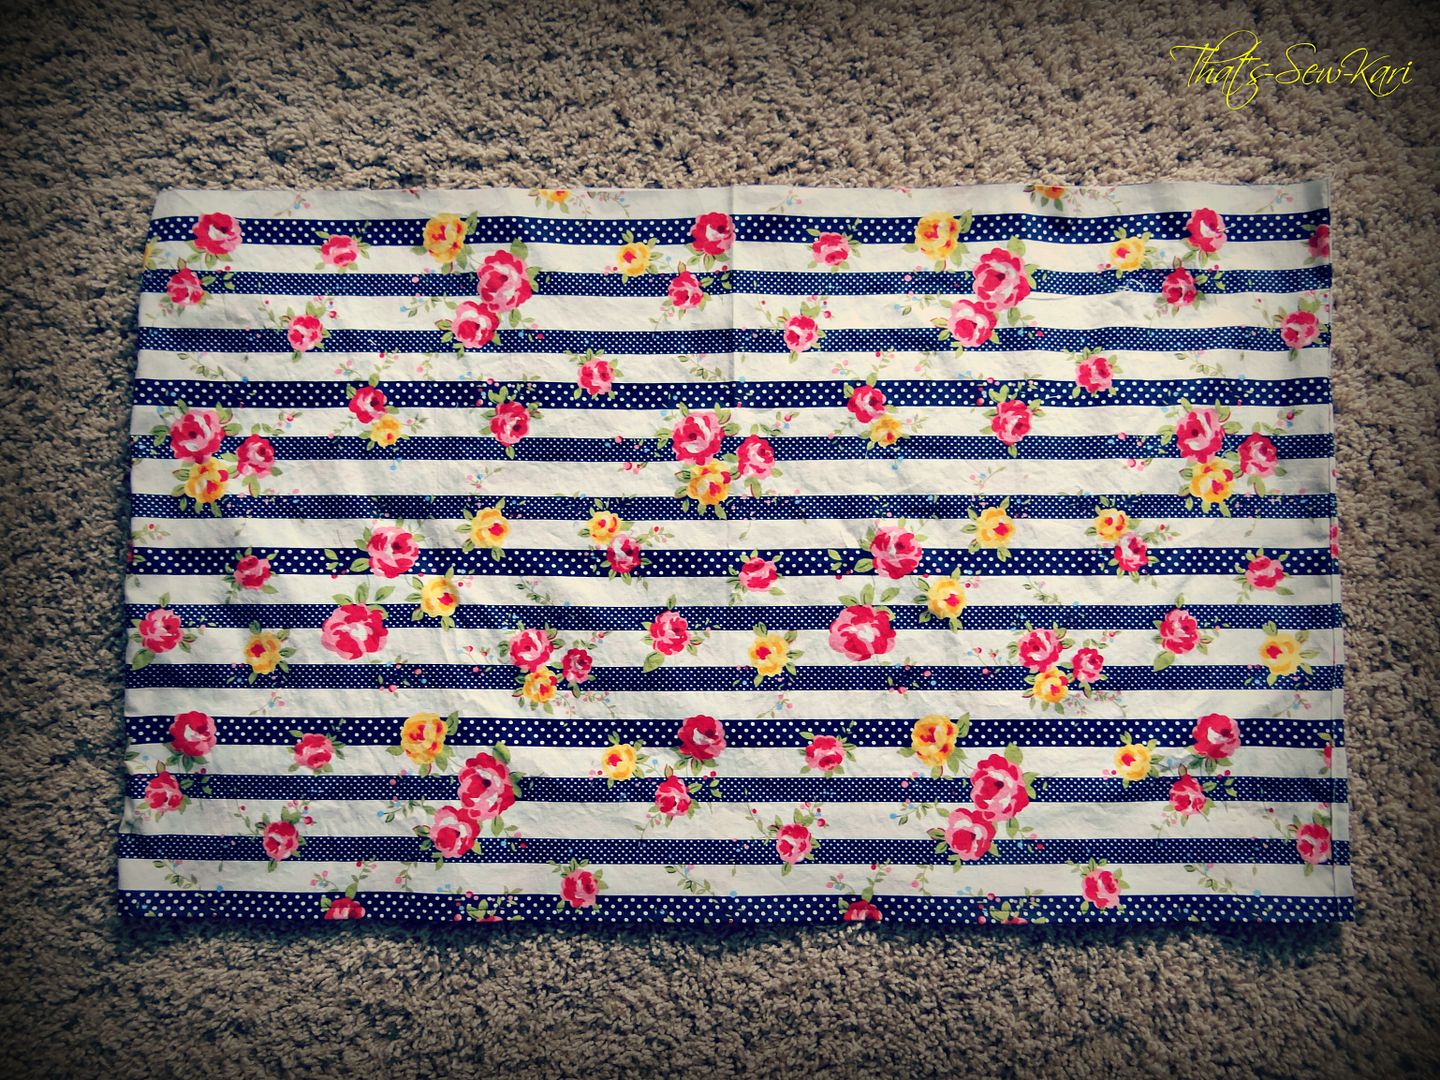
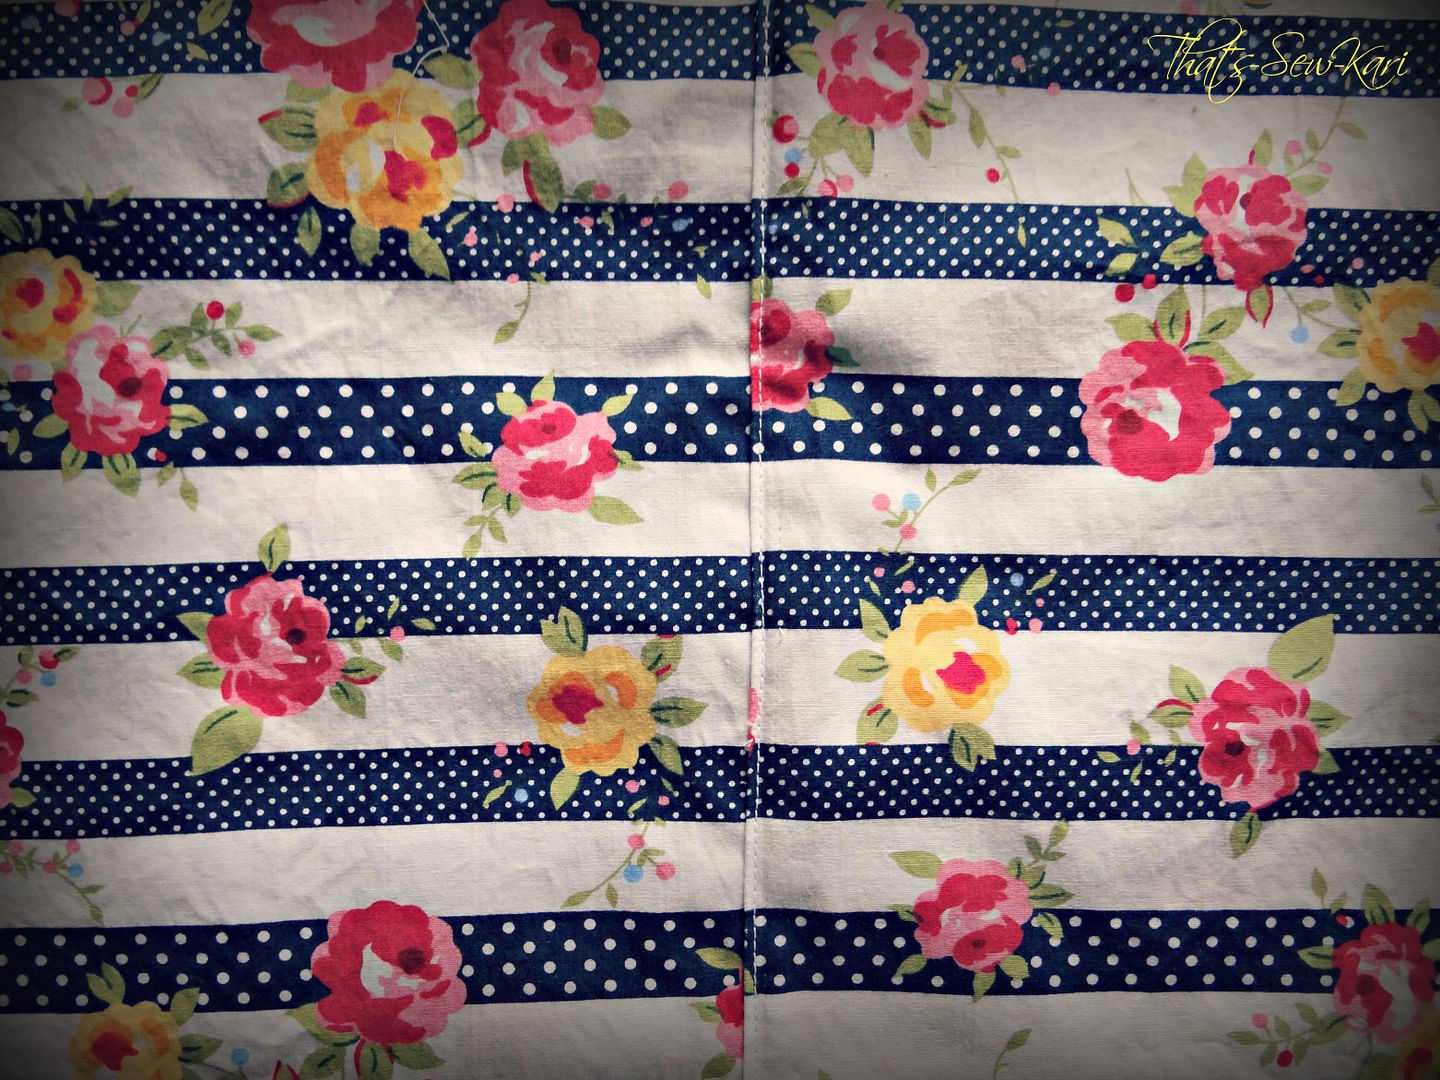
Sunday, we moved onto step 6: Attach the Skirt.  This part went together fairly quickly.  I just had to gather my skirt to the width of my bodice.  Normally, I like to gather with clear elastic, as taught by the fabulous Jocole (seriously a life-changing sewing moment when I learned this), but when you have side seams you need to match, I find gathering with clear elastic can sometimes be finicky.  I chose to gather using the traditional method of two parallel lines of long stitching (the longest stitches possible).  It takes longer, but makes matching the side seams of the skirt to the side seams of the bodice easy peasy. 

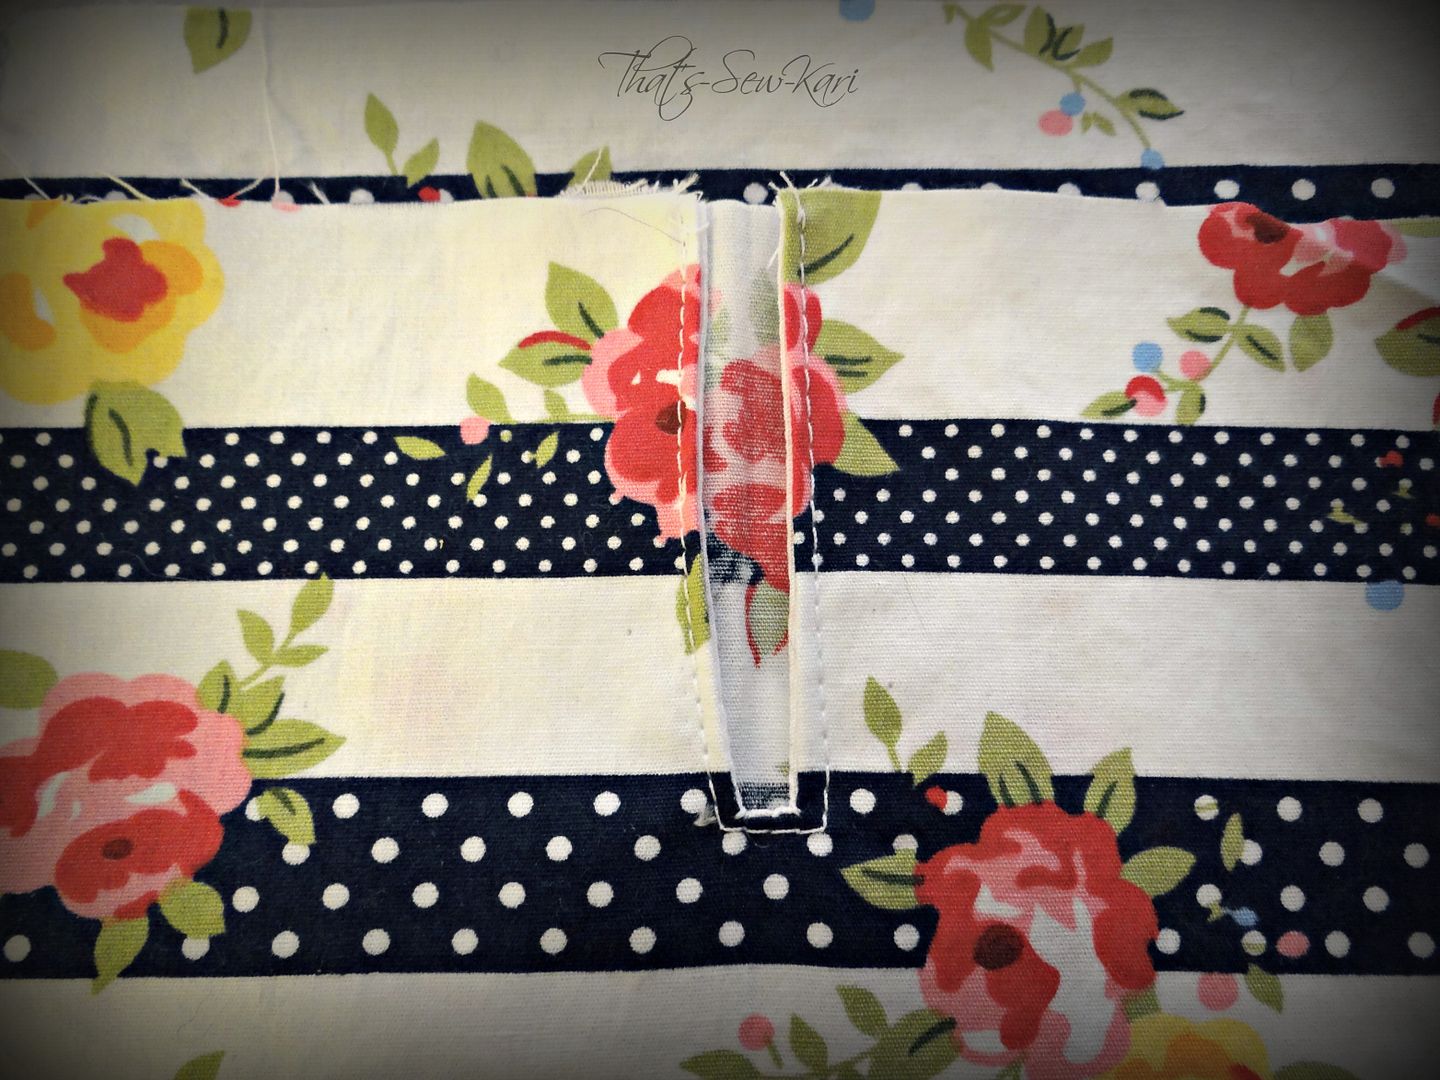
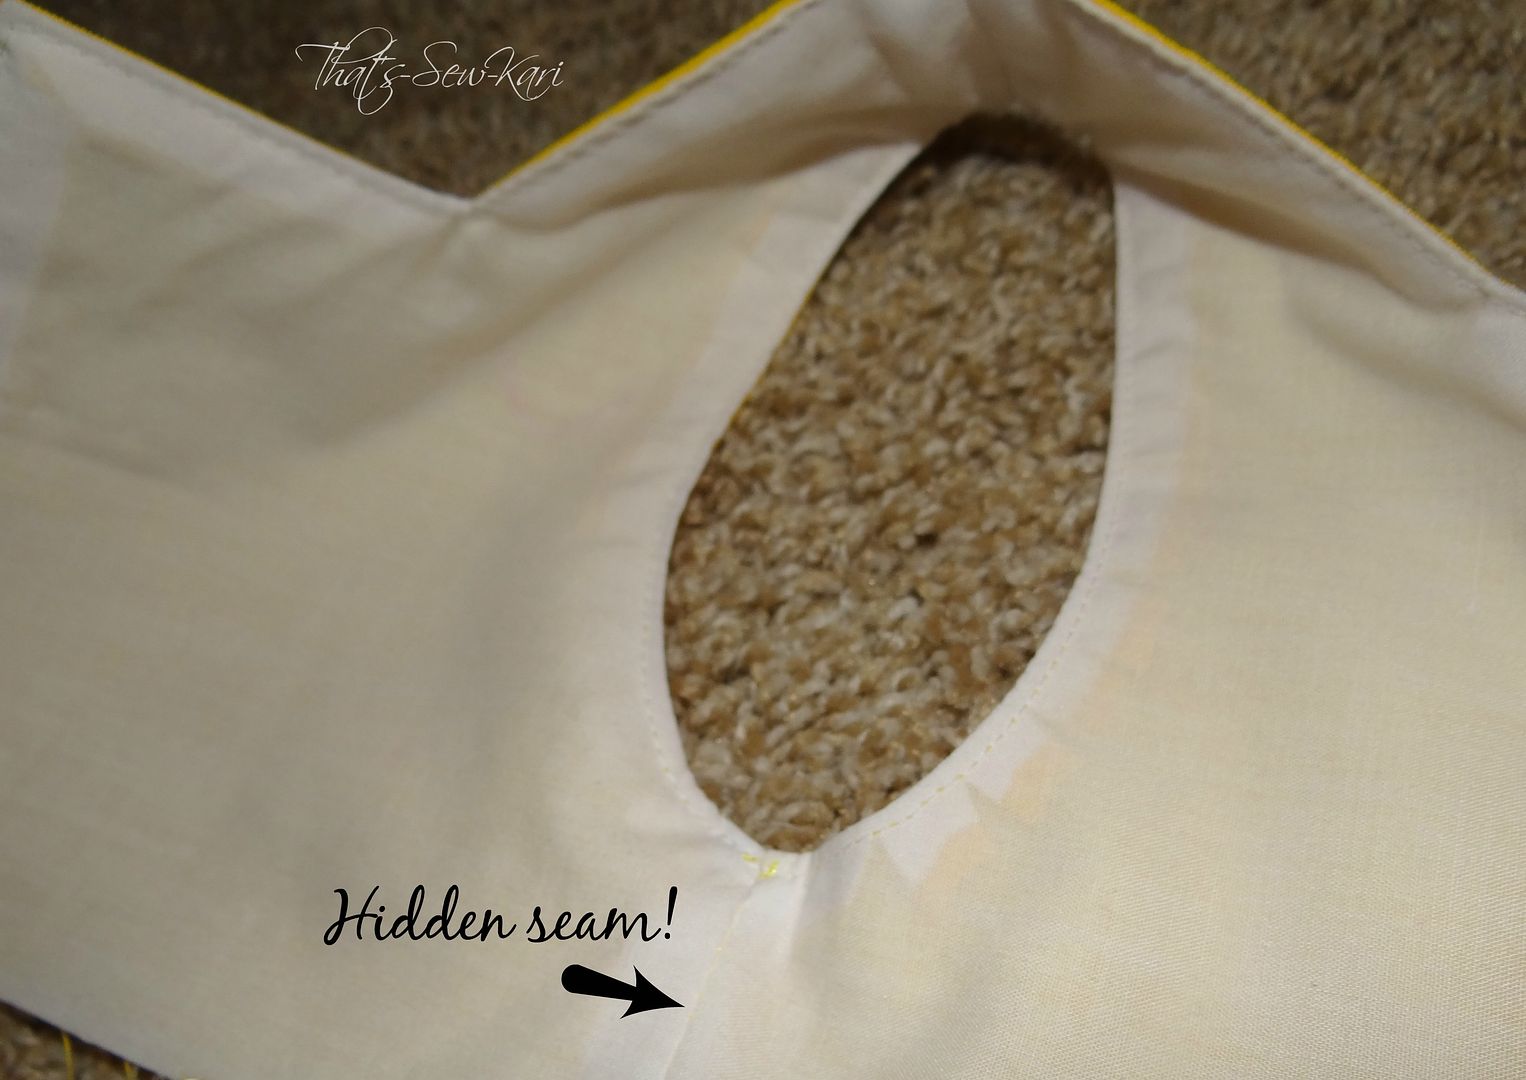
After I attached the skirt, I just needed to top-stitch the sash in place.  If I had used the sash from the Candy Castle Princess Dress pattern, the sash would have been attached before closing the side seams of the bodice.  However, I chose to use the thinner sash from the Peppermint Swirl Dress Pattern which is not sewn into the side seams, but merely top-stitched along the bottom of the sash where it sits on the front bodice.

Size 18M for my 2 year old

Size 3 for my 4 year old

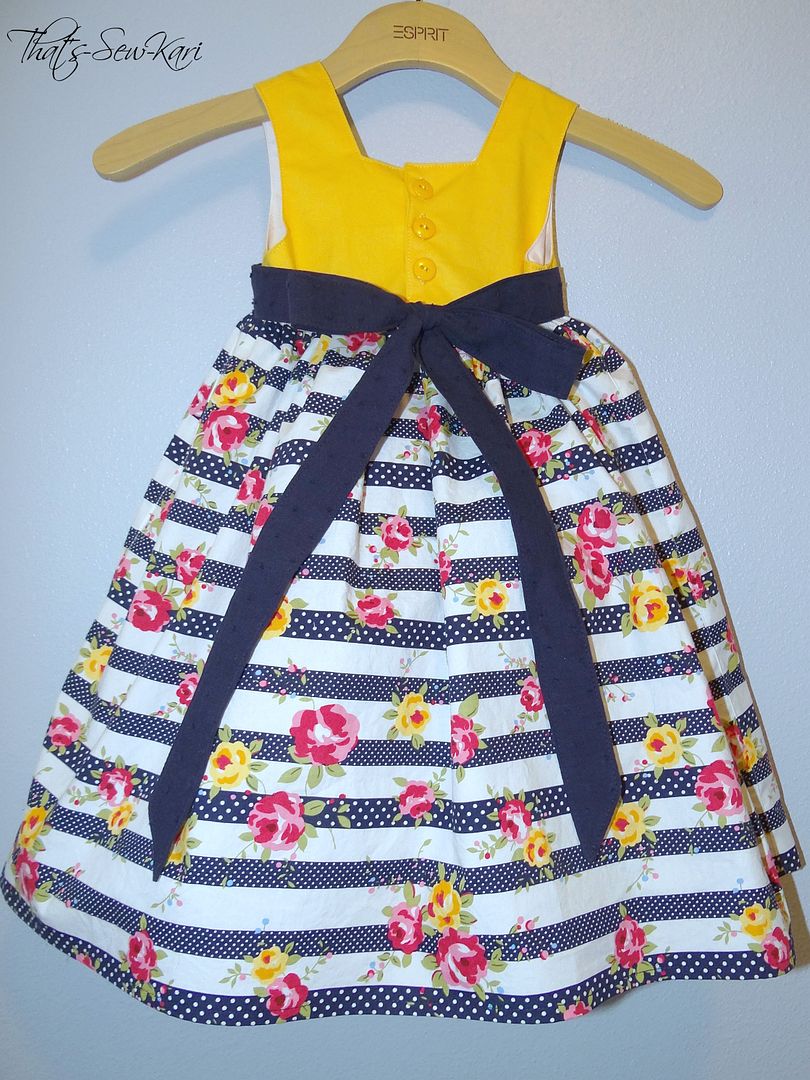
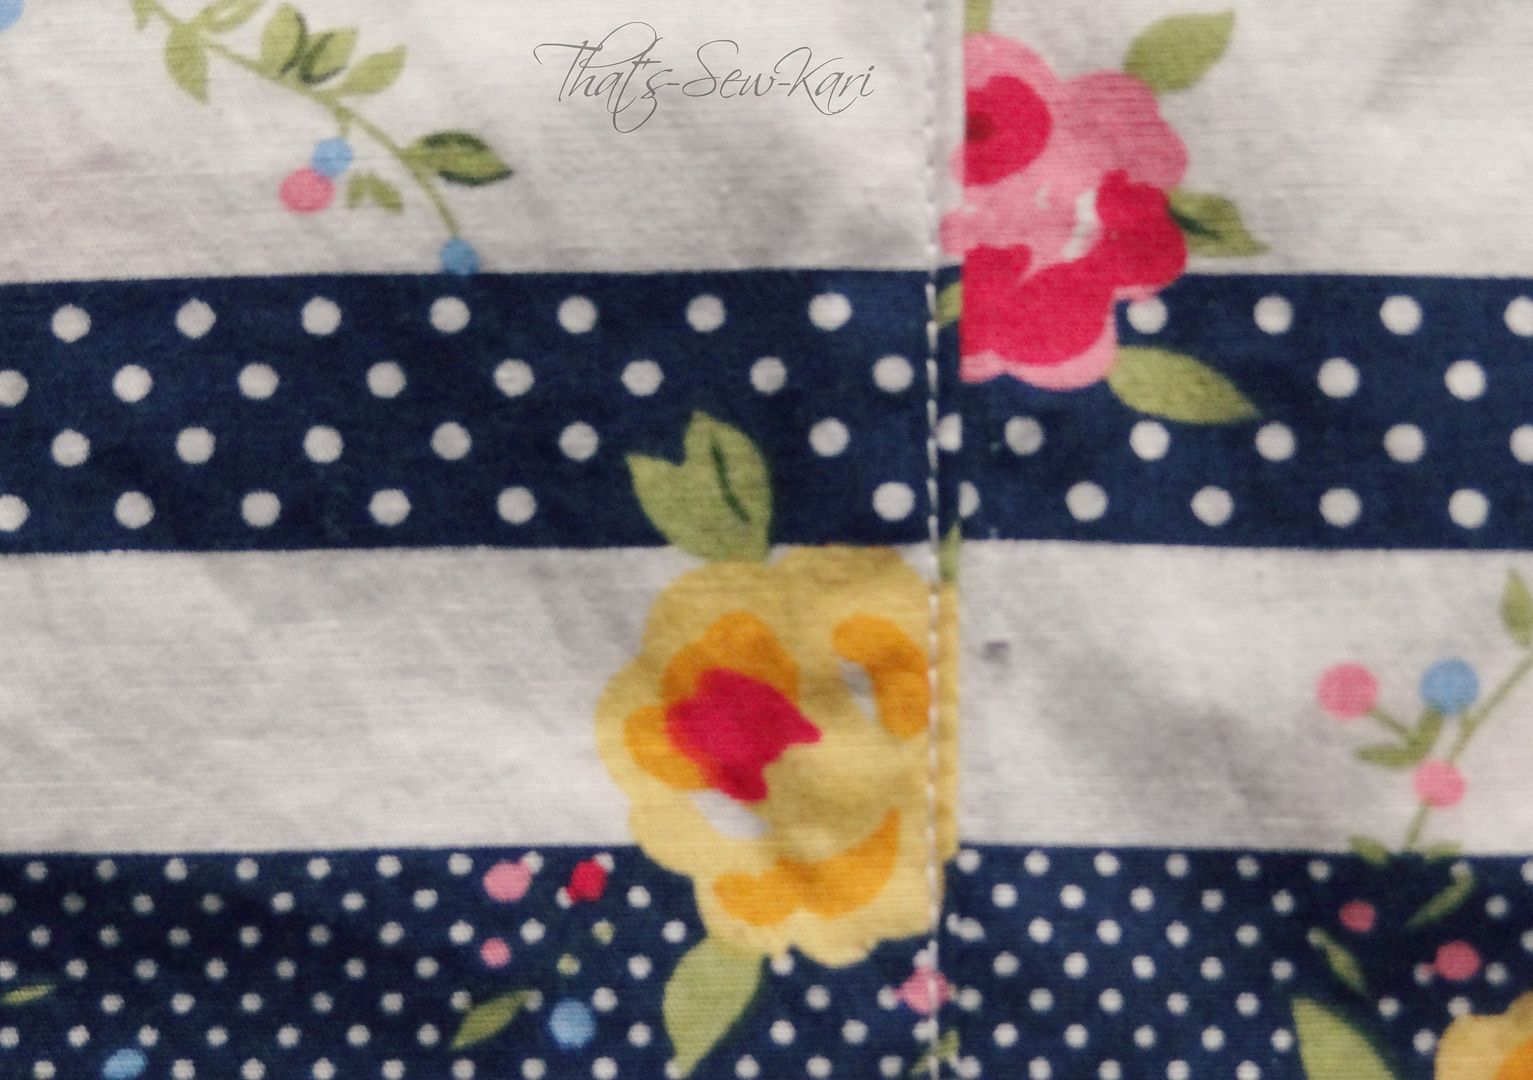
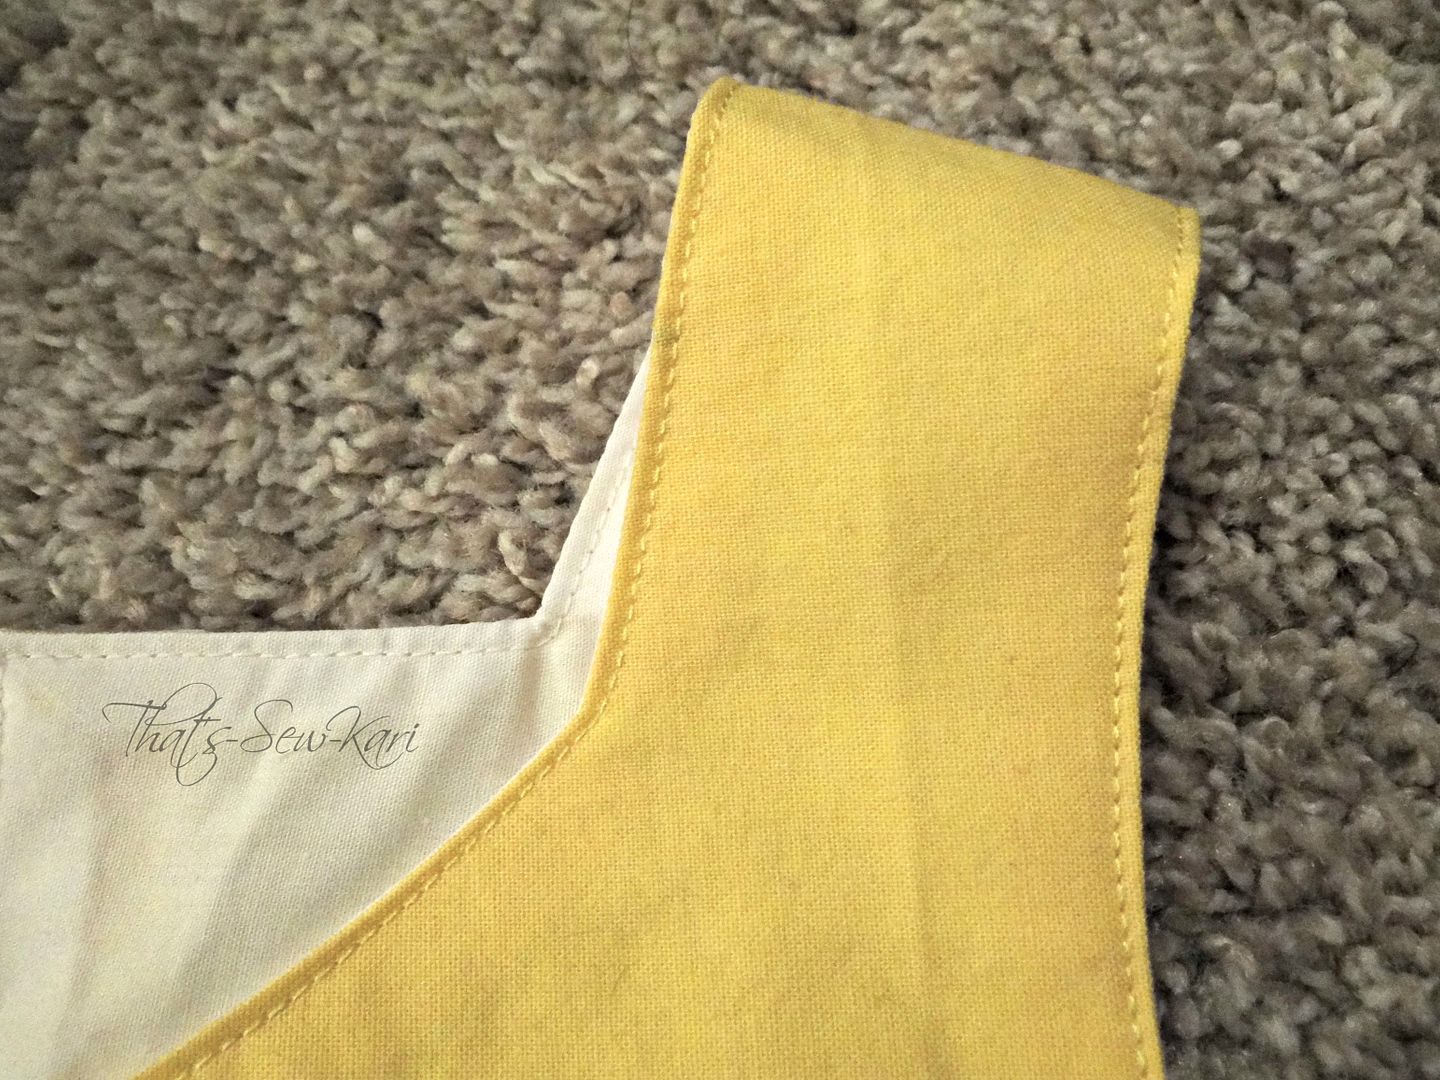
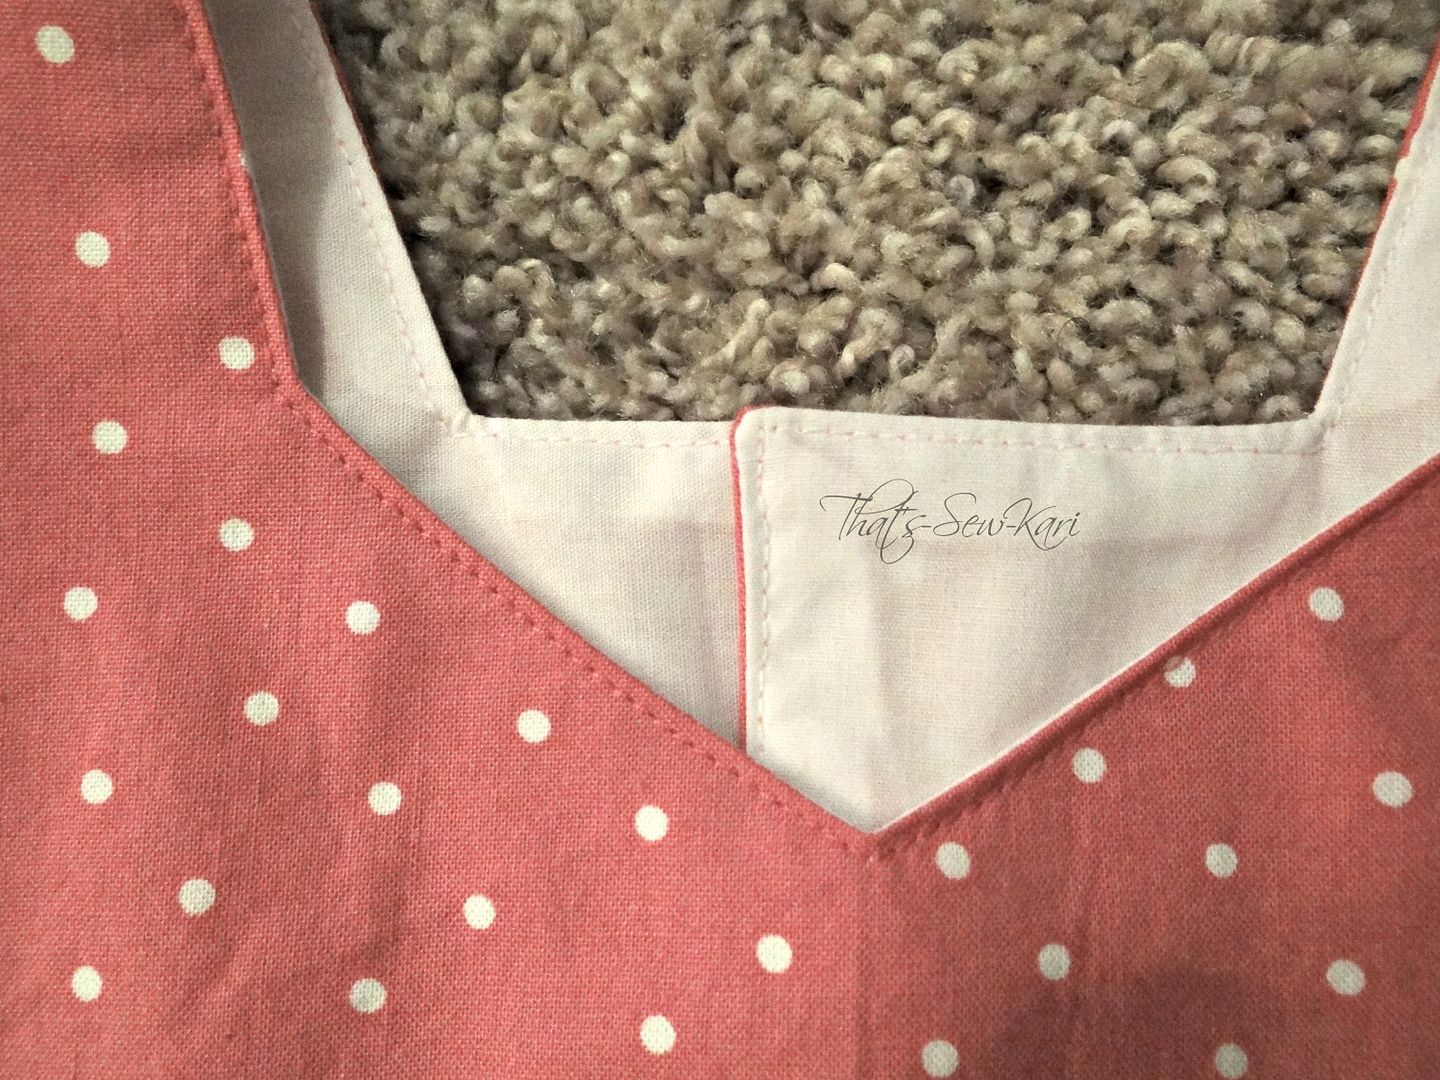
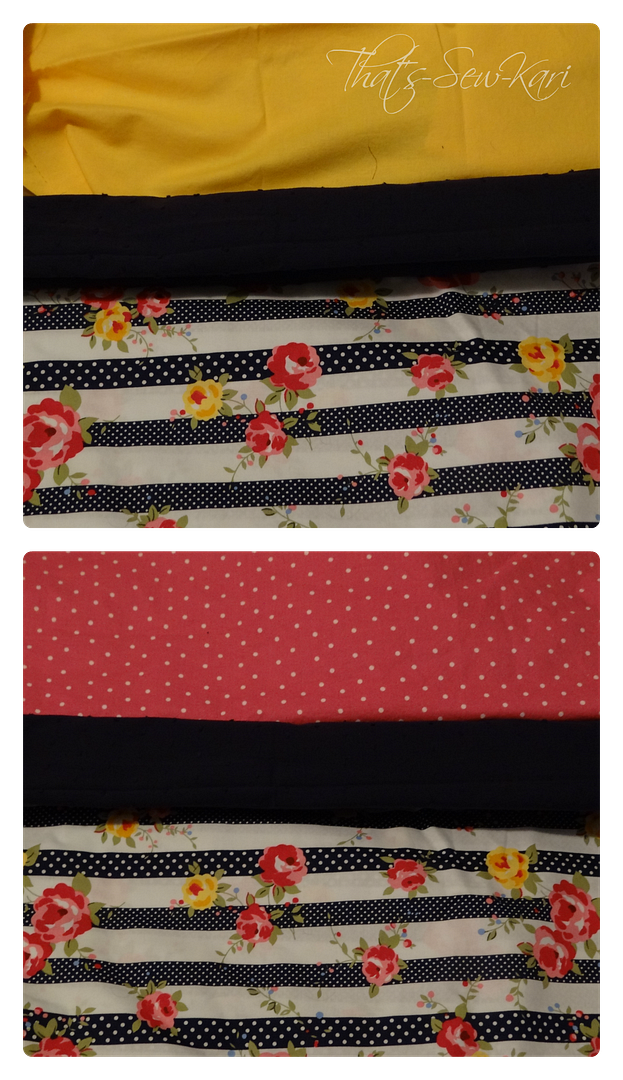
As I was top-stitching my sash on, I was loving it!  Then, I took a picture.... and something stuck out like a sore thumb (which will soon be mine after my date with my seam ripper!)  I thought I would like the peek of white under the sash, but it turns out, I really don't.  

I'm a details gal and when it's not exactly how I pictured it, I take the time to fix it.

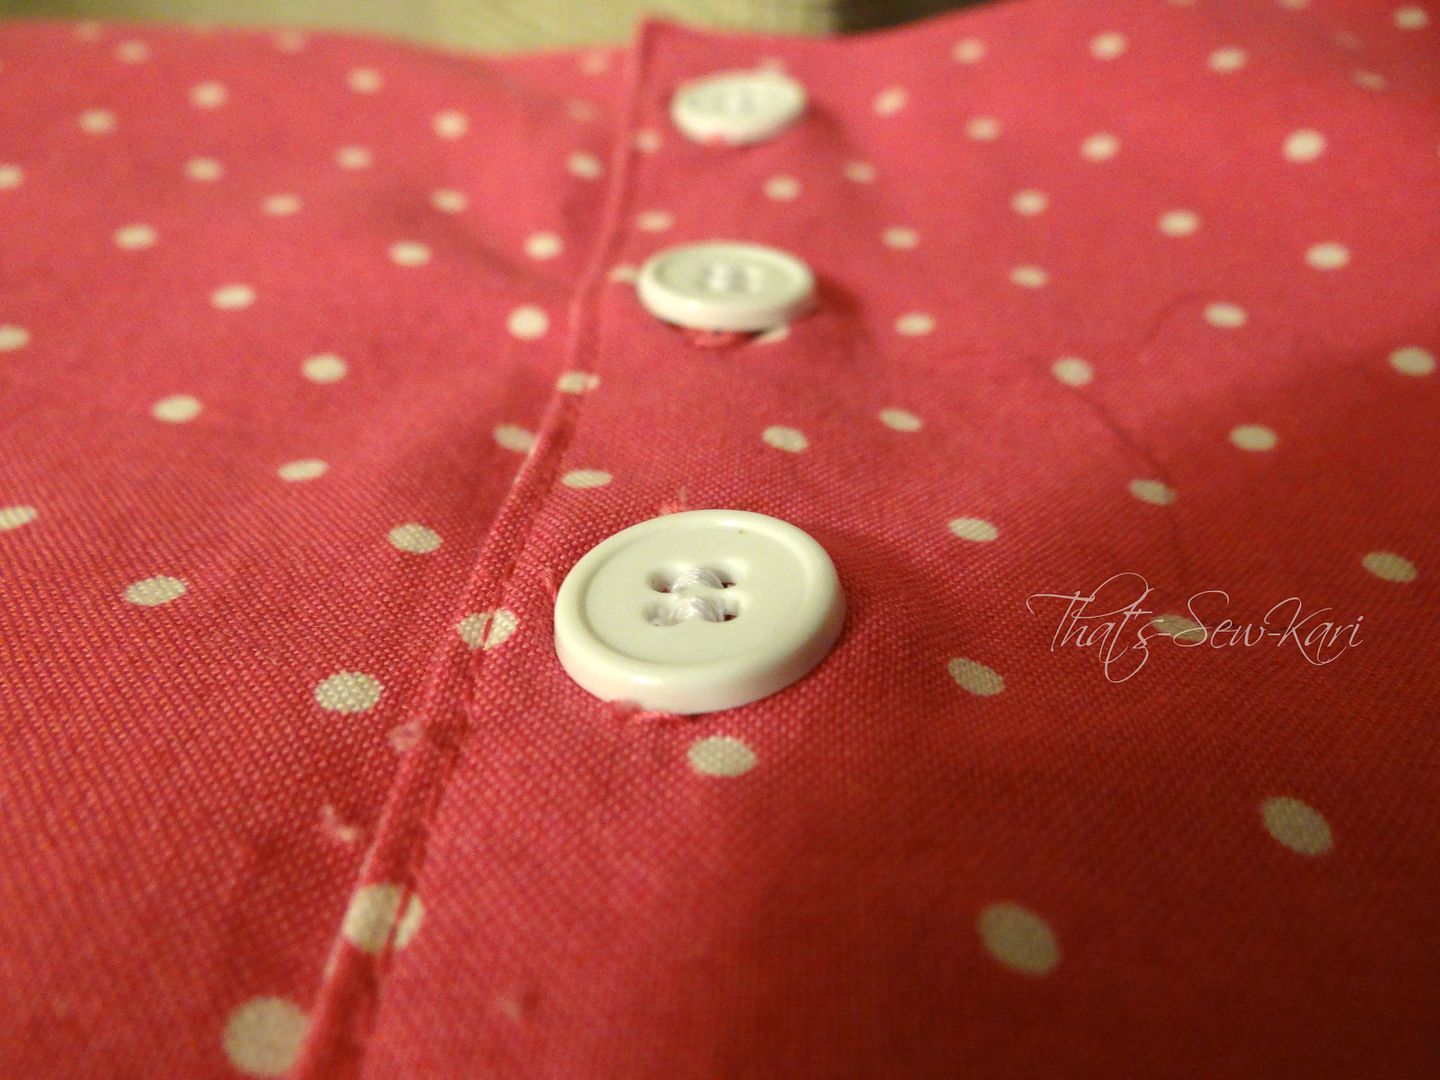
Of course, I have to show you the back!  For the previous Princess and Peppermint Swirl Dresses I've made, I've used Kam Snaps (easy and fast) or sewn-in snaps (hard to line up and take a while to hand sew in).  BUT, I was out of any Kam Snaps that would match and I thought buttons would look fancier anyway.  My machine does automatic buttonholes, but it can sometimes be finicky getting them sewn exactly where I want them.


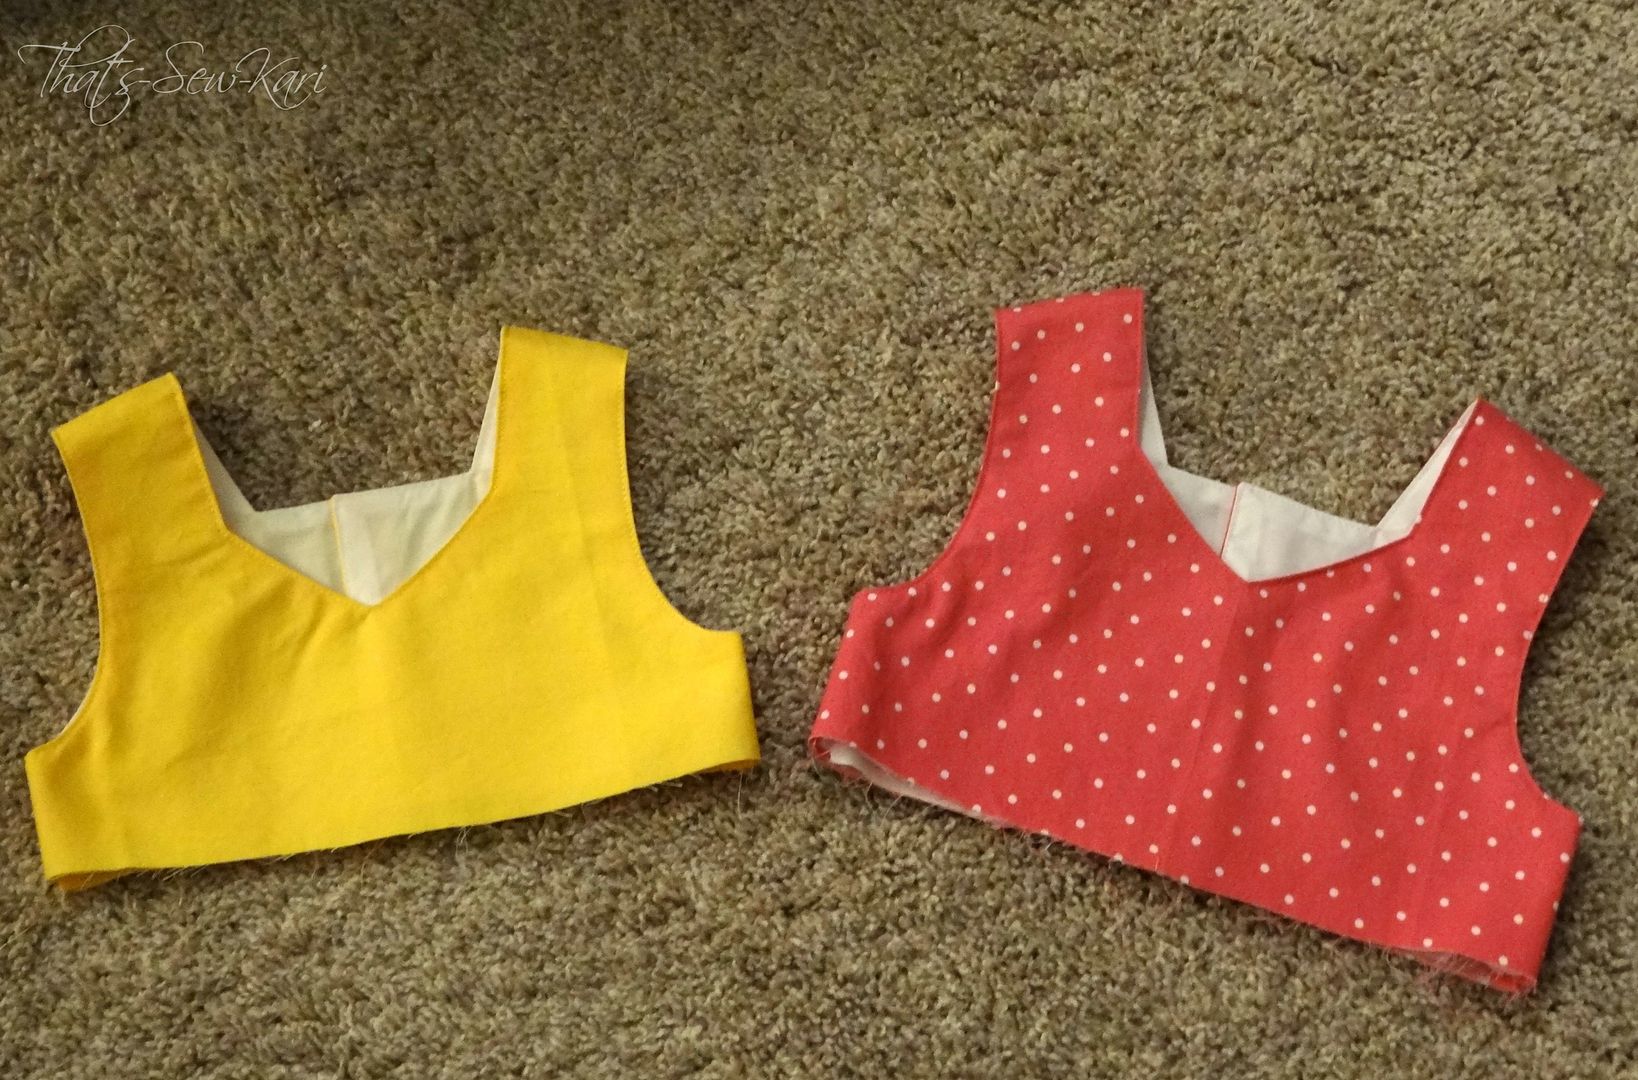
First, I practiced on some scraps (same amount of layers) to see if I could crack the code as to why my buttonholes would sometimes sew longer than intended.  After, I sewed several successful buttonholes, I switched out my scraps for my bodice -- and then held my breath.  Hahaha.


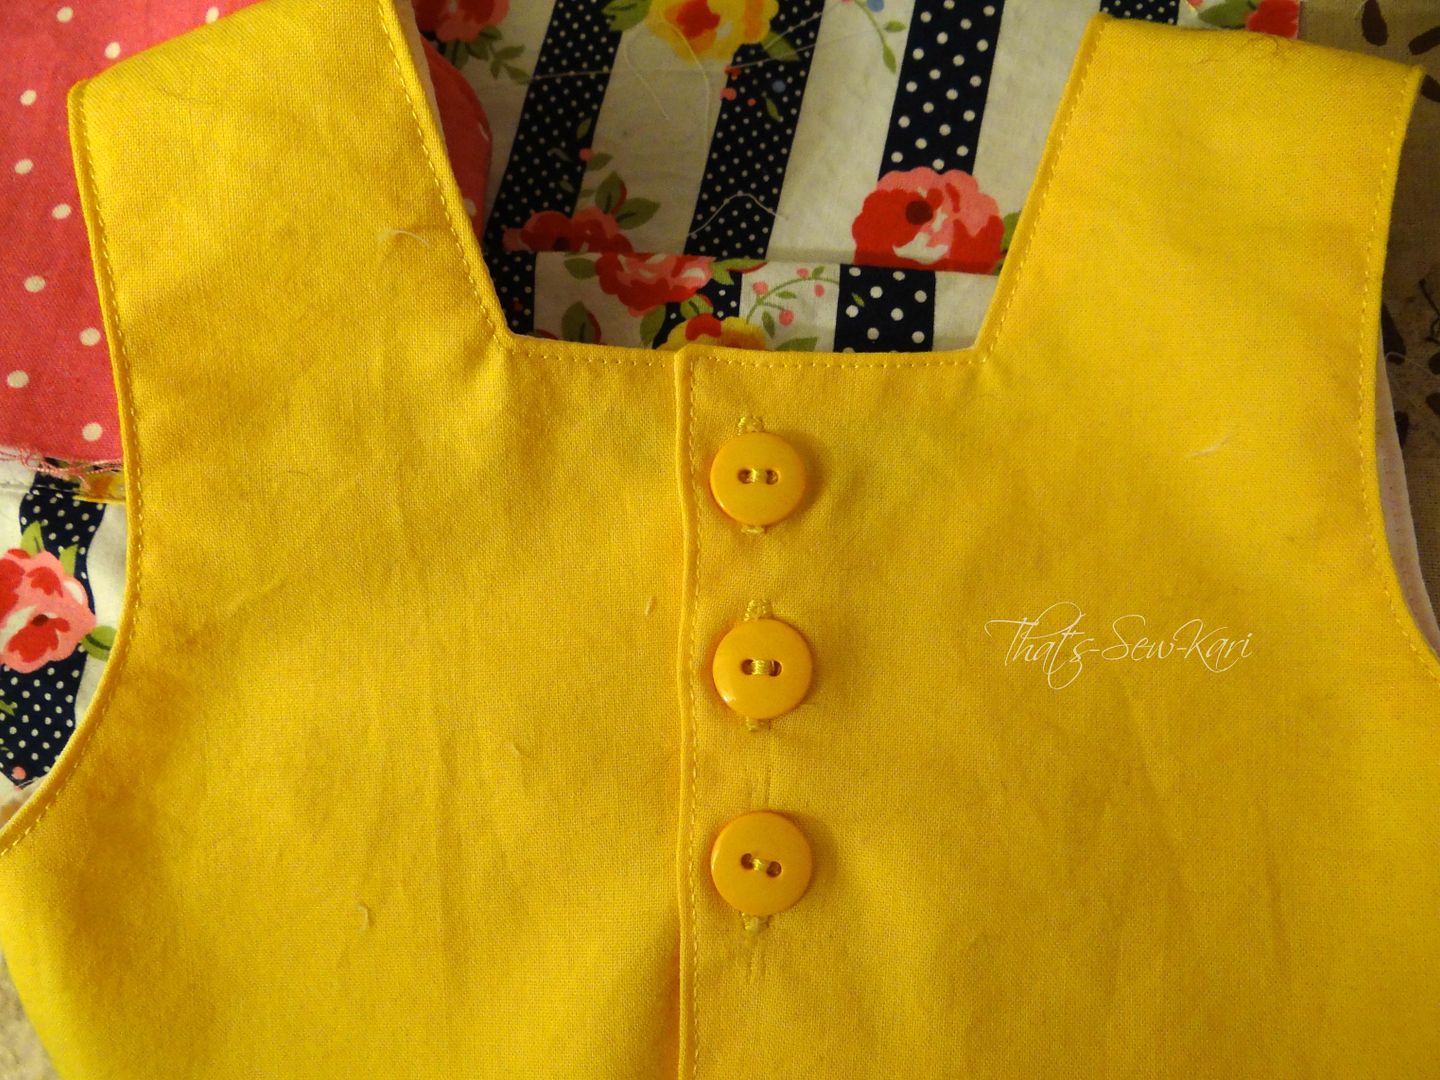
Normally with snaps, I place the top and the bottom first.  Then, folding the back in half to where the snaps meet, you find where the middle one needs placed (I learned this handy tip from the Candy Castle Princess Dress pattern and is also included in the Peppermint Swirl).  I do not recommend this method for a sewing machine with finicky buttonhole placement.  You will spend lots of time with your seam ripper, standing by a window to catch the best light, ripping out millions of teeny tiny stitches.  TRUST ME!  I found out the hard way on my yellow bodice and after the 3rd time sewing the same buttonhole, I was rethinking my plan of buttons.

The bottom button hole was stitched 3 times because my middle buttonhole
got sewn way too close to my top one.  The bottom one is slightly smaller than
the other two, but I was NOT ripping it out again :)

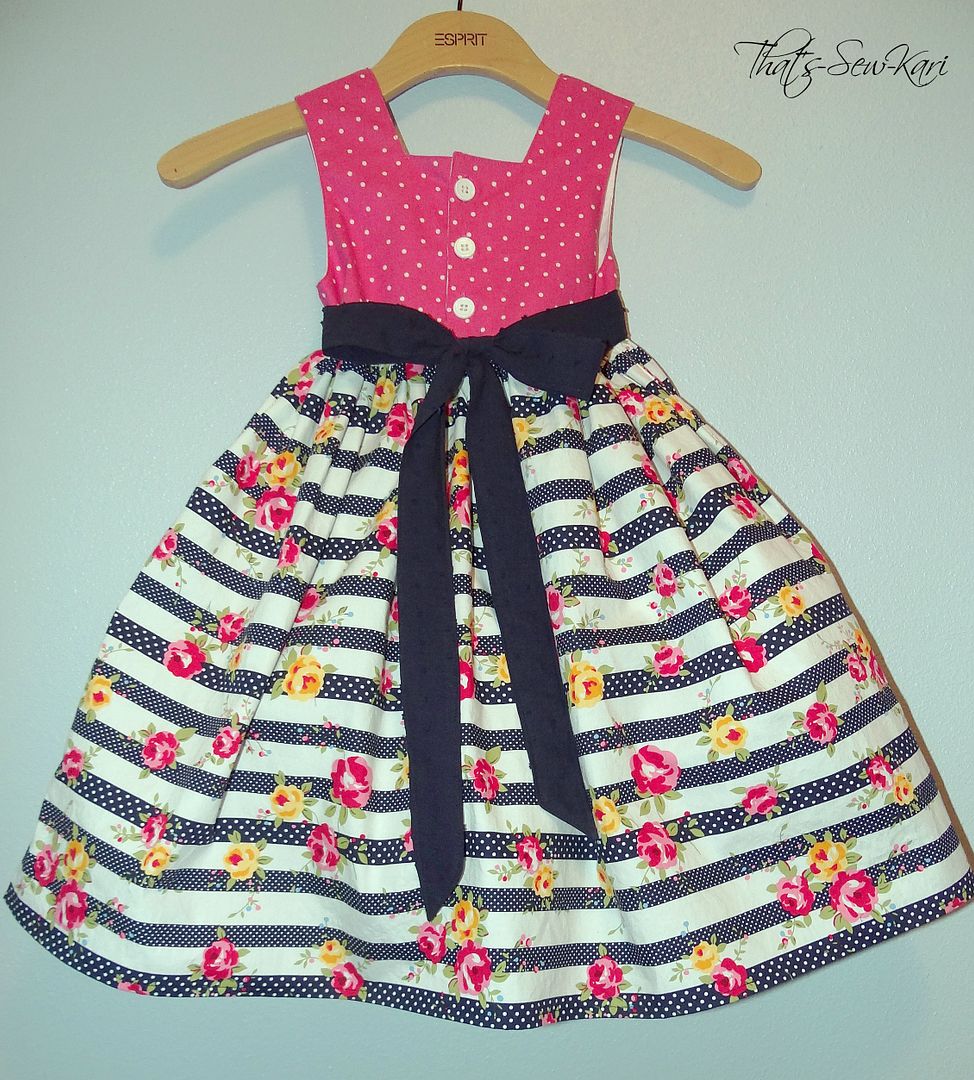
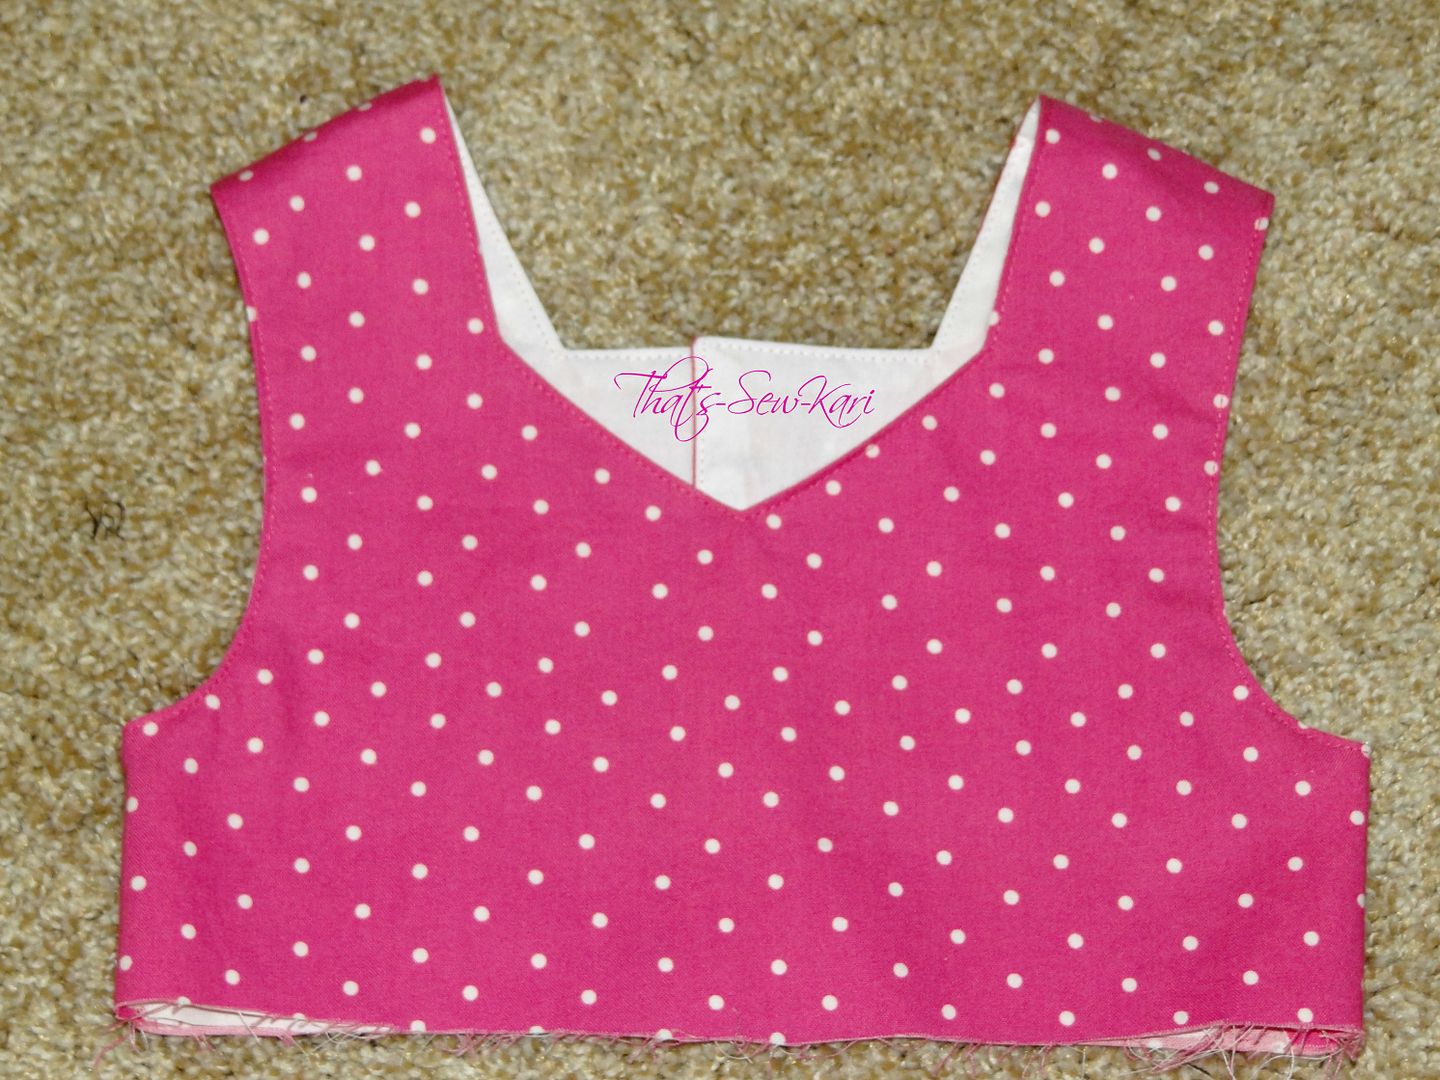
My pink bodice, however, came out beautifully with 3 perfectly, evenly-spaced buttonholes.  On this bodice, I started from the top and worked my way down.  Whew!


So there you have it!  Two Easter dresses, nearly finished.  Today, is actually the last step of the SAL before we show off the finished dresses -- adding embellishments.  I'd better get moving so hopefully I can be back with my final versions :)

***Missed a step?  Read through my previous posts!***
  • Step 1: Pick your pattern/fabric
  • Step 2: Wash,dry, iron, and cut your pieces
  • Step 3: Make a muslin (skipped)
  • Step 4: Sew your bodice
  • Step 5: Sew your skirt
Looking for more inspiration? Head over to the Candy Castle Patterns Group on Facebook -- there are so many amazing dresses that have been created!!


Before I go, I wanted to share the picture I came across on Pinterest that shows you how to tie a perfect bow -- every. single. time. 


Until next time....

www.candycastlepatterns.com


Candy Castle Patterns Sew-A-Long: Skirting Right Along

Step 5: Sew Your Skirt


Wow, time is flying by!  I thought time would be dragging while I waited to move on to the next step in Sew-A-Long, hosted by Candy Castle Patterns in her Facebook Group (seriously the sweetest group of ladies on the planet!).  But I took the extra time and delved into updating my blog :)

Yesterday, we started sewing the skirt of our dress.  And I probably had the easiest sew  in the world.  I didn't have miles of ruffles to hem or gather, or flounce upon flounce to sew together -- you see, I'm a cheater...LOL.  Remember when I said I wanted a classic silhouette? All I had are two skirt pieces to sew together, hem, and add my placket to the middle of the back.  Repeat for the second dress.  Step 5: Complete :)

For my 4 yr old

For my 2 year old -- slightly shorter and narrower.

Don't get me wrong, I love the look of both the original Princess Dress (remember, I've made 3!) and I love the magic of the flounces (I've made 2!), but they just weren't perfect matches for the vision I had in my head for this fabric.

Oh, but wait, it wasn't the "World's Easiest Sew" I thought it would be as I started this step.  Remember, I chose stripes for my skirt fabric.   And I am *slightly* OCD about matching my stripes.

3 out 4 of my side seams make me happy!!

But, sometimes, it's just hard to get them perfectly lined up (even after trying the same seam for a FIFTH time).  You gotta know when to give in to the madness of stripes ;)  Perhaps, it was karma from the sewing gods for my bragging about having such an easy sew...  

I mean, seriously, even my OCD wouldn't let me rip this seam out again!
As my Mom would say, "Are you really going to notice going 50 mph down the highway?"

The last thing to sew in this step was my placket.  A placket, when used in the skirt of a dress, is referring to an opening in the middle of the back portion of the skirt.  It's there to make it easier to put the garment on, especially with a fitted bodice, such as the Candy Castle Princess Dress.   There are a couple of different ways to sew a placket -- this is the easiest way, in my opinion!  Don't worry, when the dress is on and the sash is tied, you won't see an opening at all.


Whew!  Time to take another short break and work on other projects.  Next step is Sunday/Monday so I'll be sure to be back then!  In the meantime, I'll work up another blog or two to distract you while we wait!

Are you sewing along?  It's never too late!!! You can still join in ...  Or just stop by the group and have a cupcake with us and ogle all of the pictures being posted!

***Missed a step?  Read through my previous posts!***
  • Step 1: Pick your pattern/fabric
  • Step 2: Wash,dry, iron, and cut your pieces
  • Step 3: Make a muslin (skipped)
  • Step 4: Sew your bodice
Until next time....


www.candycastlepatterns.com


Before Bippity Boppity Boo

Project Run & Play Week 2: Let's Go to the Movies


I was very excited when I saw the theme for week 2 for Project Run & Play.  As a mom of two little - VERY GIRLY - girls, I knew I would be blogging about a Princess... I just had to decide which one to showcase!


Once upon a time....

           I was a stay-at-home mom of two looking for a hobby.  My mom had sewn while I was growing up, but it had been a couple decades since I had even been around a sewing machine.  About 15 months ago, I took the plunge and purchased a sewing machine of my own.   And thus, my story begins...

           I LOVE to create!  Being able to take a plain piece of fabric and turn it into something magnificent is more than a hobby for me; it's my passion.  A customer of mine recently gave me the challenge to create a Cinderella dress for her daughter.  The catch? Her 4 year old was adamant that it be pink in color.   Great!  The dress that the mice and birds created for Cinderella was pink and in my opinion doesn't get the spotlight it deserves.  I turned to the Internet to look for images from the movie for inspiration.


I had the perfect pattern to create the ultimate princess dress -  The Candy Castle Princess Dress by Candy Castle Patterns.  It was a pattern begging to be turned into Cinderella and really, I only added a few extra details that were not in the pattern to create Cinderella.


Here is what I added:
  • Additional lace to the bottom of the sleeves and enclosed it in the seam by making my sleeve band two separate pieces.  This way, the top of the lace which can sometimes be scratchy doesn't touch any skin.   
  • The ribbon on the bodice.  I hid the seam of the ribbon under the bow and then took it down into the side seams of the bodice.
  • A white satin collar on each side of the neck.
  • Tiny bows sewn on the back bodice to conceal my the stitches of my sewn-in snaps. 
The pattern contained everything else - the scalloped and ruffled top skirt, hemmed underskirt, puffy sleeves,and the bow pattern  The pattern is wonderful!  It comes in sizes 6m - girls 10 so it will last for years.  With its plethora of options (4 sleeves, 2 bodice fits, 2 top skirts and 2 underskirts), it can be made so many times before you repeat! (210 times if my math is correct!).  This is a PDF pattern and I love that it's instant gratification.  You can purchase the pattern from Candy Castle Patterns and it's instant download.  

Sewn-in snaps with tiny bows sewn on top.

Of course, every little princess needs a pettiskirt!  I decided to make this petti with a base of satin so it can be worn alone.  I just love how it turned out!  I used the Pettiskirt Party pattern by Foo Foo Threads.


 Of course, if you'd like to skip the work, but still dress your little princess as if she's off to the ball, I take custom orders!  You can contact me via Facebook at That's-Sew-Kari or Etsy and I can make your little girl's dreams come true.  This is actually one of 3 of these dresses I've made.  I've also made Sofia the First and Minnie Mouse (and many more princesses on the way)!  I've also blogged about all my Candy Castle Pattern Creations (HERE) so you can get a peek at all of the Candy Castle Patterns there as well!

Of course, I can't end this post without pics of my other two dresses made from the same pattern!  

Now presenting..... Sofia the First!


And a very adorable Minnie Mouse - complete with sequin-trimmed Minnie Mouse cutout in back!


Next week's theme is Repurposing - stay tuned!


One Step Closer in the Sew-A-Long with Candy Castle Patterns: Step 4

Step 4: Sew your bodice.


Whoop!  It's a new step in the Princess/Peppermint Swirl SAL with Candy Castle Patterns.   Yesterday, those that had never sewn these patterns before participated in Step 3: Make a muslin.

A "muslin" is basically a test run of the fitted portions of the pattern to check the fit before cutting into your gorgeous fabrics.  Some seamstresses do, in fact, use muslin, which is an inexpensive, lightweight cotton.  I like to use anything cheap so I like to hit up the sales rack.   If it fits, I might just turn it into another dress if the fabric is cute enough.  I just stocked up on a bunch of sale fabric at Walmart - on sale for $0.87/yd or less!!

I sat yesterday out since I have sewn both patterns for each girl.  But, today, I got to sew my bodices!  I was so excited it was a new step, I started first thing this morning.  My bodices went together pretty fast.

Sister dresses
Size 18 m slim
Size 3 slim

And since they are sleeveless, all the seams are hidden between the outer and the lining - even the side seams!

We can't forget about the top-stitching! This is one of the finishing touches that I never skip.  It also helps keep the lining and main fabric from shifting around at the seam line.

It's important to stitch slowly and carefully when top-stitching!
To turn a corner, put your needle down through your garment,
lift your presser foot, and pivot your fabric.
Of course, since I completed this today, I have to wait a few days until it's time to move along to the next step.  I must say, I love a relaxed SAL schedule like Candy Castle Patterns plans.  It gives me time to get through the steps if something comes up one day or another.  This also means, you can still join in ... hint, hint!  Or just stop by the group and have a cupcake with us and ogle all of the pictures being posted!

***Missed a step?  Read through my previous posts!***
Until next time....


www.candycastlepatterns.com


Candy Castle Patterns Sew-A-Long: Step 2

I'm back!   Since I picked out my fabric on the first day of the Sew-A-Long, it was tough waiting the next two days (although I usually take forever to decide so I normally appreciate the longer window).

Today, I got to cut out my fabrics and I'm even more in love!!!   I'm such a visual person so even though, I set the fabrics in the order I would see them on the dress, there's nothing like seeing the actual pieces cut laid out like a real dress.   I mean, seriously --- <3

For my brown-eyed brunette 4 year old!

As you can see, I decided to go ahead and make both of my daughter's dresses.   It's not going to be that much extra work and this way, they'll both be done with plenty of time to spare --  AND -- what would be cuter than a sisters photo shoot!?

For my 2 year old: My blue-eyed blondie!

Like I said in my first post,  I chose the Candy Castle Princess Dress pattern, but I am going for a more classic silhouette so I am skipping the top skirt.  I also decided to use the sash from the Peppermint Swirl Dress since it's slightly narrower and I love the sash top-stitched onto the dress along the bottom of it.

If you haven't decided if you'd like to join in, there's still time (click HERE to go to the Candy Castle Patterns Group where all the fun happens)!   Tomorrow, we'll be making a muslin to check the fit (I'll be skipping this portion as I've made each girl both a Candy Castle Princess as well as each a Peppermint Swirl so I'm confident on the fit).

I'll be back on at the beginning of next week with my bodices sewn up!


Happy sewing!!


It's Sew-A-Long Time at Candy Castle Patterns!

Candy Castle Patterns is back with another Sew-A-Long!  This marks the 4th Sew-A-Long since August.

Q: What is a Sew-A-Long?

A:  A Sew-A-Long (SAL) is where a group of people all sew the same pattern at the same time.  A schedule of events is posted at the beginning and each day or so, more steps are added until the garment is completely sewn.  And, of course, lots of chatter and pictures along the way make them extra fun!

This SAL is a bit different because we're sewing along to 3 patterns actually - two dress patterns (Peppermint Swirl and Candy Castle Princess ) and then an additional sleeve pattern (Swizzle Sticks Sleeve Add-on) that is optional.

We've just begun, so our "homework" today is to purchase our patterns and purchase our fabrics!   Well, I owned the patterns already so that was the easy part!   Deciding fabrics is always a lengthy process for me.  I always want to get it just right.  I had lots of choices from my stash and depending on what I chose would help me decide which pieces of the patterns I'd be using.

After much deliberation (and pulling out every bit of my stash!), I decided to start on my daughters' Easter dresses.  If I don't, I know it will be almost Easter and I'll be scrambling to make something.  Just before Christmas, I was in Hancock Fabrics and saw a fabric that immediately screamed Easter dress to me!
Top picture is for my blonde-haired 2 yr old and the bottom picture is for my brunette 4 yr old!

I will be going for a simple silhouette here - I'll be using the Candy Castle Princess as my base, but I will be skipping the top-skirt.  I've decided a sleeveless dress would look best (so I will have to save my Swizzle Sticks Sleeves for another dress!) and I picked different colored bodices for each girl.  A navy Swiss dot sash will be the finishing touch.

Today is just the start so there's still plenty of time to join in :) Head on over to the Candy Castle Patterns Group on Facebook to join in!  Oh and through Thursday night, there's a discount on the Swizzle Sticks Sleeve Add-on -- purchase HERE & enter code SWIZZLE at checkout to save 25%.

I'll be back on Friday with my pieces cut out!

Happy sewing!

Custom Post Signature

Custom Post  Signature