Image Slider

Ellie Inspired 2014 Holiday Collection Blog Tour


Whew, is it Christmas-time already?!  It seems like yesterday that I went on tour for the first time with Ellie Inspired for their Spring Collection. Time flies when you are having fun :)

Hop on the tour bus... cuteness overload ahead :)

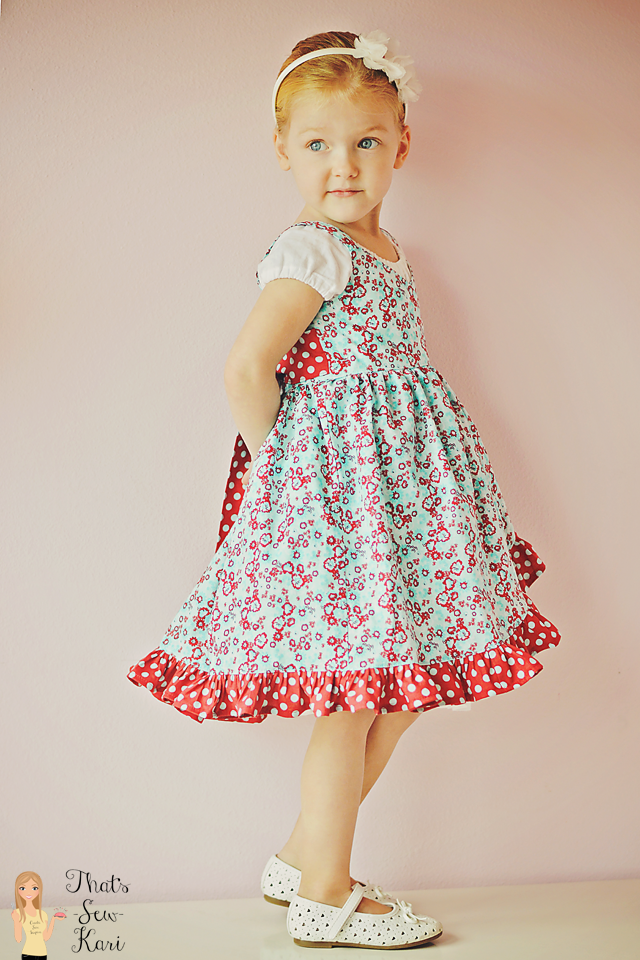
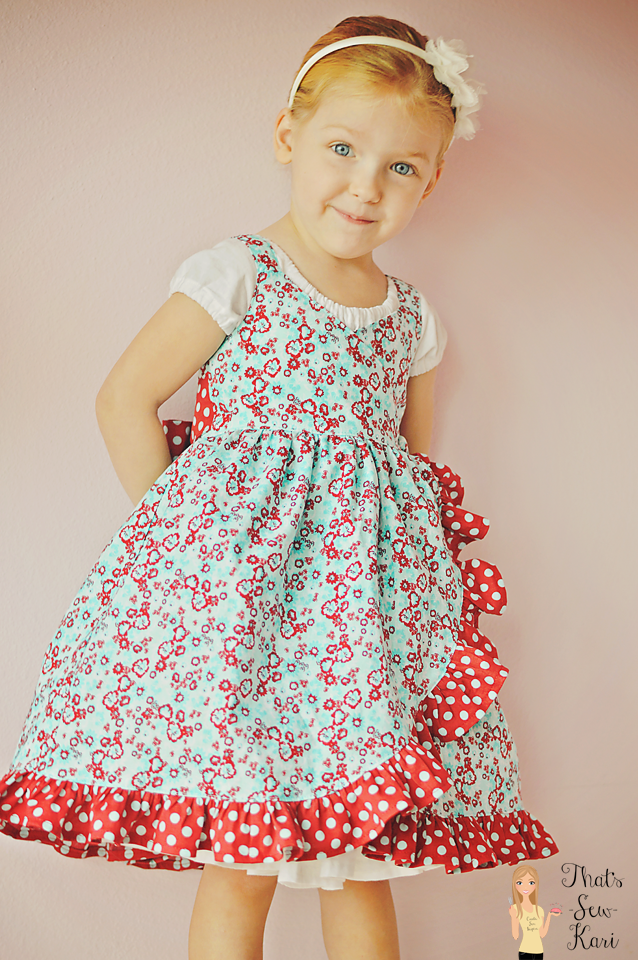
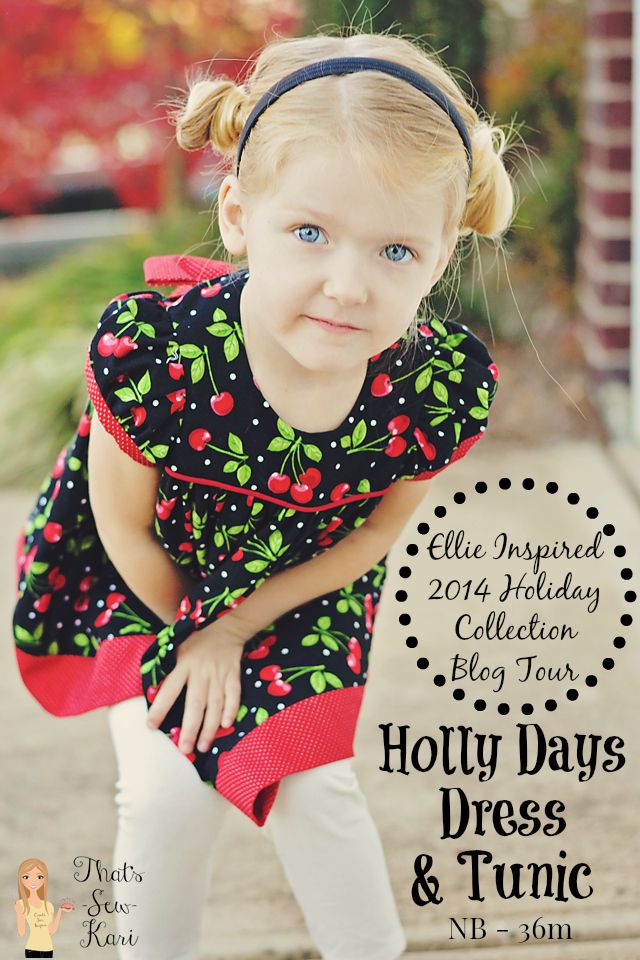
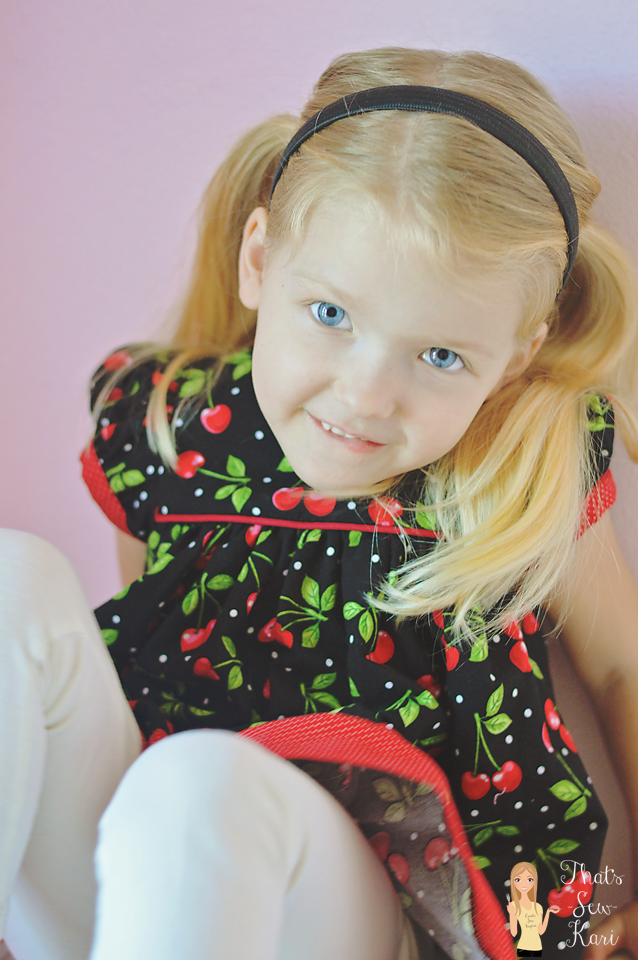
I am here today showing off my version of Holly Days Dress & Tunic.  It's such a classic design with its puffed sleeves, peter pan collar, empire waist and buttons in the back. As much as I love a peter pan collar, I omitted it on this one to show of those cherries!


Holly Days covers sizes Newborn to 36 months.  My little lady has her 4th birthday right around the corner, but she's built like a rail.  Don't tell her this, but I made her an 18m size and just lengthened it to match a size 3.  This is just one of the many reasons why I love to sew!  I can create a custom fit every single time!

I also decided to make a tunic as it's a bit more preschool friendly and she's really been into her leggings lately.  She may be 3, but she thinks she's going on 13!


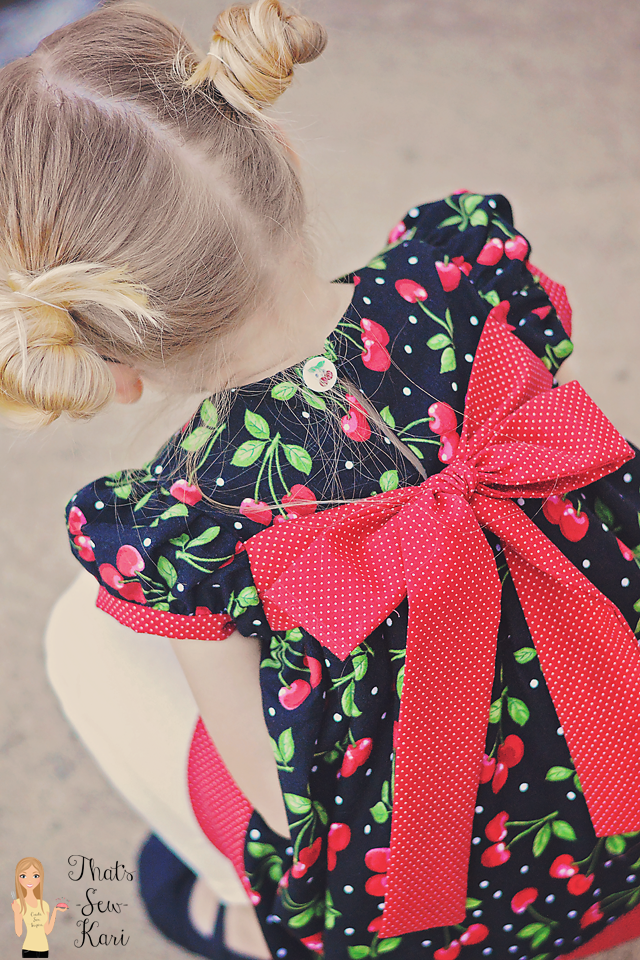
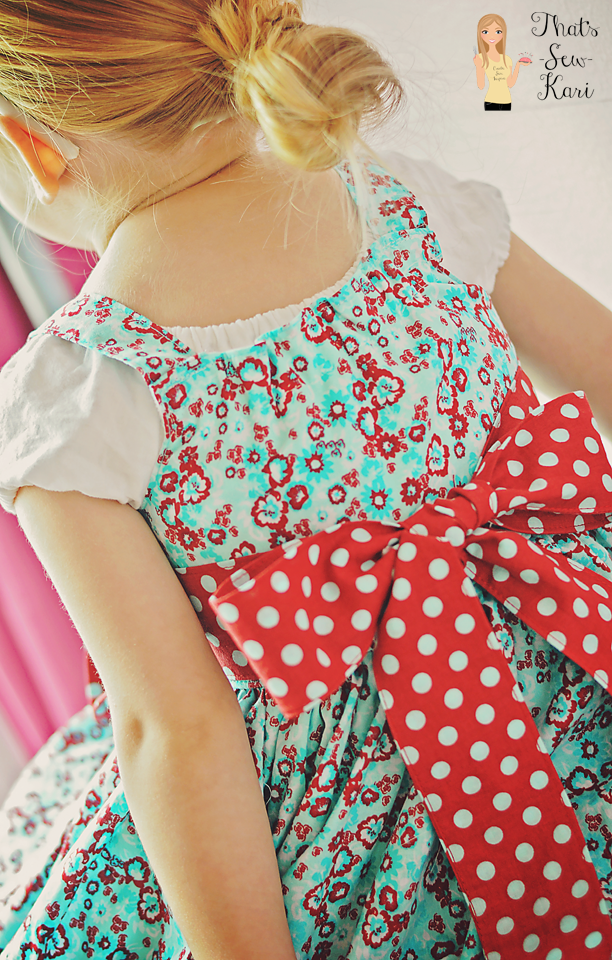
Eeks, I just adore the back of this!  Instead of the overlap with a row of buttons, I added a fabric loop along with a super sweet cherry button that I have been saving for the perfect project.

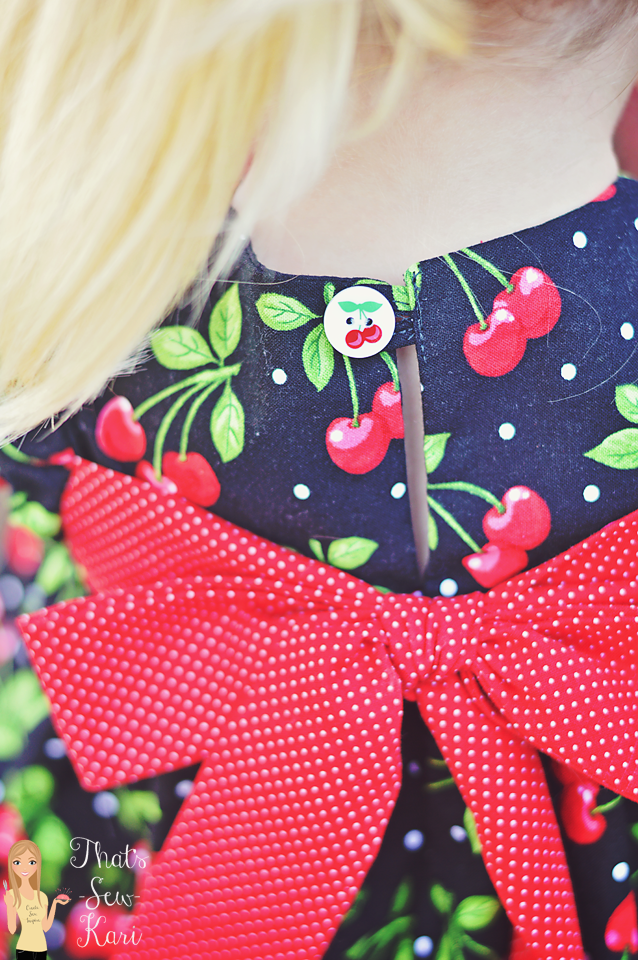
This little button has traveled all the way from the Netherlands (thanks Rebecca!)

I thought about doing a Holiday version since, you know, this is a Holiday Blog Tour, but hey, I love cherries.  No seriously, no matter what I pulled from my stash, my eyes kept going to the cherries.  Miss 3 loves her Cherry Shirt.  At least the colors are right for the holidays ;)


I took the suggestion in the pattern and added piping to the seamline on the bodice.

Ellie Inspired's patterns are fantastic to sew.  Not only are they professional in appearance and easy to follow along, Laura (of EI) often uses techniques common in heirloom sewing.  The bodice lining and sleeve bands are all whipstitched into place on the inside.  While my whipstitching needs a bit of practice, I am happy I took the time to hand sew these areas.  Of course, if speed is more your style, finish in the traditional method you currently use (but seriously, try it sometime!!)


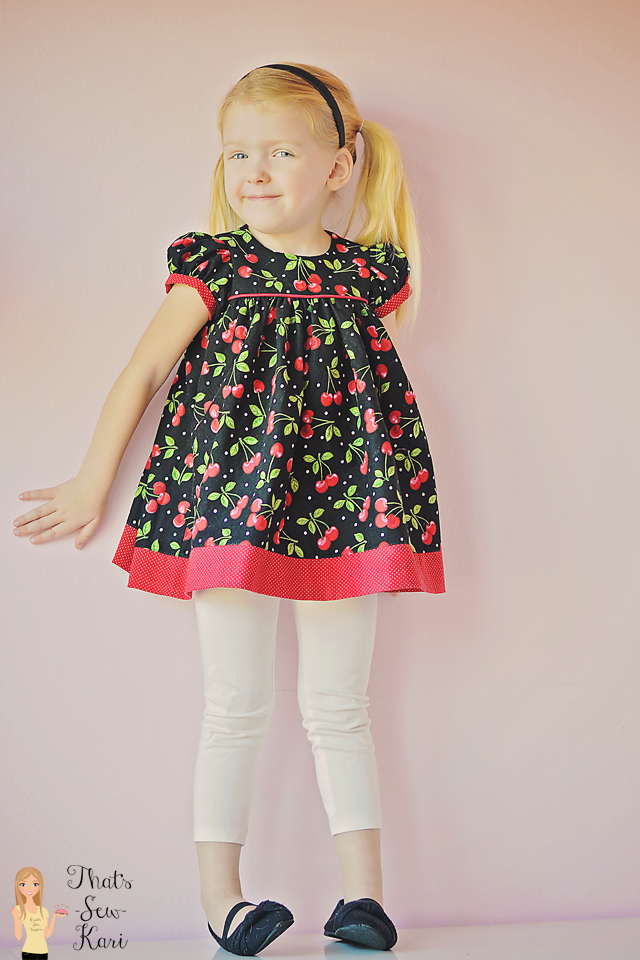
Included in the pattern is also a set of bloomers, but as I mentioned above, this girl is 3 going on 13 and I knew leggings are more her style.  (Need a leggings pattern?  Click here for a FREE leggings pattern from Ellie Inspired.)
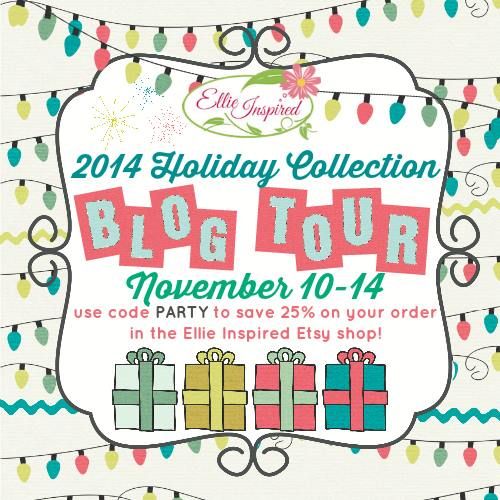


To celebrate the
2014 Holiday Collection Blog Tour,
enjoy a savings of 25% on your order in the
But hurry because the tour ends tomorrow!!


Need more inspiration?  Check out the other bloggers on tour!

Day 5: Rebel and Malice | Lulu & Celeste

Laura and Ellie Inspired team -- thanks for having me back!  I love it!
*In exchange for my spot on the blog tour, I was supplied with a copy of the pattern. 
I was not compensated in any other way.  All thoughts written here are mine and mine alone.

BLOG TOUR: Betty Skirt by The Shaffer Sisters


Fabric laid out, measurements chart nearby, scissors in hand.

Blink.

"Miss 5, you have a new skirt ready!  Do you love it?!"


Yup, this skirt was that fast.
__________________________________________________

Today, I have the pleasure of hopping on the virtual tour bus, driven by The Shaffer Sisters, and sharing some Betty Skirt love.

First of all, my girls freaking love skirts.  I have made them loads of skirts recently and this pattern will definitely be added in the rotation!  Covering sizes  NB - 16, the Betty Skirt comes with 4 options - small pleat, large pleat, gathered, or gathered with a placket.


I chose the "gathered" option which is a crazy fast sew.  I do plan on trying the pleated option, but for this fabric, I thought the gathered would look best.  Before I began cutting, I checked the measurement charts to see where her hips fell and what the finished length would be.  I prefer my skirts to end just above the knee, so Miss 5 fit perfectly into a straight 3 (she's super duper skinny).


The pattern has both the cutting measurements as well as actual pattern pieces so the choice is yours whether you want something to print.  There is also a page dedicated to mixing sizes to get the perfect fit for your little lady, including space for you to write down exactly what measurements you need!


The tutorial is very easy to follow - computer generated images and clear instructions will guide you through.  I loved the images of the girl at the step of cutting the perfect length of elastic.


I added this ITH (in the hoop) bow for embellishment and made it removable for easy care and in case she wants to switch out her shirt for another.  This was my first stitch out and I was trying to beat the sunset to get my pictures.  Next time, I'll switch my thread for the final outline stitch.


The pattern and tutorial, combined with the large size range and different options included make this skirt pattern great bang for your buck.

        .... and it just so happens to be on sale to celebrate the blog tour!  Pop on over to the Etsy shop and get ready to share your own #bettyskirt love.

1) Go to the Shaffer Sisters Etsy shop -- click here---> SHOP
2) Enter BETTYTOUR in the coupon code box during checkout.
3) Sew your skirt.
4) Take photos of said skirt.
5) Blast photos on social media with #bettyskirt
6) Repeat steps 3-5 :)

Want to see more inspiration?  Head over to The Shaffer Sisters blog for links to all of the Betty Skirt Tourists!


REVIEW: Sweet Innocence by My Treasured Heirlooms


WOW.  I love how this turned out! As you read, you'll see just how many feet of fabric I ruffled and exactly why it was worth every minute and inch.

The moment I saw the listing for Sweet Innocence by My Treasured Heirlooms, my breath was taken away.  The fullness of one of the under dress options caught my eye, the cascading skirt ruffle had me dreaming of fabric combos, and the different options included in the pattern made me smile.

*Listing photo of Sweet Innocence*

Reading through the details, I noted the size range of 2-6.  My 3 and 5 year old are so slim, they often require a size 2 or slightly smaller sized bodice so I knew this pattern would last a long time.  But what about the mommas of those already in the upper range of the pattern?  Don't worry, Annastasia, the designer behind My Treasured Heirlooms is working on an upsize right this very moment!! She is adding sizes 7-10!

This pattern has so many options, you could outfit an entire family of girls and have them each unique.  Sweet Innocence contains patterns for THREE styles of dress, TWO under dresses and TWO styles of pants. I chose the lower left option (Option A) of the listing photograph shown above.


Option A features a wrap style dress closed with buttons on the front of the bodice.  The under dress is a comfortable peasant style dress with 3 ruffled tiers for extra twirl and poof.  Did you know that between the under dress and the main dress, there are nearly 5 yards of fabric and over 68 feet (let's let that sink in for a moment) of gathering?!  And I'm the first to tell you, I gathered it all by hand and it is totally worth every.single.minute.

I figured I'd be smart and make the under dress out of white so I could pair it with everything (or nearly everything).  My daughter already put it to good use in her Little Red Riding Hood costume on Halloween.  The fabrics for the dress I had picked up a while ago on a JoAnn's run when it was on a crazy sale, like $2.50/yd.  The total cost of this dress came out under $15!  Score!!


As I mentioned above, my 3 yr old is all height and no meat.  Her chest measures just 19" which is a full 2" below the smallest chest measurement on the included sizing chart.  Normally I make a muslin of any new pattern I sew because fitted bodices require sizing down.  Alas, I didn't follow my normal protocol and ended up with a bodice that was too large for my little lady.  Don't worry, the sizing is not off, I just didn't think about reducing the width of the back bodice to account for her narrow frame.

I channeled my inner Tim Gunn, emailed some pics to Annastasia with my thoughts of what would work ... you know, since I had completely finished. (Oh, the joys of sewing at night...LOL).  I moved the buttons closer to each side seam so that it wraps a bit more and then to reduce the width in the back, I sewed in a strip of extra wide single fold bias tape and threaded 3/4" elastic though it.  It worked!


A brief rundown of the tutorial itself - The instructions include clear, drawn pictures of what is to happen in each step.  Accompanying the pictures are concise instructions, but definitely thorough enough that you won't be left scratching your head.  Before you cut, make sure to check the sizing chart as well as the printing chart and both cutting charts so you know which pattern pieces correspond with your choice.


My Treasured Heirlooms also has several other sewing patterns as well as some adorable crochet patterns available in her Etsy Shop -- it seriously makes me want to learn to crochet!  Also, join in her Facebook group to keep in the loop :D

Thanks Annastasia for this beautiful pattern!!  I adore it!


*Although I was provided a copy of this pattern in exchange for my review, I was not
compensated in any other way.  All thoughts in this post are mine and mine alone.

Custom Post Signature

Custom Post  Signature