Image Slider

PATTERN REVIEW: Skinny Legs Leggings by Little Kiwis Closet


It's that time of year... when time enters warp-speed because you have a million items on your Holiday to-do list.  Luckily, sewing up a pair of Skinny Legs Leggings by Little Kiwis Closet takes no time at all.

Lydia, the owner of Little Kiwis Closet has been asking me for a few months now if I could/would review one of her patterns and well, our schedules just never quite matched up.  Third time's a charm though because this time, I was nearing the end of my commitments and I could finally try one of her patterns!


Pattern Details:
  • Sizes: 12m - 14y
  • 2 Leg styles: Ruched or Normal
  • 2 Waistband Styles: Yoga or Elastic
  • 2 Rise options: High or Low
  • 4 Length Options: Shorts, Above Knee, 3/4, Long Ankle
  • Knit only (unless you're daring ... more on this later!)
  • Beginner-friendly
  • Pages to print: 12, nested pieces, color ink
  • Tutorial style: Real photos with steps broken down into sections
  • Charts included: Yardage, Measurement/Sizing, Cutting 


The pattern is very easy to put together and the way the pieces are nested make mixing sizes very easy!  My girls are both skinny in comparison to their height so I knew I'd have to "size down" for the width.  There is also an included measurement table to write in your child's measurements which makes it easy to remember them when consulting the sizing chart.

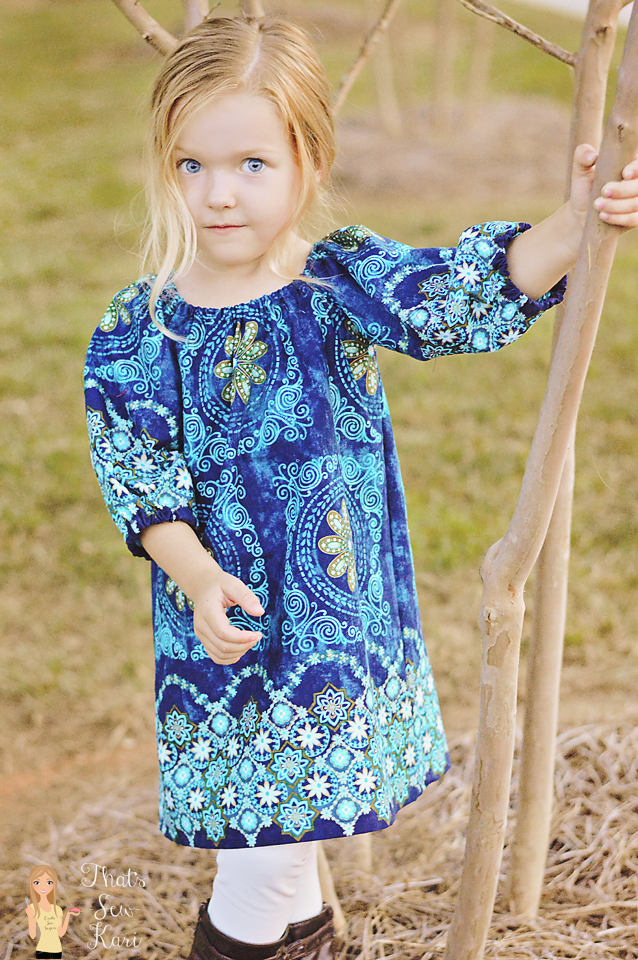
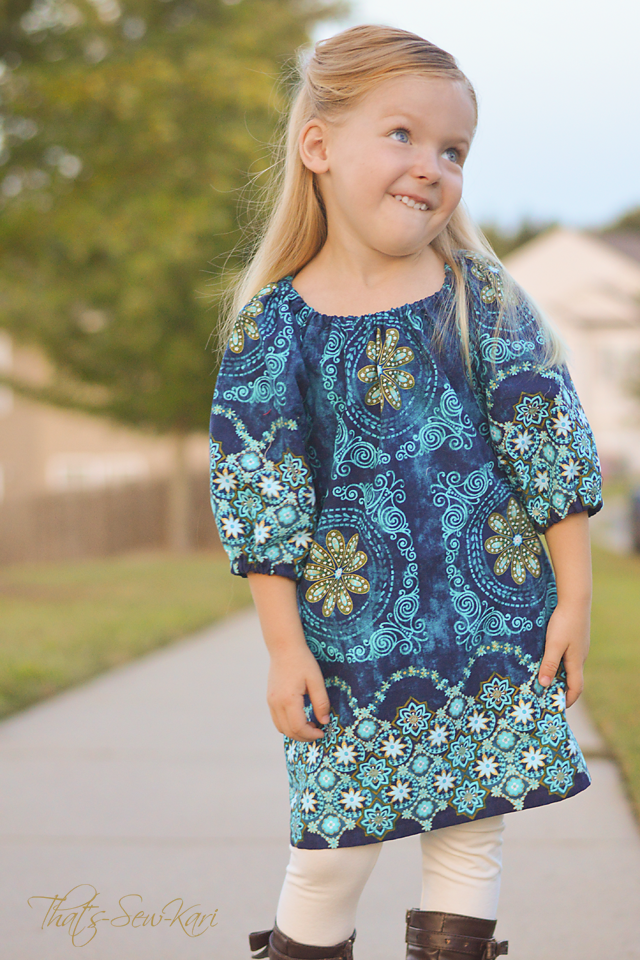
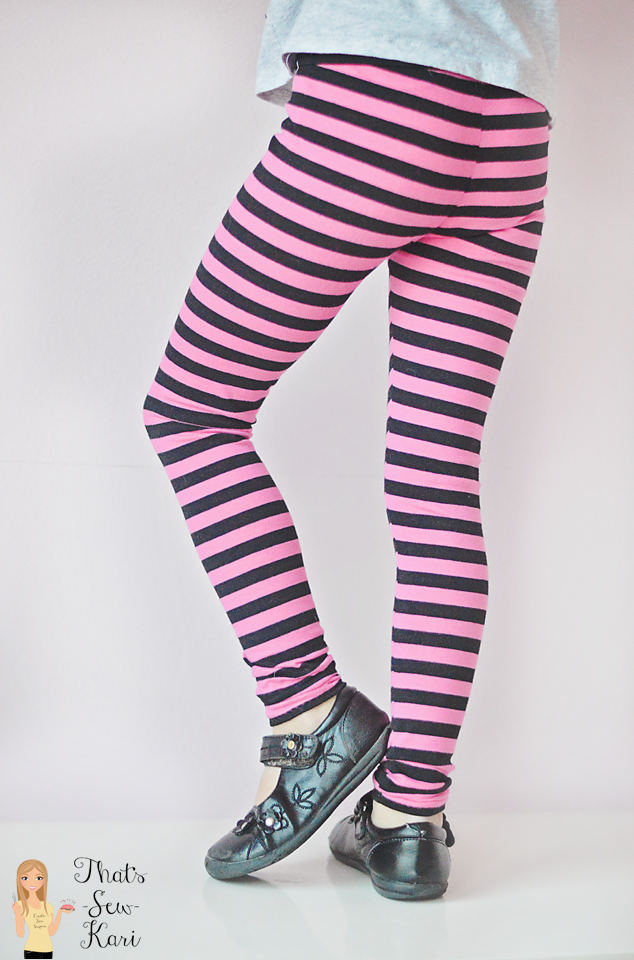
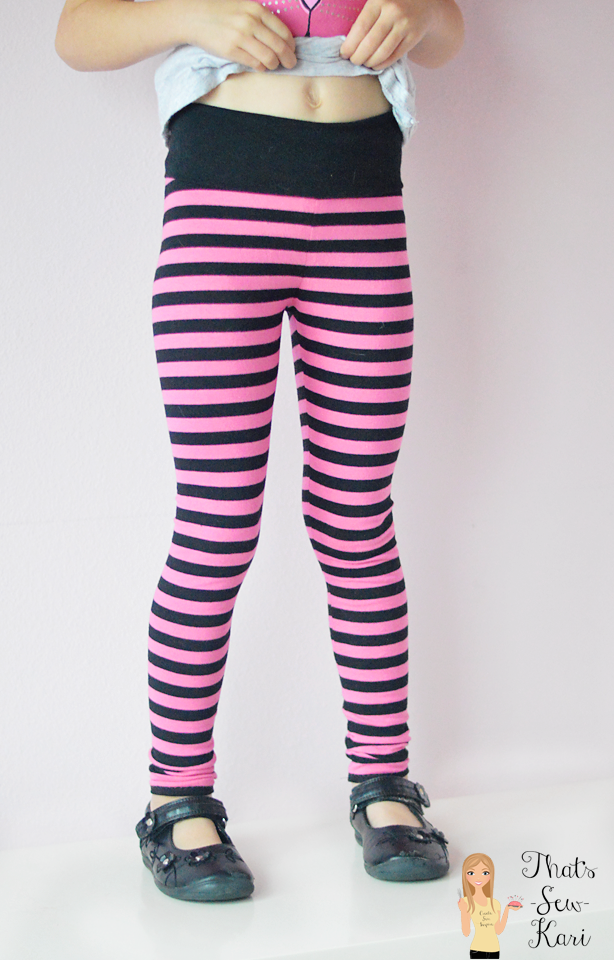
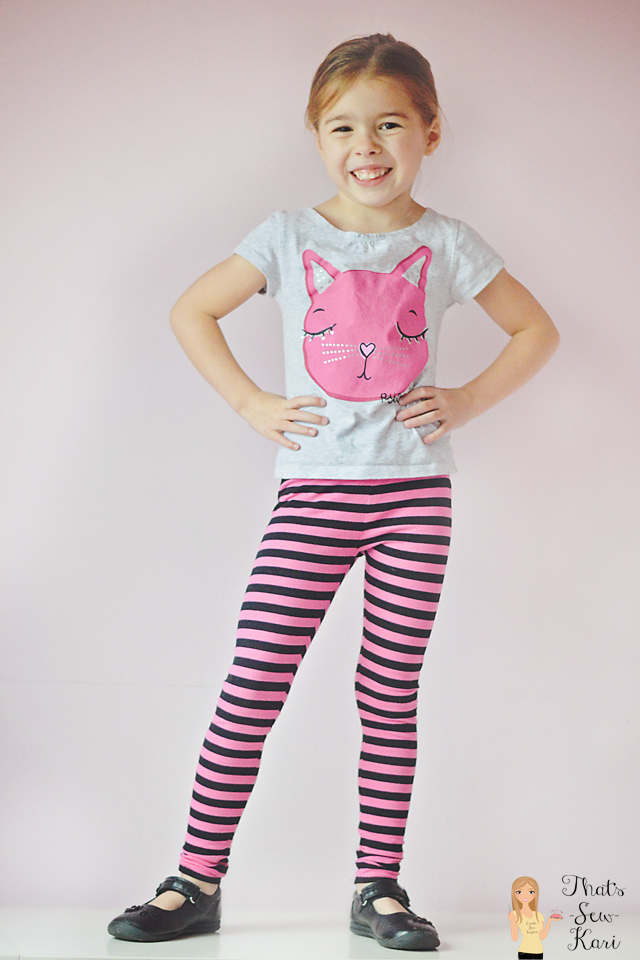
For my 5 year old, I chose full ankle length plain leggings, low rise with a yoga waistband that I folded over.  I made them a bit long in the legs, but I figure this winter, they'll be in boots most of the time (she's obsessed with her tall leather boots) and next spring, they'll be the perfect length!

For the fabric, I used a nice cotton/lycra blend from Funkalicious Fabrics on Etsy.  She's my go-to shop for stripes.  Although small stripes do add a bit of difficulty when sewing. My OCD demands that they match up.... everywhere. LOL


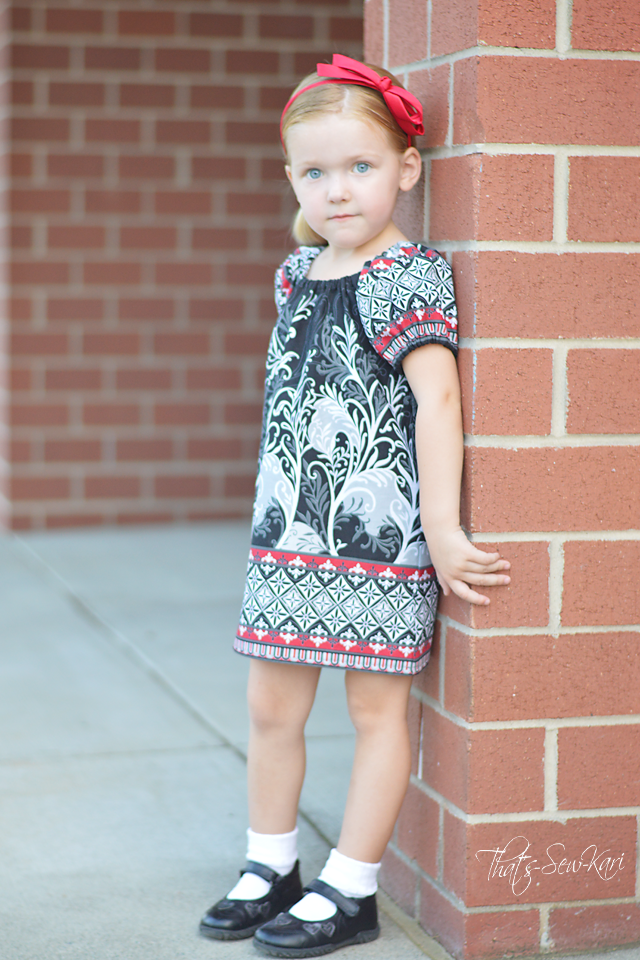
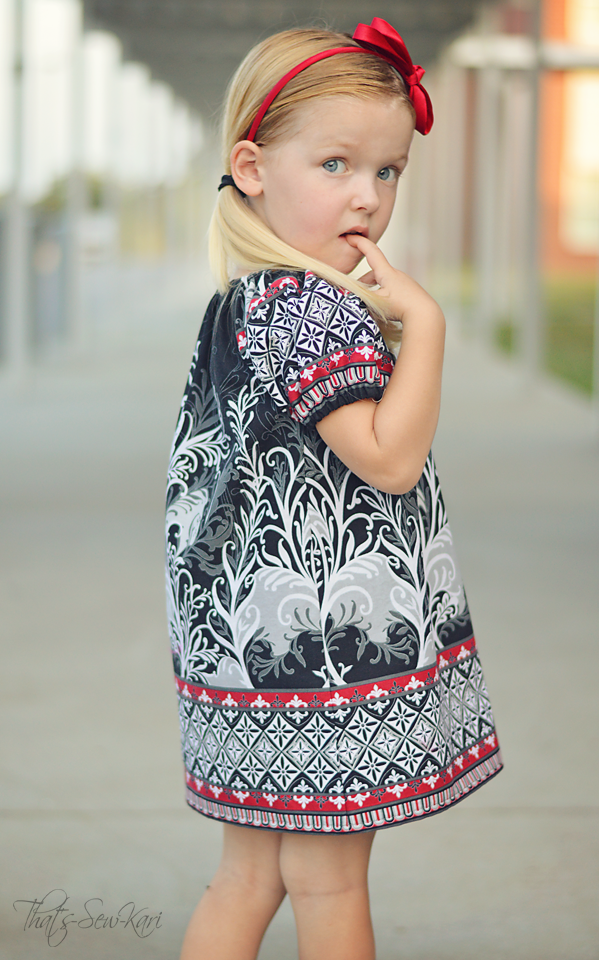
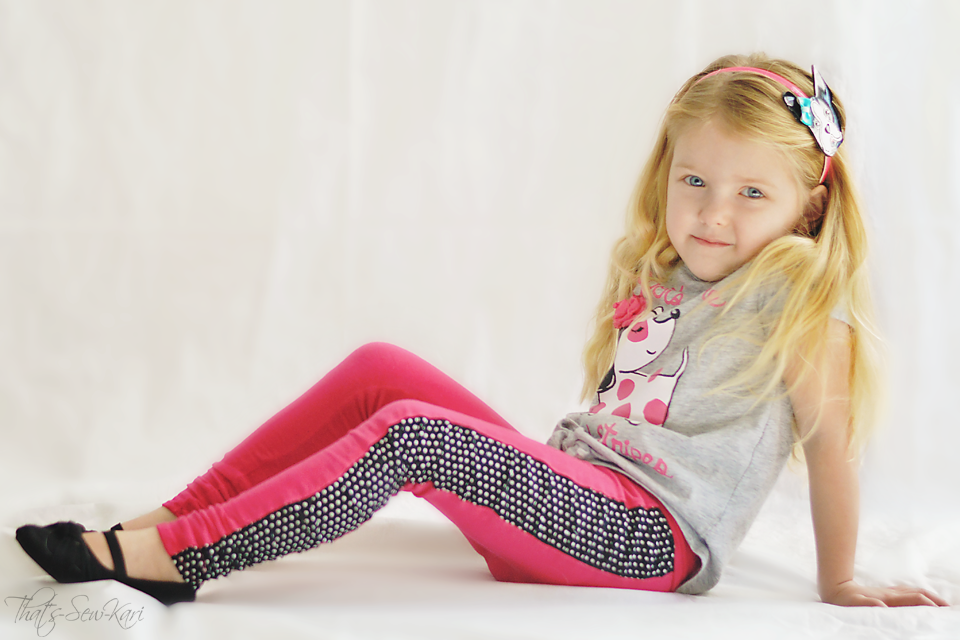
As I mentioned above, the pattern is intended for knit only.  Of course, I got curious if I could switch out the ruched panel with a ruched woven panel.  I decided to throw caution to the wind and try it out.  I made my youngest a 2 width and a 3 length.  Let's just say, we got them on for pictures, but I'm not sure how comfortable they are.  IF I were to retry, I'd reduce the eliminated portion of the outseam to only 0.5" on either side (this will make sense when you read the pattern).  I think the added inch in her size will give her sufficient room to easily get dressed. (I cannot speak for the larger sizes.)


I love the options this pattern has and how quickly they come together. Most importantly, the fit is great!! My girls both love wearing skirts to school and I hate that their legs get cold in the winter.  Excuse me while I go sew up some more Skinny Legs!

* In exchange for my review, I was provided a copy of the pattern free of charge.  
All thoughts in this review are mine and mine alone.

Ellie Inspired 2014 Holiday Collection Blog Tour


Whew, is it Christmas-time already?!  It seems like yesterday that I went on tour for the first time with Ellie Inspired for their Spring Collection. Time flies when you are having fun :)

Hop on the tour bus... cuteness overload ahead :)

I am here today showing off my version of Holly Days Dress & Tunic.  It's such a classic design with its puffed sleeves, peter pan collar, empire waist and buttons in the back. As much as I love a peter pan collar, I omitted it on this one to show of those cherries!


Holly Days covers sizes Newborn to 36 months.  My little lady has her 4th birthday right around the corner, but she's built like a rail.  Don't tell her this, but I made her an 18m size and just lengthened it to match a size 3.  This is just one of the many reasons why I love to sew!  I can create a custom fit every single time!

I also decided to make a tunic as it's a bit more preschool friendly and she's really been into her leggings lately.  She may be 3, but she thinks she's going on 13!


Eeks, I just adore the back of this!  Instead of the overlap with a row of buttons, I added a fabric loop along with a super sweet cherry button that I have been saving for the perfect project.

This little button has traveled all the way from the Netherlands (thanks Rebecca!)

I thought about doing a Holiday version since, you know, this is a Holiday Blog Tour, but hey, I love cherries.  No seriously, no matter what I pulled from my stash, my eyes kept going to the cherries.  Miss 3 loves her Cherry Shirt.  At least the colors are right for the holidays ;)


I took the suggestion in the pattern and added piping to the seamline on the bodice.

Ellie Inspired's patterns are fantastic to sew.  Not only are they professional in appearance and easy to follow along, Laura (of EI) often uses techniques common in heirloom sewing.  The bodice lining and sleeve bands are all whipstitched into place on the inside.  While my whipstitching needs a bit of practice, I am happy I took the time to hand sew these areas.  Of course, if speed is more your style, finish in the traditional method you currently use (but seriously, try it sometime!!)


Included in the pattern is also a set of bloomers, but as I mentioned above, this girl is 3 going on 13 and I knew leggings are more her style.  (Need a leggings pattern?  Click here for a FREE leggings pattern from Ellie Inspired.)


To celebrate the
2014 Holiday Collection Blog Tour,
enjoy a savings of 25% on your order in the
But hurry because the tour ends tomorrow!!


Need more inspiration?  Check out the other bloggers on tour!

Day 5: Rebel and Malice | Lulu & Celeste

Laura and Ellie Inspired team -- thanks for having me back!  I love it!
*In exchange for my spot on the blog tour, I was supplied with a copy of the pattern. 
I was not compensated in any other way.  All thoughts written here are mine and mine alone.

BLOG TOUR: Betty Skirt by The Shaffer Sisters


Fabric laid out, measurements chart nearby, scissors in hand.

Blink.

"Miss 5, you have a new skirt ready!  Do you love it?!"


Yup, this skirt was that fast.
__________________________________________________

Today, I have the pleasure of hopping on the virtual tour bus, driven by The Shaffer Sisters, and sharing some Betty Skirt love.

First of all, my girls freaking love skirts.  I have made them loads of skirts recently and this pattern will definitely be added in the rotation!  Covering sizes  NB - 16, the Betty Skirt comes with 4 options - small pleat, large pleat, gathered, or gathered with a placket.


I chose the "gathered" option which is a crazy fast sew.  I do plan on trying the pleated option, but for this fabric, I thought the gathered would look best.  Before I began cutting, I checked the measurement charts to see where her hips fell and what the finished length would be.  I prefer my skirts to end just above the knee, so Miss 5 fit perfectly into a straight 3 (she's super duper skinny).


The pattern has both the cutting measurements as well as actual pattern pieces so the choice is yours whether you want something to print.  There is also a page dedicated to mixing sizes to get the perfect fit for your little lady, including space for you to write down exactly what measurements you need!


The tutorial is very easy to follow - computer generated images and clear instructions will guide you through.  I loved the images of the girl at the step of cutting the perfect length of elastic.


I added this ITH (in the hoop) bow for embellishment and made it removable for easy care and in case she wants to switch out her shirt for another.  This was my first stitch out and I was trying to beat the sunset to get my pictures.  Next time, I'll switch my thread for the final outline stitch.


The pattern and tutorial, combined with the large size range and different options included make this skirt pattern great bang for your buck.

        .... and it just so happens to be on sale to celebrate the blog tour!  Pop on over to the Etsy shop and get ready to share your own #bettyskirt love.

1) Go to the Shaffer Sisters Etsy shop -- click here---> SHOP
2) Enter BETTYTOUR in the coupon code box during checkout.
3) Sew your skirt.
4) Take photos of said skirt.
5) Blast photos on social media with #bettyskirt
6) Repeat steps 3-5 :)

Want to see more inspiration?  Head over to The Shaffer Sisters blog for links to all of the Betty Skirt Tourists!


REVIEW: Sweet Innocence by My Treasured Heirlooms


WOW.  I love how this turned out! As you read, you'll see just how many feet of fabric I ruffled and exactly why it was worth every minute and inch.

The moment I saw the listing for Sweet Innocence by My Treasured Heirlooms, my breath was taken away.  The fullness of one of the under dress options caught my eye, the cascading skirt ruffle had me dreaming of fabric combos, and the different options included in the pattern made me smile.

*Listing photo of Sweet Innocence*

Reading through the details, I noted the size range of 2-6.  My 3 and 5 year old are so slim, they often require a size 2 or slightly smaller sized bodice so I knew this pattern would last a long time.  But what about the mommas of those already in the upper range of the pattern?  Don't worry, Annastasia, the designer behind My Treasured Heirlooms is working on an upsize right this very moment!! She is adding sizes 7-10!

This pattern has so many options, you could outfit an entire family of girls and have them each unique.  Sweet Innocence contains patterns for THREE styles of dress, TWO under dresses and TWO styles of pants. I chose the lower left option (Option A) of the listing photograph shown above.


Option A features a wrap style dress closed with buttons on the front of the bodice.  The under dress is a comfortable peasant style dress with 3 ruffled tiers for extra twirl and poof.  Did you know that between the under dress and the main dress, there are nearly 5 yards of fabric and over 68 feet (let's let that sink in for a moment) of gathering?!  And I'm the first to tell you, I gathered it all by hand and it is totally worth every.single.minute.

I figured I'd be smart and make the under dress out of white so I could pair it with everything (or nearly everything).  My daughter already put it to good use in her Little Red Riding Hood costume on Halloween.  The fabrics for the dress I had picked up a while ago on a JoAnn's run when it was on a crazy sale, like $2.50/yd.  The total cost of this dress came out under $15!  Score!!


As I mentioned above, my 3 yr old is all height and no meat.  Her chest measures just 19" which is a full 2" below the smallest chest measurement on the included sizing chart.  Normally I make a muslin of any new pattern I sew because fitted bodices require sizing down.  Alas, I didn't follow my normal protocol and ended up with a bodice that was too large for my little lady.  Don't worry, the sizing is not off, I just didn't think about reducing the width of the back bodice to account for her narrow frame.

I channeled my inner Tim Gunn, emailed some pics to Annastasia with my thoughts of what would work ... you know, since I had completely finished. (Oh, the joys of sewing at night...LOL).  I moved the buttons closer to each side seam so that it wraps a bit more and then to reduce the width in the back, I sewed in a strip of extra wide single fold bias tape and threaded 3/4" elastic though it.  It worked!


A brief rundown of the tutorial itself - The instructions include clear, drawn pictures of what is to happen in each step.  Accompanying the pictures are concise instructions, but definitely thorough enough that you won't be left scratching your head.  Before you cut, make sure to check the sizing chart as well as the printing chart and both cutting charts so you know which pattern pieces correspond with your choice.


My Treasured Heirlooms also has several other sewing patterns as well as some adorable crochet patterns available in her Etsy Shop -- it seriously makes me want to learn to crochet!  Also, join in her Facebook group to keep in the loop :D

Thanks Annastasia for this beautiful pattern!!  I adore it!


*Although I was provided a copy of this pattern in exchange for my review, I was not
compensated in any other way.  All thoughts in this post are mine and mine alone.

Stitch Box Monthly: October


Woo-hoo -- happy mail!!  After opening my mailbox day after day, receiving bills, bills and more bills (and none of them being dollar bills...lol), I was so happy the day my Stitch Box Monthly showed up!

 If you haven't heard of SBM, it's basically a mystery box of sewing goodies that shows up in your mailbox each month (or however long you have signed up for).  Each box has a theme and the supplies inside revolve around that.  Boxes are $35 including shipping (US pricing), but you can get the boxes as low as $25/month if you prepay for the entire year.  The Stitch Boxes contain at least $40 worth of sewing supplies.  [International shipping also available, see website]

I actually got it just as I was getting ready to head over to my daughter's school and wait (and wait and wait) in the car line.  This little box sat next to me while I waited.  And I wondered what was hiding inside...

What is IN THE BOX?
  • 2 yds of coordinating Moda Simply Style fabric
  • Josephine Dress Pattern by Foo Foo Threads
  • 1 spool of Gutermann thread in matching green
  • 2 green rhinestone buttons
  • Bohin Double Face Tape
  • Omnigrid Glow-Line Tape


I was excited that these fabrics pulled me outside my comfort zone a bit, namely the green.  They are perfect for fall, but will wear well in the spring as well.  It was my 5 year old's turn to get a new outfit so I enlisted her help in which version of the Josephine Dress by Foo Foo Threads I should sew and where each fabric should go.  I was happy to see the Josephine as the chosen pattern.  I had been eyeing this as it's always recommended for a flat-front peasant dress.  With countless options to make it unique, you'll love it too!


Miss 5 decided she wanted short sleeves so she could wear it year-round (smart thinking!) and was adamant that the bodice be green.  Perfect!  The back is shirred and I so happened to have received matching green thread!  I dug through my stash to find a third coordinate for the sash and came up with a very tiny scrap of turquoise and had just enough to squeak out a thin sash.  I added navy ric rac to pull the blue upward and added to navy blue buttons on the bodice.


If you read my last post on Stitch Box Monthly, you'll know I didn't use the Gutermann thread last month... not because I didn't like it.  Quite the opposite.  I didn't want to waste it on the inside seams...LOL  But, I went to town shirring up the back with the included thread and it sews like a dream!

As I was sewing my sash, I got to the last step where I topstitch it all to close the little gap that I had turned it all through... and then the lightbulb went off (or maybe it's on...). Anyway, I headed over to this month's box (yes, I leave it all inside until I use it, otherwise it quickly gets lost in my sewing mess room) and pulled out the Bohin Double Face Tape.  Yup. I taped that sucker shut and quickly got it topstitched without having to remove any pins.


Oh yeah, those two green rhinestone buttons -- I racked my brain on how to use those.  I couldn't sew them on my bodice because my daughter chose the green fabric for the bodice.  I thought about sewing some fabric flowers and adorning the sash, but then I saw my bobby pins.  I stuck a bobby pin through each shank, pulled my daughter's hair into a bun and stuck them in.  Done and done!

The only item I haven't had a chance to use is the Omnigrid Glow-Line Tape.  I know it will come in handy when I sew my larger hems because reading those little lines on your machine is hard. haha


How do you GET THE BOX?!
  • Signing up for Stitch Box Monthly is easy!  
  • Head to www.stitchboxmonthly.com to choose a 1, 3, 6. 12 month subscription or choose a recurring subscription every month
  • Add in your shipping info
  • Pay 
  • Wait by your mailbox for your surprises!

Thanks, Stitch Box Monthly --- I had SEW much fun!!

*In exchange for my review, I was sent the products for free.  I was not compensated
in any other fashion.  All views and thoughts are mine, and mine alone. *

REVIEW: The Traveler Cape by Stitchwerx Designs


Over the river and through the woods, to Grandmother's house we go!

Okay, so I'm pretty sure this song isn't about Little Red Riding Hood, but she is on her way to Grandma's with her basket full of goodies.   Of course, Little Red wouldn't be complete without her signature cape & hood!

Enter the Traveler Cape by Stitchwerx Designs.


The Traveler Cape is so versatile.  It's a dual-layer cape (long and caplet), but can be made with just one layer (as I have done) if desired.  The cape consists of three panels which help keep its shape at the shoulders. The pattern pairs well with S138 Joyce Ann Bonnet too.

I seriously debated having my Little Red Riding Hood wear a bonnet instead of a hood just to show the cuteness!  Alas, I chose adding a hood (not included).  I will sew a Joyce Ann Bonnet soon though!  It's on "the list".

Note: The Traveler Cape does not come with a hood.  I used the hood
from a pattern I currently own - the Soda Pop Polo by Candy Castle Patterns

Pattern Highlights:

  • Sizes 12/18m - 8/10y
  • Dual-layer cape - long and caplet
  • Pattern pieces to print: 15 pages for XS/S, 27 pages for M, L, and XL 
  • Tutorial: 11 pages of thorough instruction with a clear picture each step of the way
  • Charts included: Sizing, Finished Measurements, Yardage, Layout, and Pattern Construction
  • Suitable for a confident beginner


For this cape, I selected a gorgeous 21 wale corduroy by Kaufman and lined it with a black broadcloth.  The corduroy is so soft, just be sure to make sure you cut the corduroy in the proper direction (it should feel soft when you run your hand downward).

Adding the hood was rather easy.  The hood I selected (from the Soda Pop Polo - Candy Castle Patterns) also had a collar stand.  So I simply added the hood to the collar stand from The Traveler Cape using the instructions from the polo pattern, then picked back up with the cape instructions for attaching the collar stand to the main cape.

You think that Big Bad Wolf scares me?
Puh-lease!!  He hasn't seen my tantrums!

My 3 year old daughter is all set for Halloween festivities thanks to the Traveler Cape from Stitchwerx Designs.


You say you want a SALE??

Save 25% off every pattern at Stitchwerx Designs
with the code SEWKARI at checkout.

But, hurry because this sale expires
Thursday 10/16/14 11:00pm (EST)

Because the coupon is good for all of your pattern purchases, here are some of my other Stitchwerx Designs favorites!!

Bentley Harness, Rosemary & Thyme Pants
Essential Leggings and Lane Raglan

Psst.... want to take a peek at what's under the cape?

Modified Georgia Vintage by The Cottage Mama


SHOP REVIEW: Paradise Beads Designs

*In exchange for pictures, I was sent the necklace for free.  I was not compensated
in any other fashion, nor required to write a review.  All views and thoughts are mine, and mine alone. *


OH. MY. WORD.   This necklace!

A few months ago, I met Kristen - owner of Paradise Beads Designs - a fun boutique full of one-of-a-kind chunky bead necklaces.

How did I meet Kristen?

I had the pleasure of sewing an item for a customer - Kristen.  After she received the item, we had a lovely chat.  Over the course of our conversation, she mentioned owning Paradise Beads Designs and if I were interested in doing some boutique photographs on my daughter [for her shop], she'd send a necklace my way.  Ummmm, yeah!!!

Shortly after that, THIS necklace from Paradise Beads Designs popped into my newsfeed.  It was perfect and actually inspired my daughter's entire outfit!!


Made-to-match(M2M) chunky necklaces are extremely popular right now -- and I can see why!

I have a little, teensy confession.  This is actually the first chunky necklace my girls have ever worn.   Why?  Honestly, I just didn't know much about them or where the best place to buy them or even whether my girls would be gentle enough to not break them.  Until now...


I'm in love with the clasp on this necklace!  (Note: clasps will vary from necklace to necklace and can even be made magnetic or stretch)


Here's an upclose shot of the Barbie silhouette adorned with rhinestones - so pretty!


As you can see, my littles are smitten with their new necklace... and will have to get used to sharing it!


Most necklaces run between $15 -20 plus shipping.  Paradise Beads Designs often has ready to ship items (from Disney to holiday to light up pendants) or you can put in a special request!  

A quote from Kristen -- " I double wire my necklaces, and honor my work so if one ever breaks the customer can send it and I will repair/ship back with no charge."


** Special Offer **

Enjoy FREE** shipping at Paradise Beads Designs
if you mention That'-Sew-Kari sent you :)

*offer valid through 11/03/14
(**US residents only)

To order, visit Paradise Beads Designs on Facebook
and contact her via message.


REVIEW: Sew Groovy by Ola Jane Patterns

NOW available in sizes 6m - Girls' 14

WHOA -- things just got a little bit GROOVIER at Ola Jane Patterns! Sew Groovy just got UPsized!!!  Outta sight, right?

Now, I'm no child of the 60s, but there's nothing wrong with channeling your inner hippie.


Yes, Sew Groovy is a peasant dress, but it's way more boss (that's 60's slang for fantastic) than your run-of-the-mill peasant dress pattern.  For starters, there are actual pattern pieces rather than the traditional rectangle cuts.   The pattern pieces are a-line shaped so this means it's more slim fitting on top, but still a great canvas for gorgeous border prints as I've showcased here.


There are THREE sleeve lengths included in this pattern -- I've sewn the short-sleeve and 3/4-length sleeves.  You can check out Kara's version of the long sleeves over at Pattern Revolution.

Fabric: Kanvas Bohemian Rhapsody Metallic Bohemian Border Medallion
Azure/Teal by Benartex

The size range starts at 6m and extends all the way to a girl's 14.  On my little lady here (age 3), I sewed the size 3 in the black/red combo.  For the blue dress, I cut the size 3, but extended the length to a size 4.  I actually prefer the length of the size 3, but my daughter grew nearly 2 inches this summer so I wanted to ensure that my 'fall' dress will fit her all the way through.

Fabric: Black, White & Currant 5 Double Border Stripe Black
by Henry Glass & Co.

Did you know that this entire dress can be sewn with French seams?  It makes the inside so neat and tidy!  Sandra, owner of Ola Jane, includes French seams in all of her patterns (when applicable) and also gives instructions on how to straighten your fabric properly.   Her patterns are truly lessons. The first time I used one of her patterns, the depth of instruction really impressed me.


Here's a quick recap of the pattern highlights:

  • Sizes 6m - girl's 14
  • 3 sleeve lengths included (short, 3/4, and long)
  • A-line shape -- no boxy rectangle dresses
  • Instructions for French seams and straightening your fabric
  • Charts included: Size chart, Finished length chart, elastic cutting chart, yardage chart, and fabric layout guides for both border fabrics and non-border fabric.
  • Clear, easy-to-follow instructions with pictures at each step


Wait, don't flee the scene yet... there's some far out news to share!

Can you guess?!


Did somebody say SALE?

You can pick up Sew Groovy for just $5 now through Sunday at 11:59pm EST!  Purchase your pattern HERE.

*If you previously own the original Sew Groovy, please email your receipt (to Ola Jane, not me!) to receive the updated sizing FREE  (formerly Foot Loose & Fancy Free)

Sign up for the newsletter HERE and join the Facebook group HERE to stay in-the-know on all things Ola Jane!


Bye for now!!

Custom Post Signature

Custom Post  Signature