

When I first saw this series idea posted for Pattern
Revolution, I knew I needed to sign up.
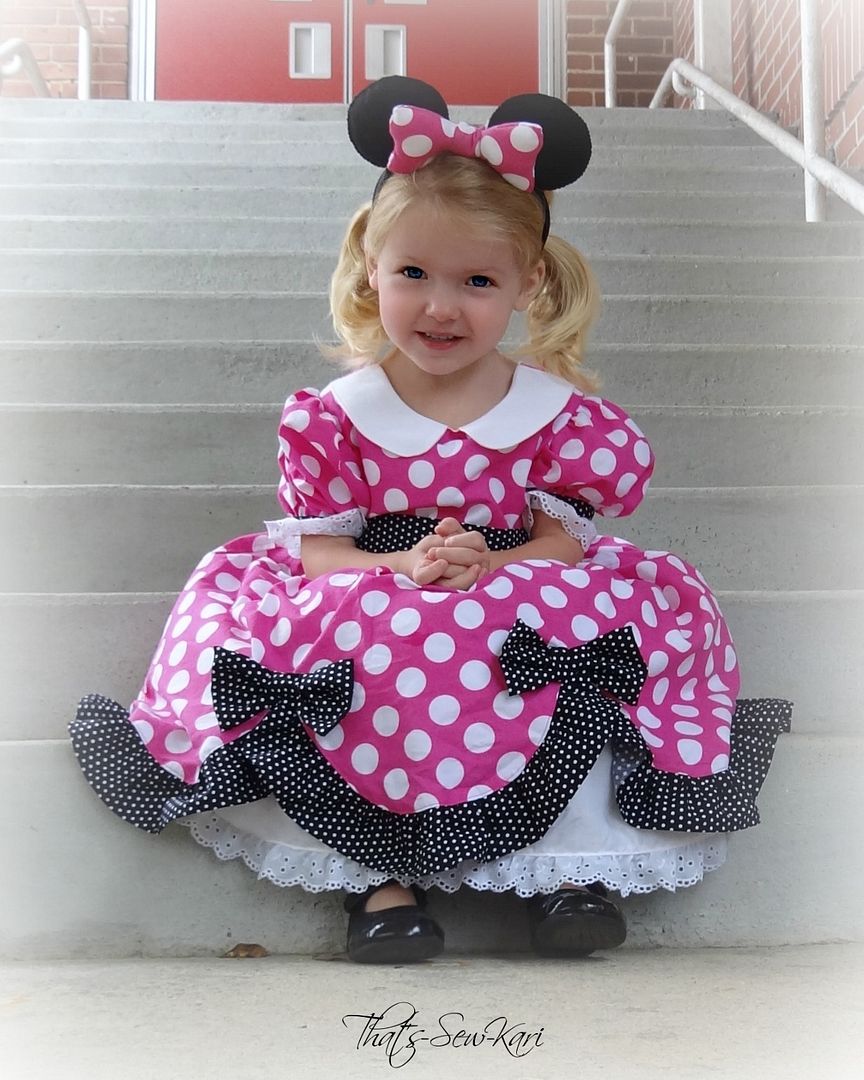
I knew I'd be using the Candy Castle Princess Dress to create one-of-a-kind Halloween costumes for my girls. I discovered Candy Castle Patterns at the beginning of the summer with my Bubblegum Dress review. I was lucky enough to test the Candy Castle Princess Dress pattern and made Sofia the First during testing. For Minnie Mouse, however, I wanted to deviate from the pattern a little bit so I could share it with all of you!

First of all, this pattern has lots of options so chances are that the pattern contains what you need! There are 4 sleeve options, a slim or regular fit bodice, hemmed or ruffled underskirt and a paneled or non-paneled skirt. I've made 3 dresses so far!

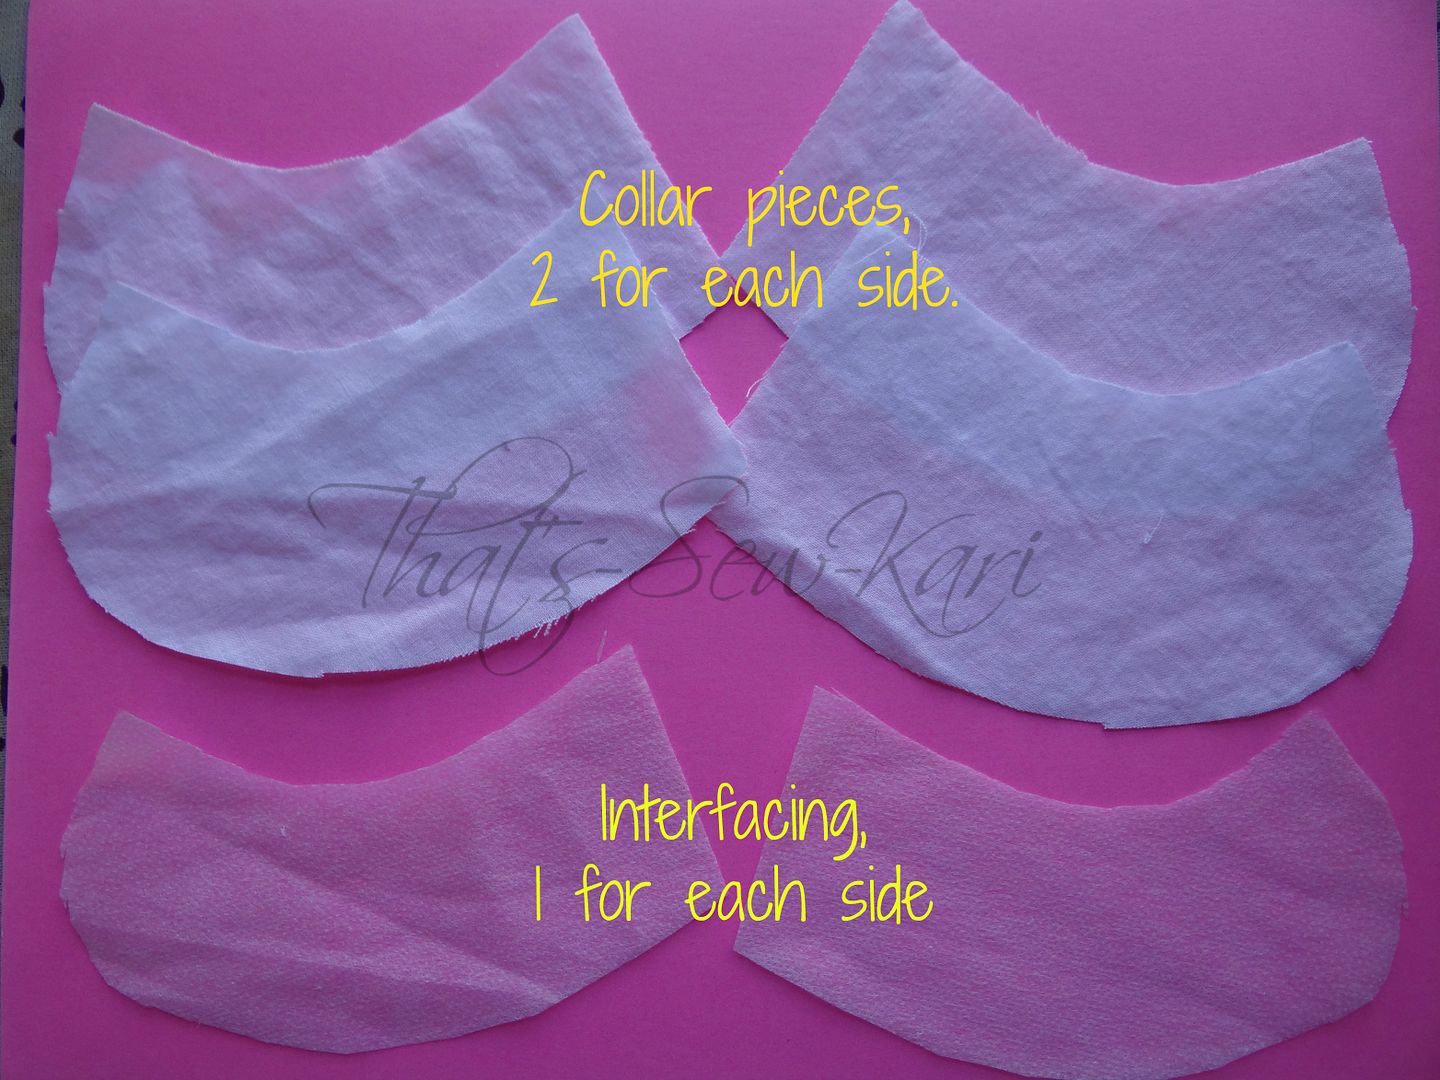
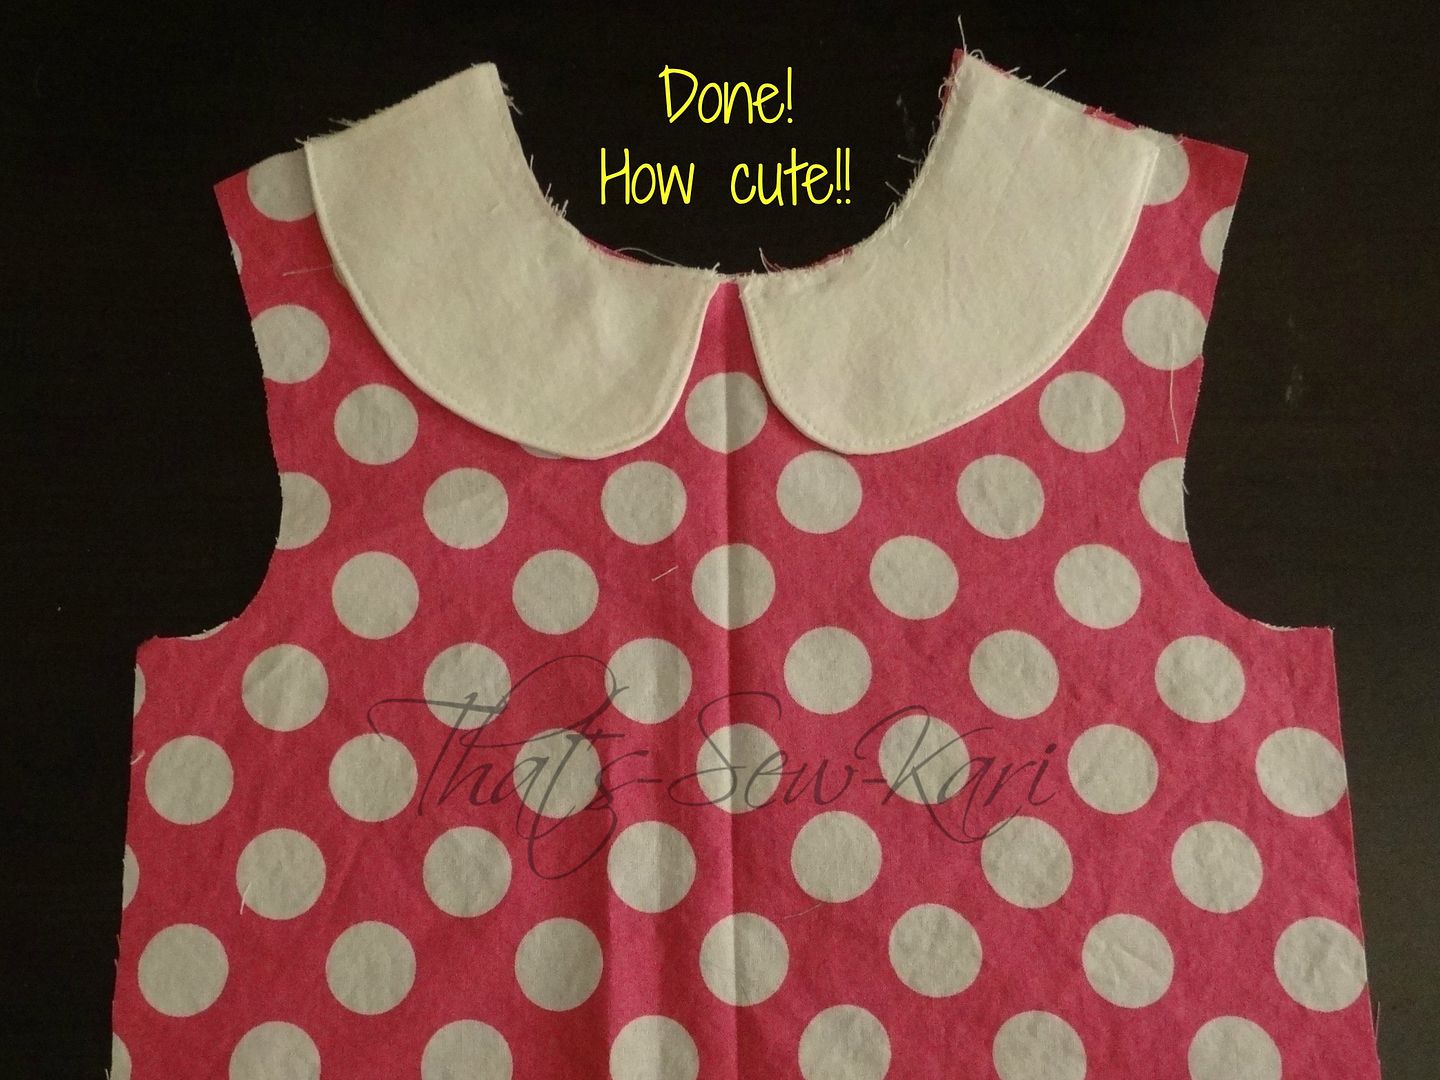
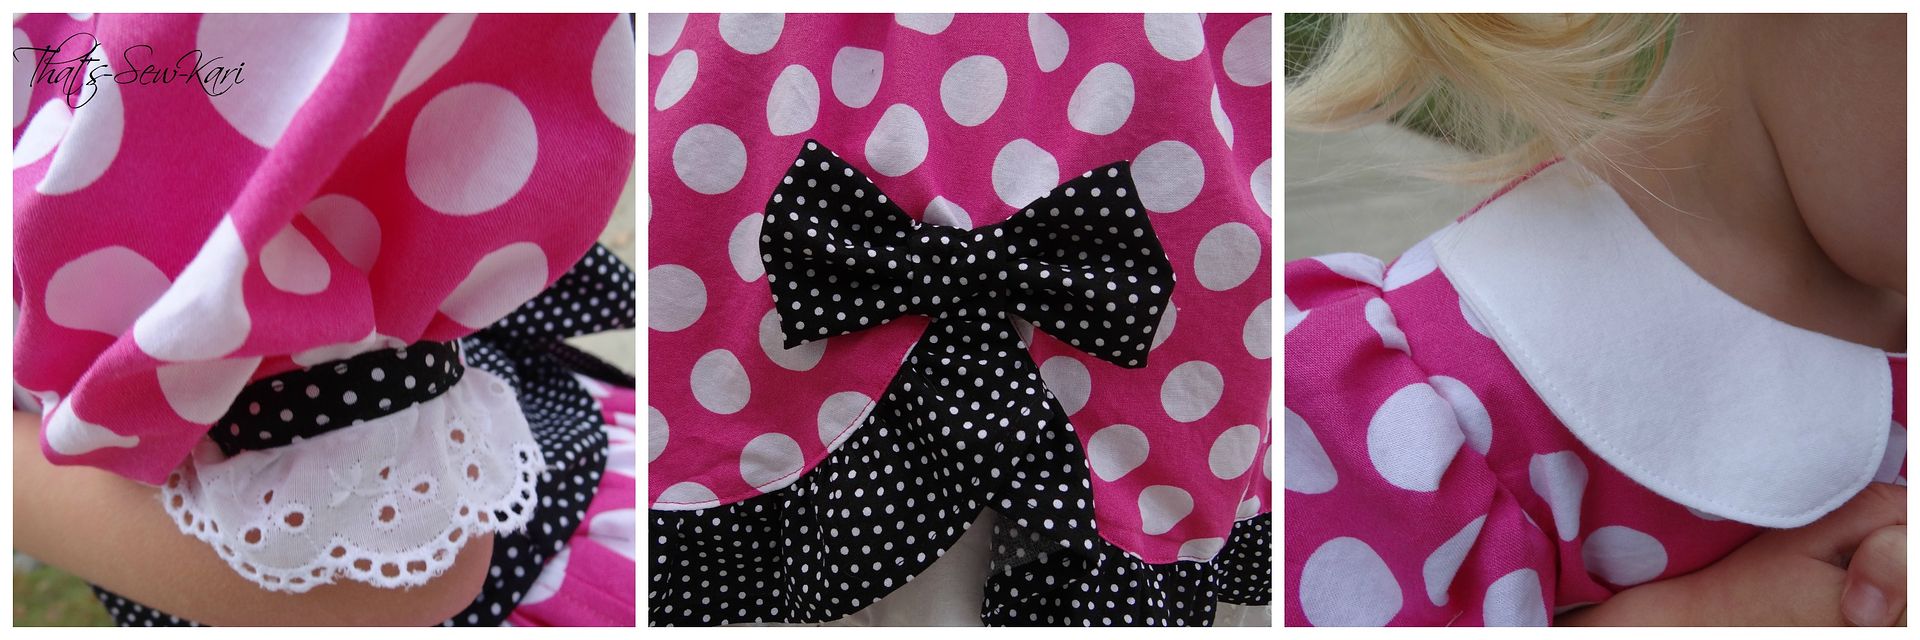
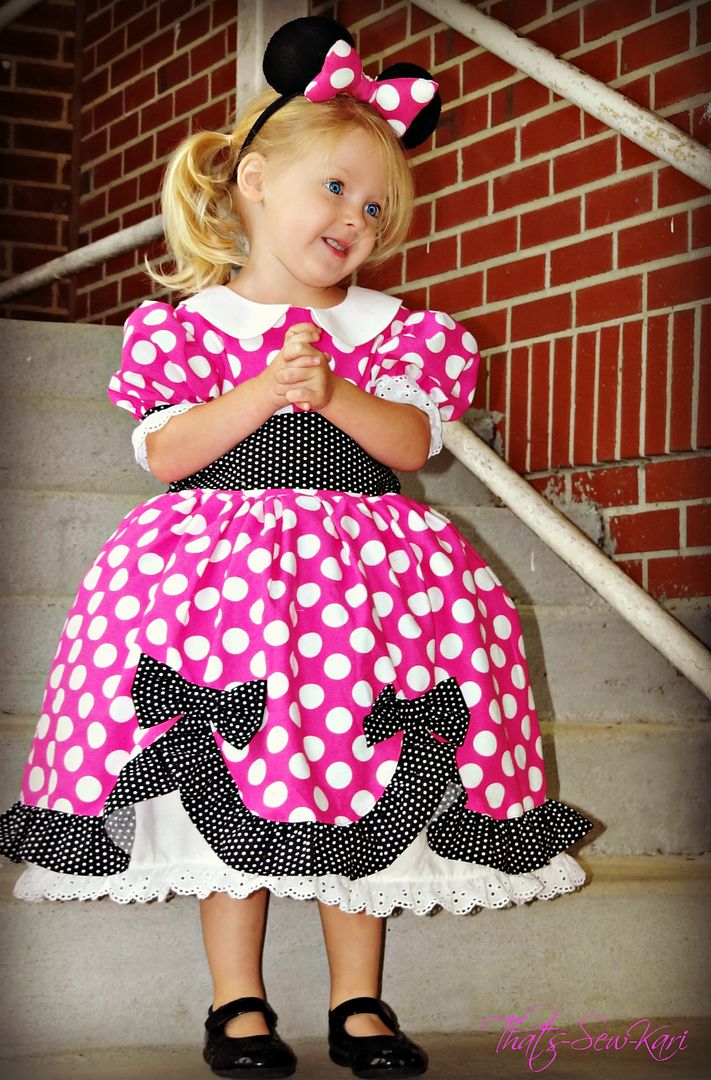
Minnie Mouse likes to wear a sweet peter pan collar on her dresses and it wasn't an option in the pattern so I set out to draft my own! I wanted it to end at the shoulder seam so I would not have to alter the back.


When you cut out your pieces, cut the interfacing without the added seam allowance to reduce bulk in the seams.


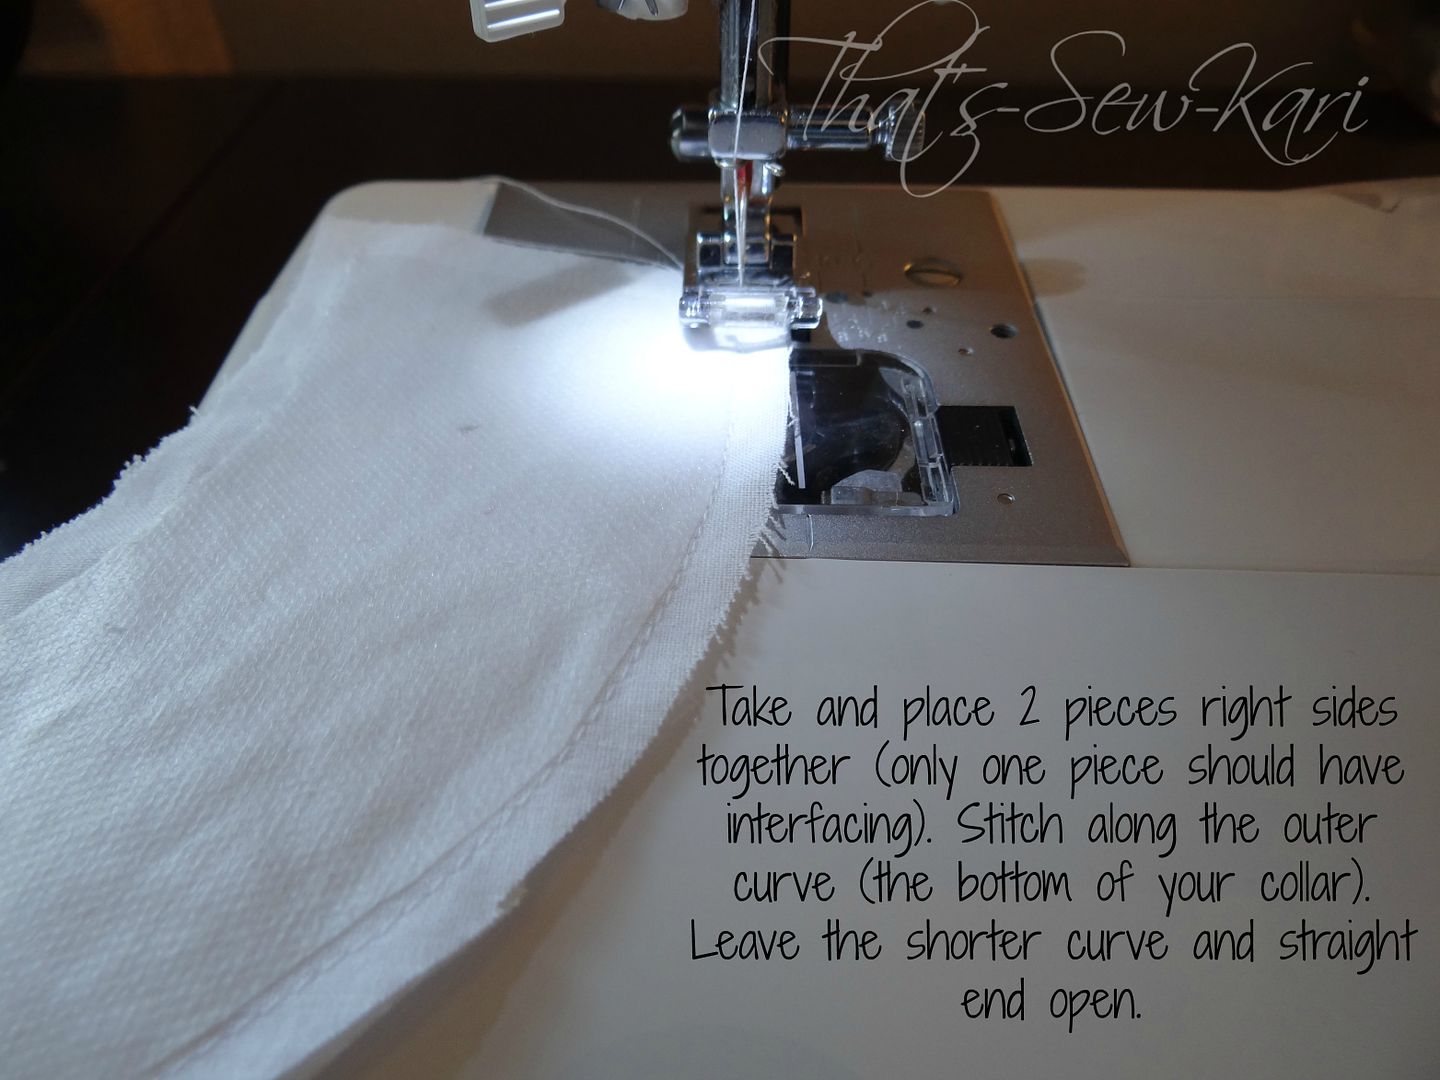
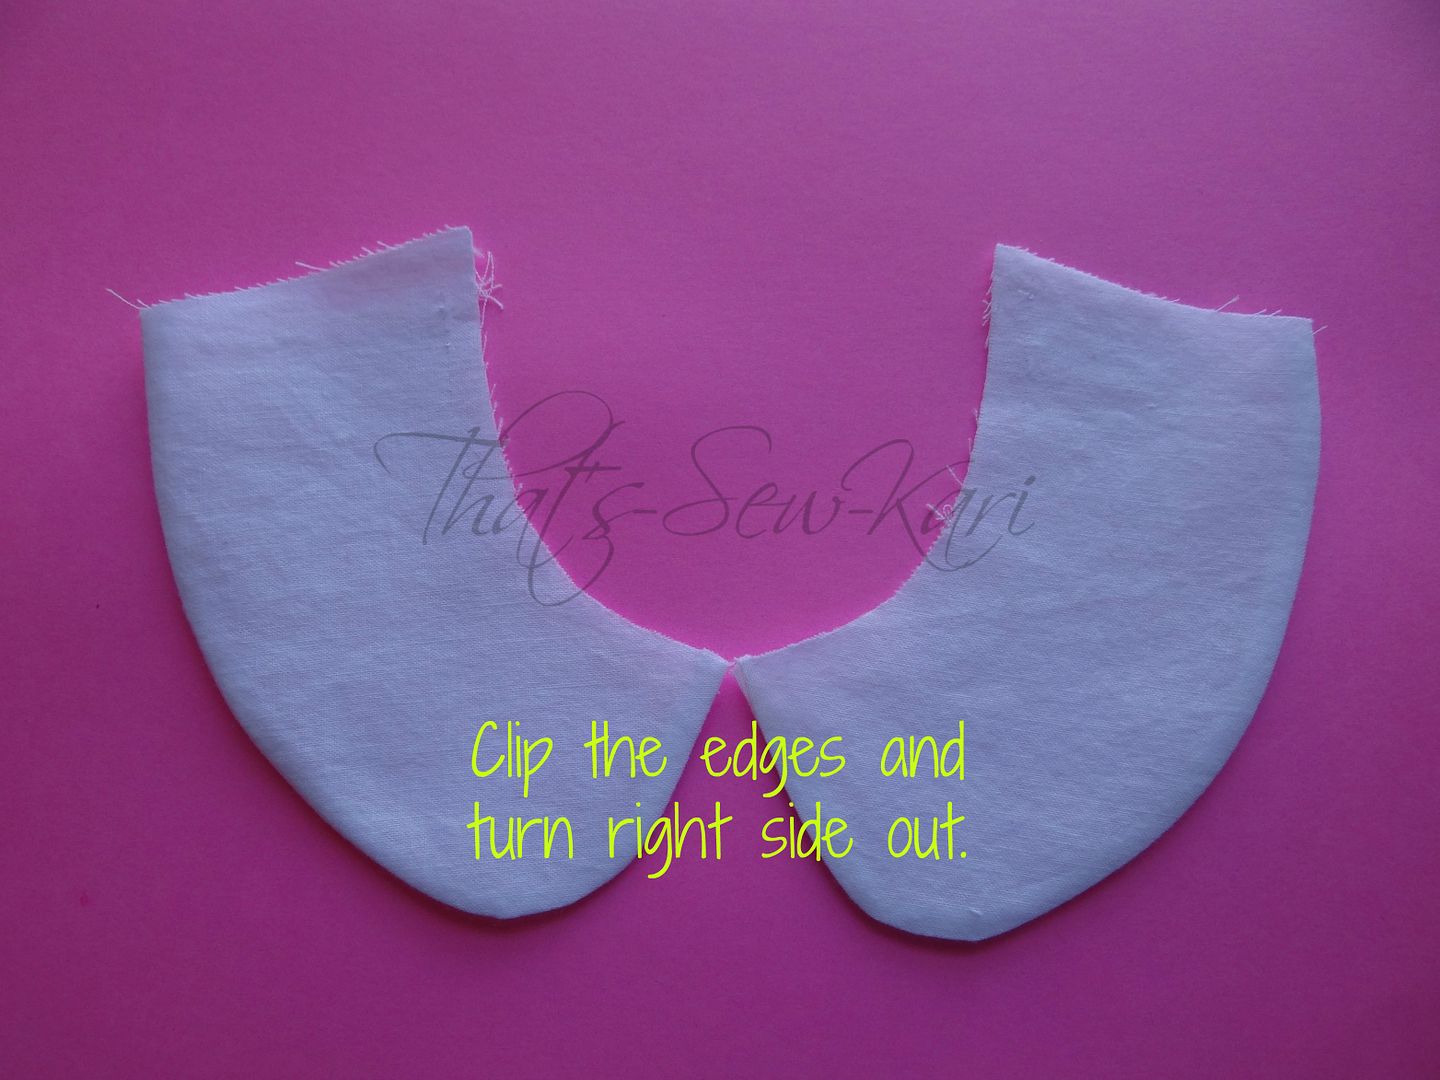
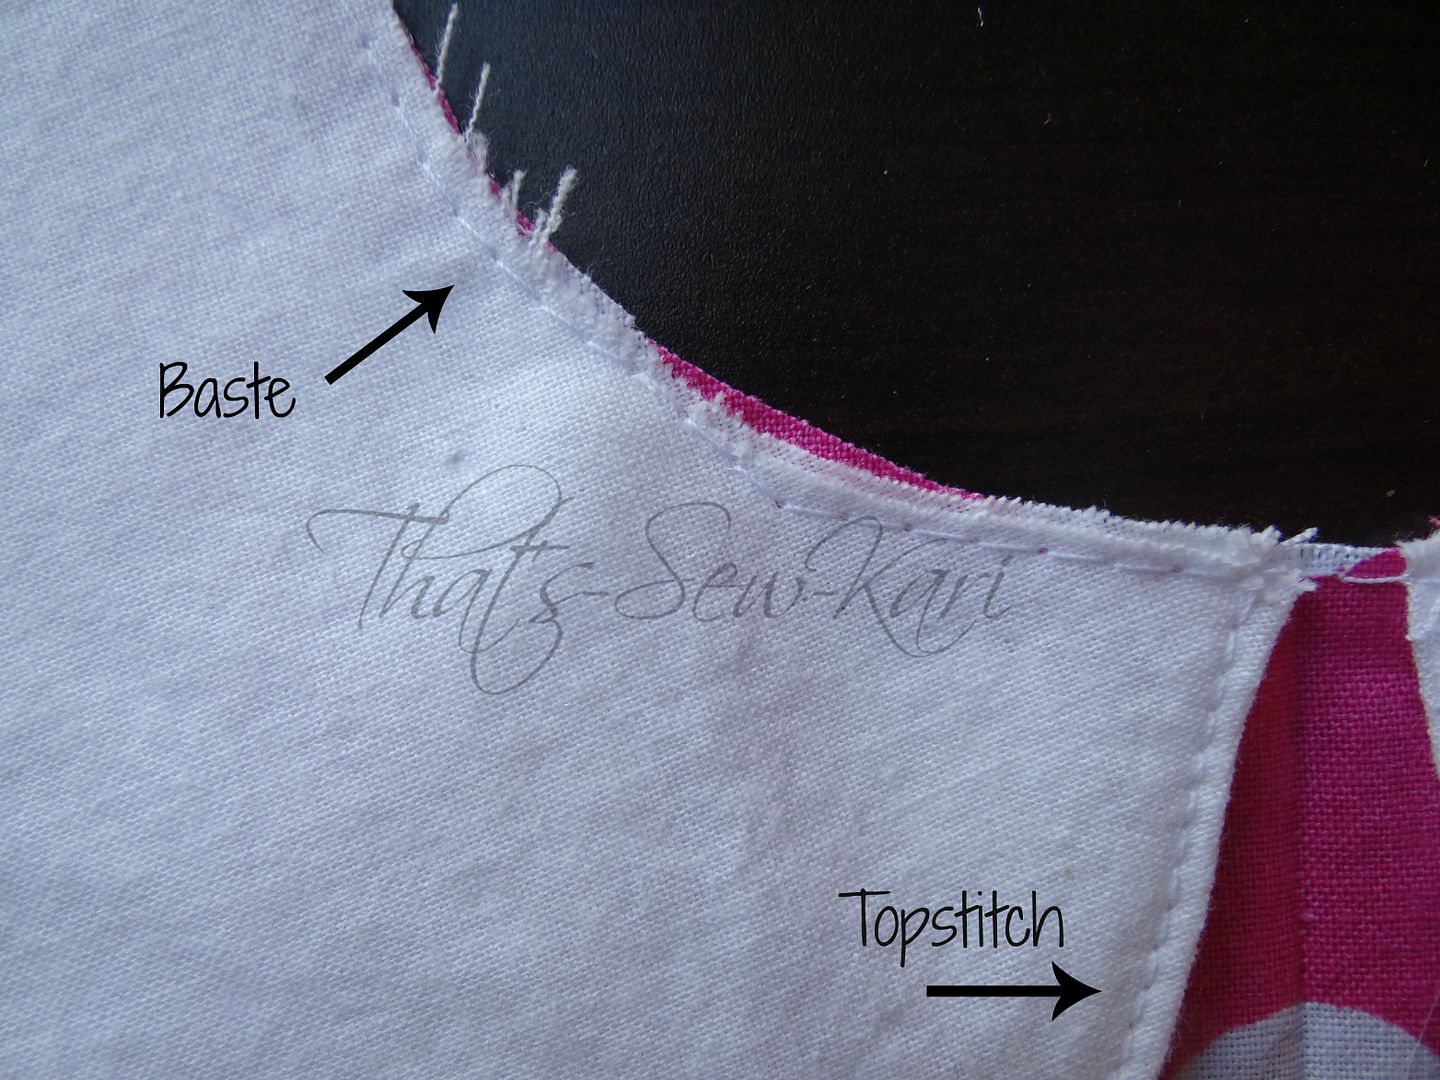
 Now, sew according to pattern.
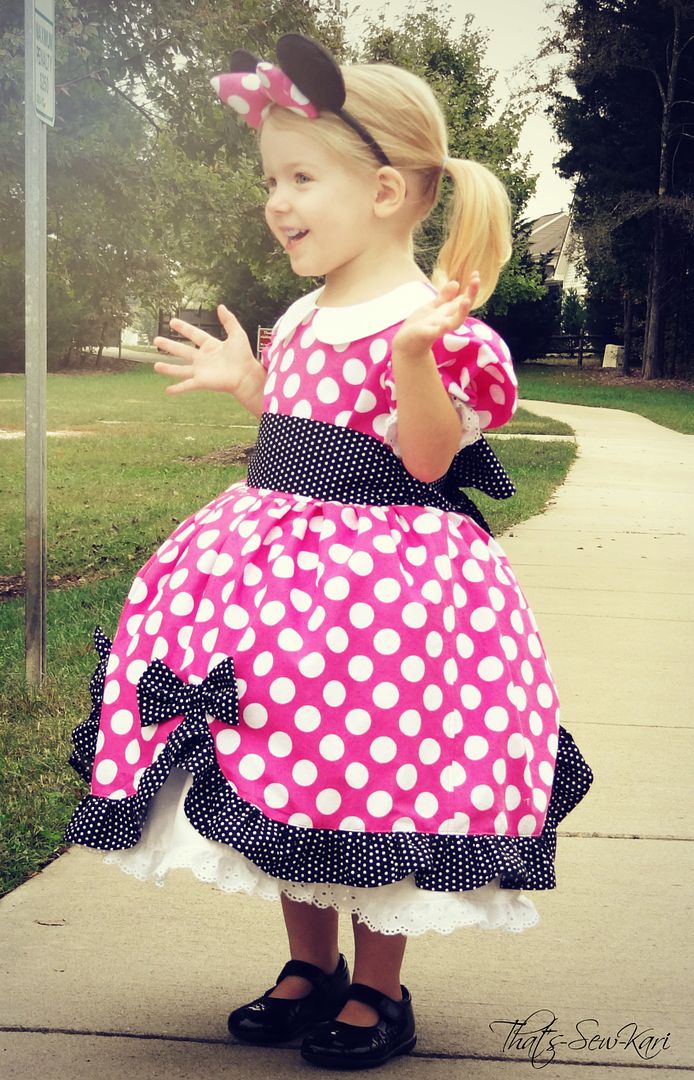
Other than the peter pan collar, Minnie Mouse dresses are easily recognizable simply by choosing the right fabric. Minnie likes either red or pink, but white polka dots are a must. My 2 year old was very adamant that she wear the "Pink" Minnie Mouse so I used a combination of pink/large white polka, black/small white polka, and white. (The red combination would be the same combo, but substitute the pink with red and add in some bright yellow! It really pops!) All of my fabrics and trim came from Hobby Lobby.
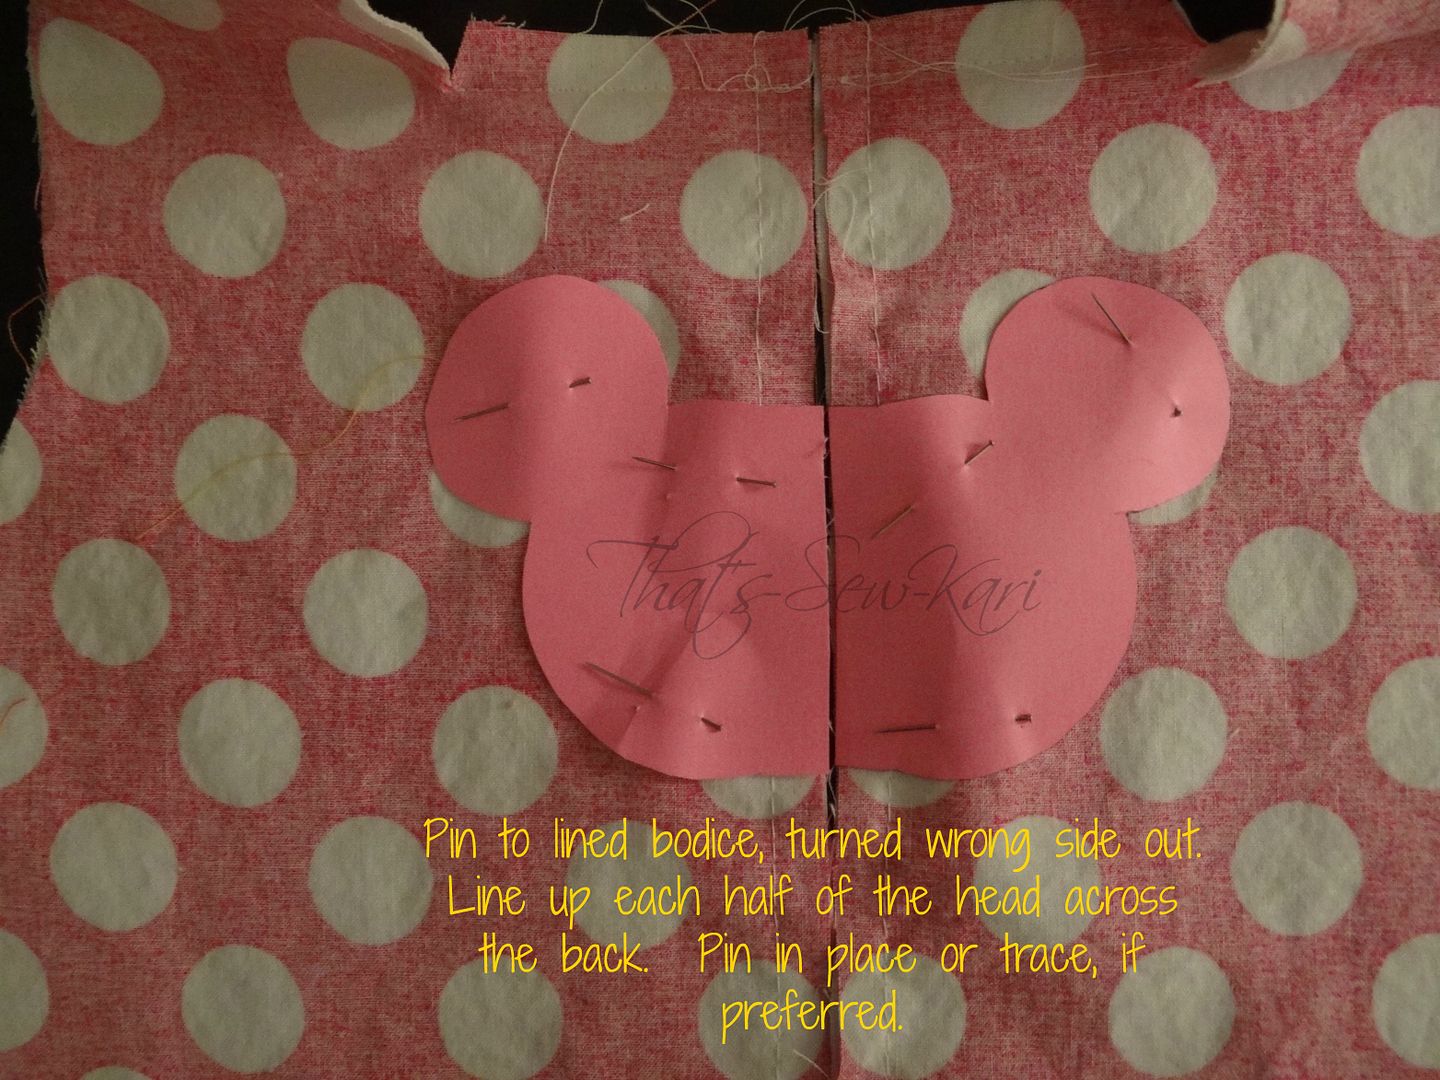
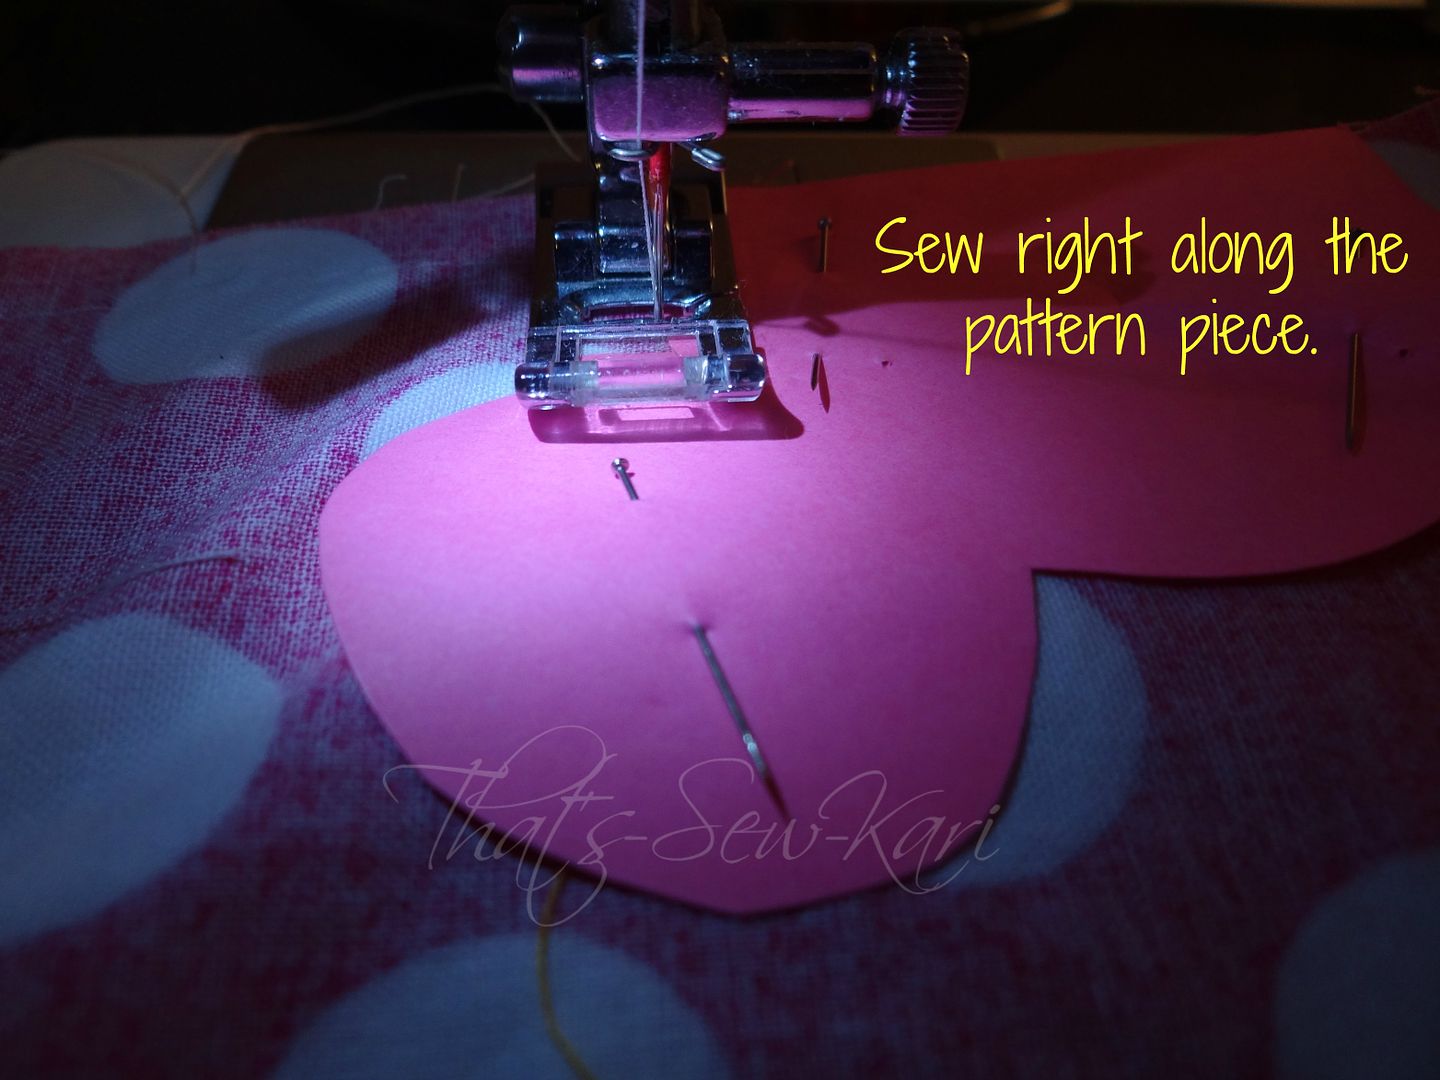
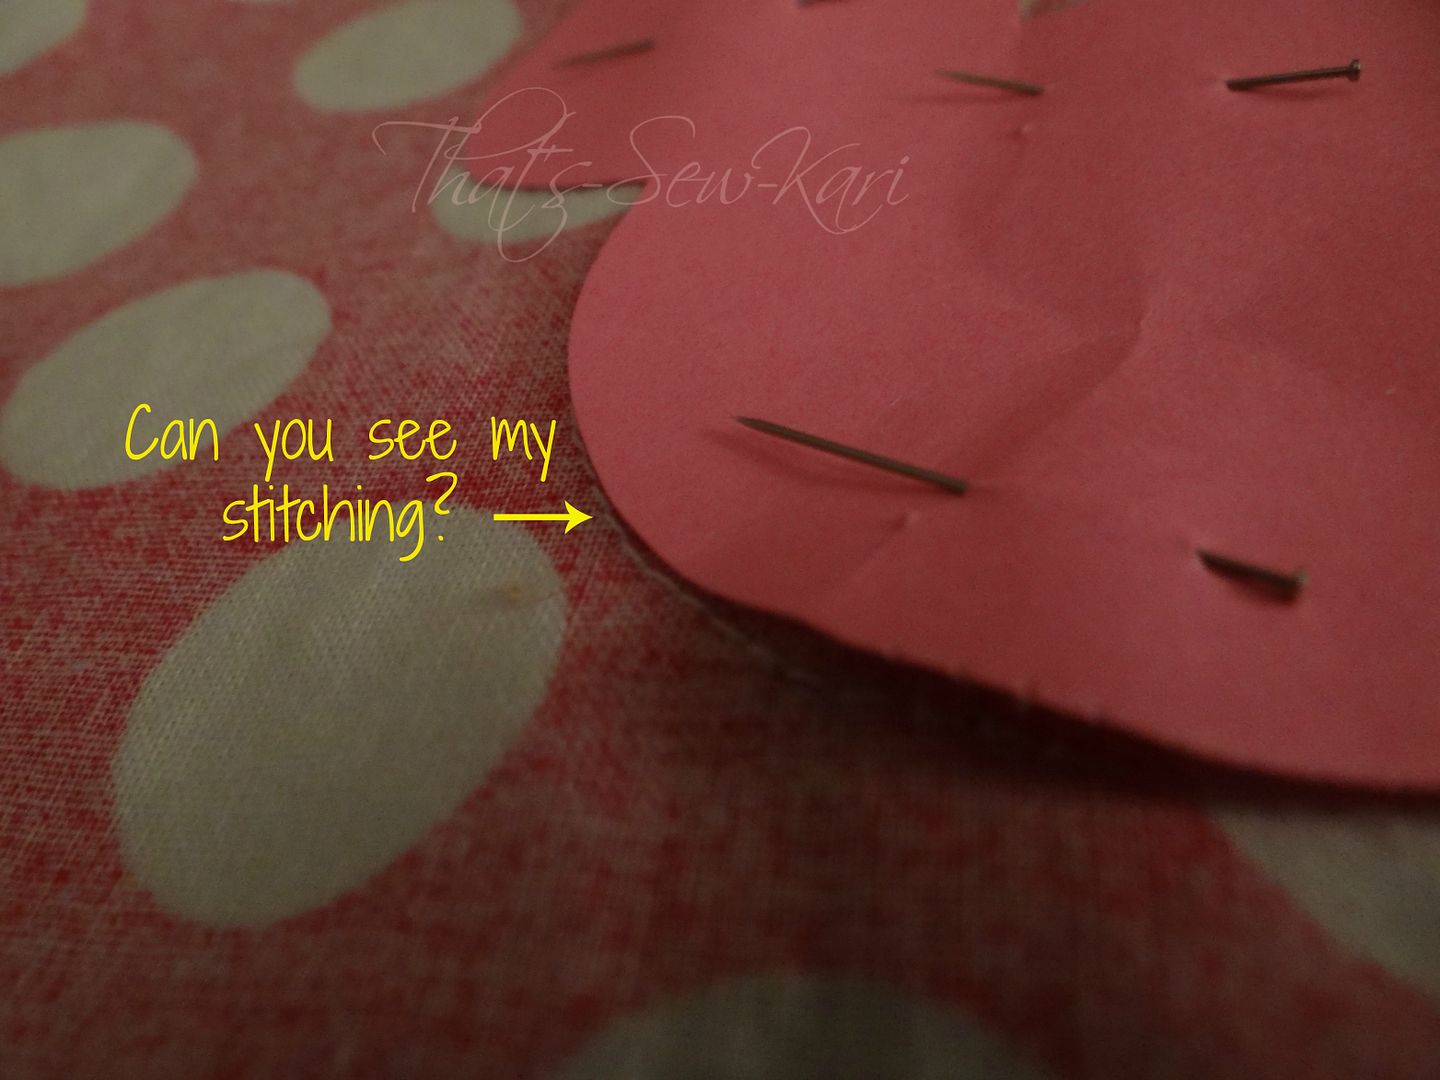
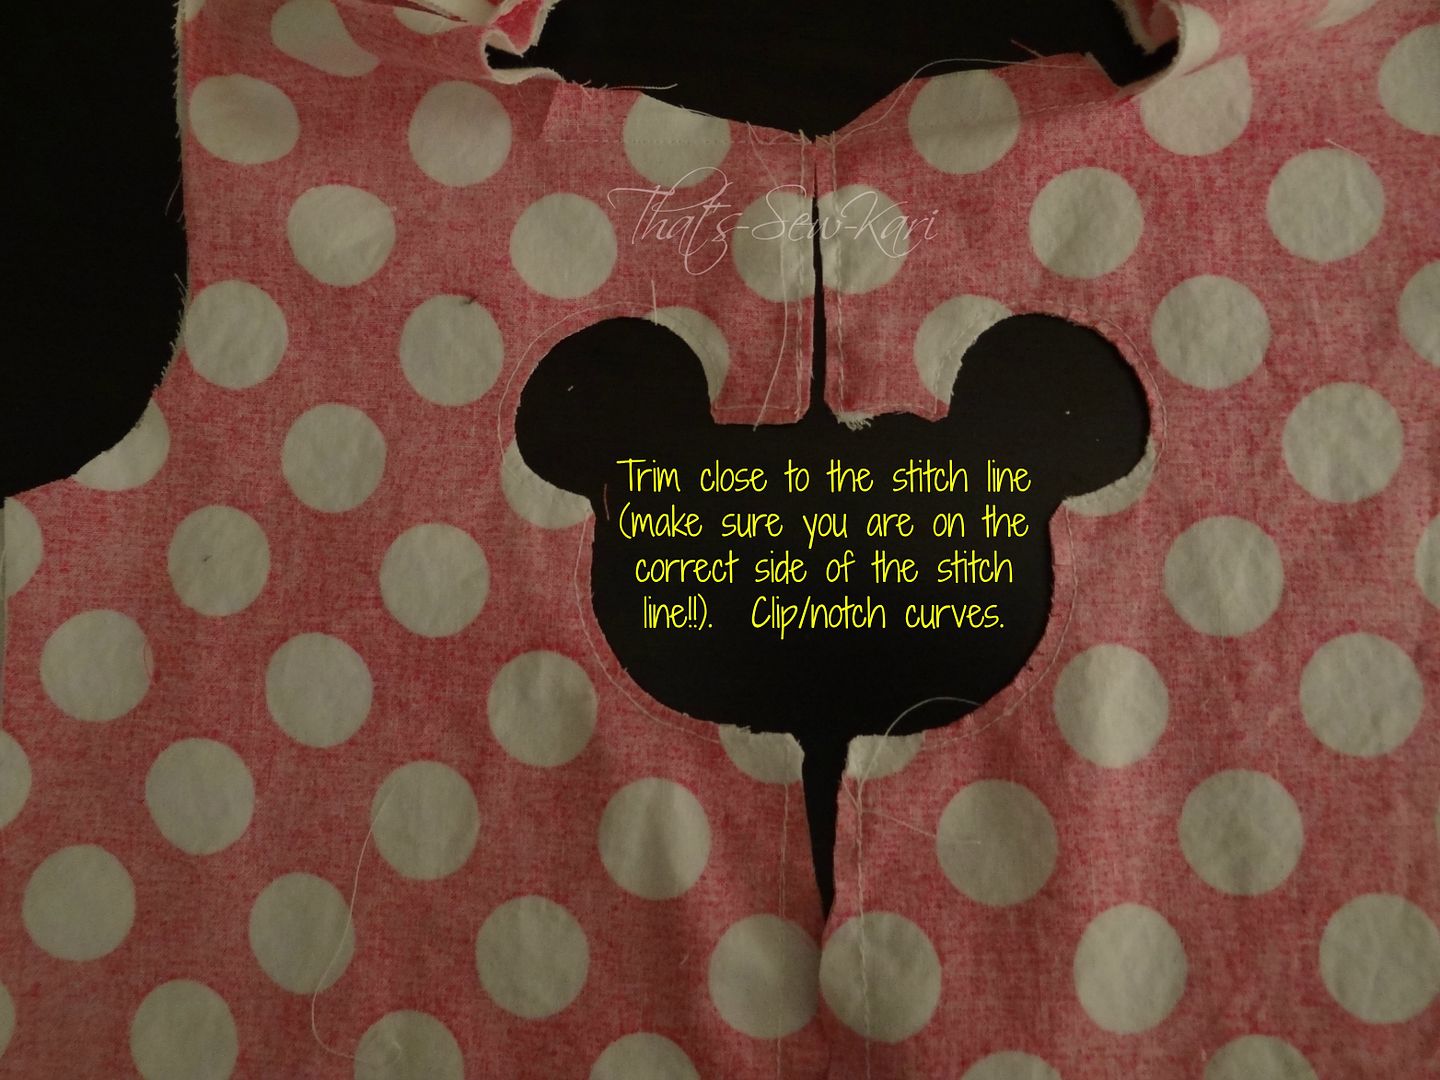
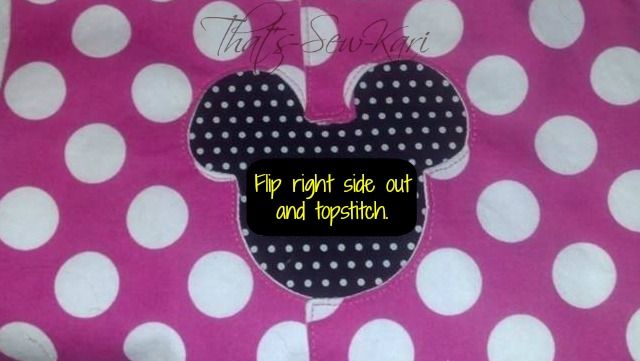
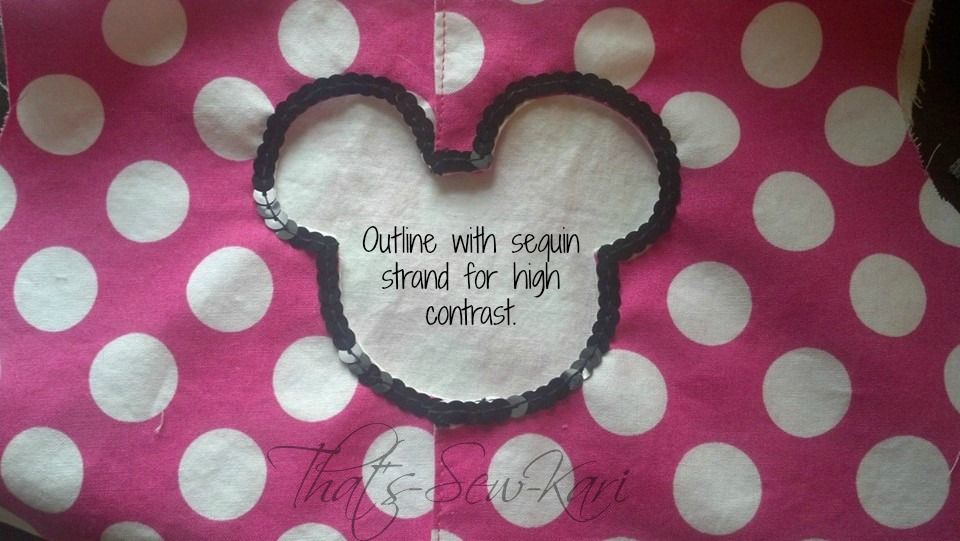
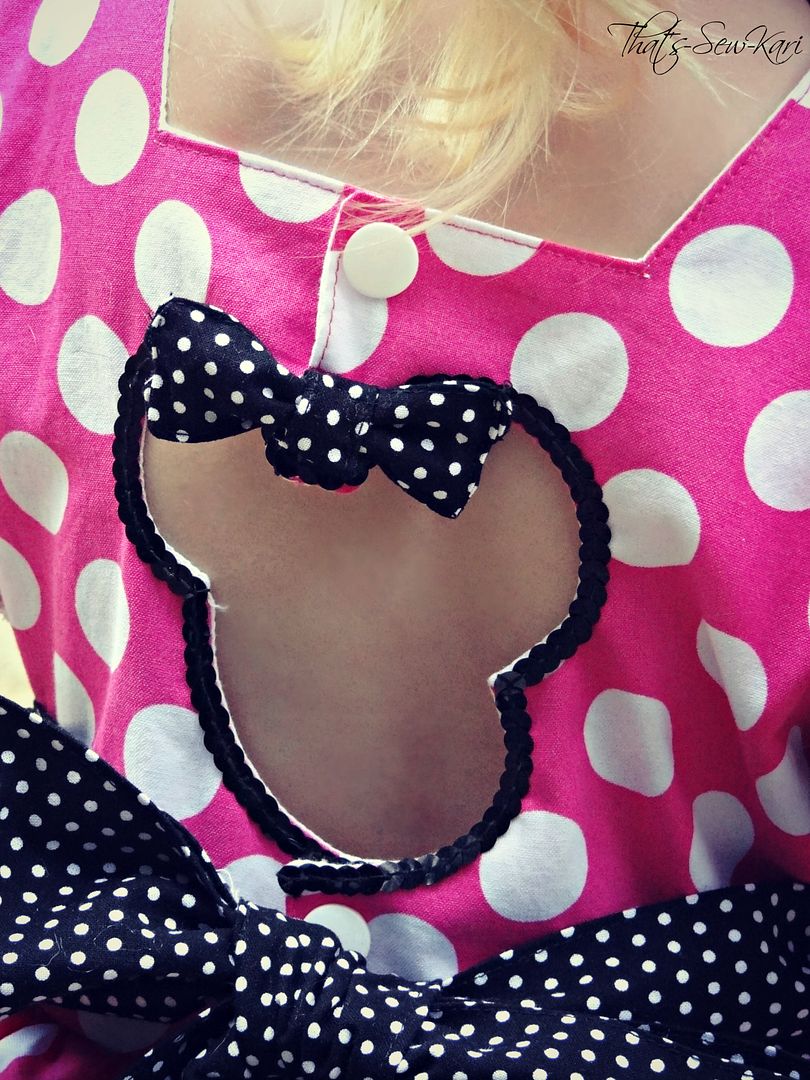
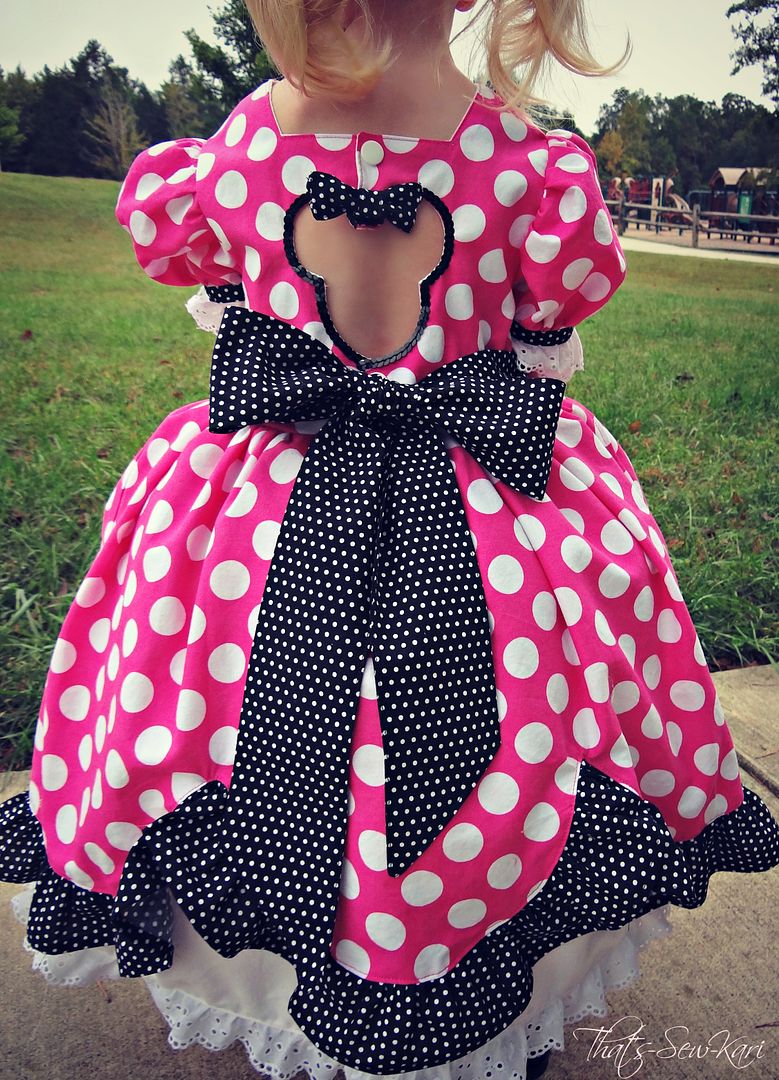
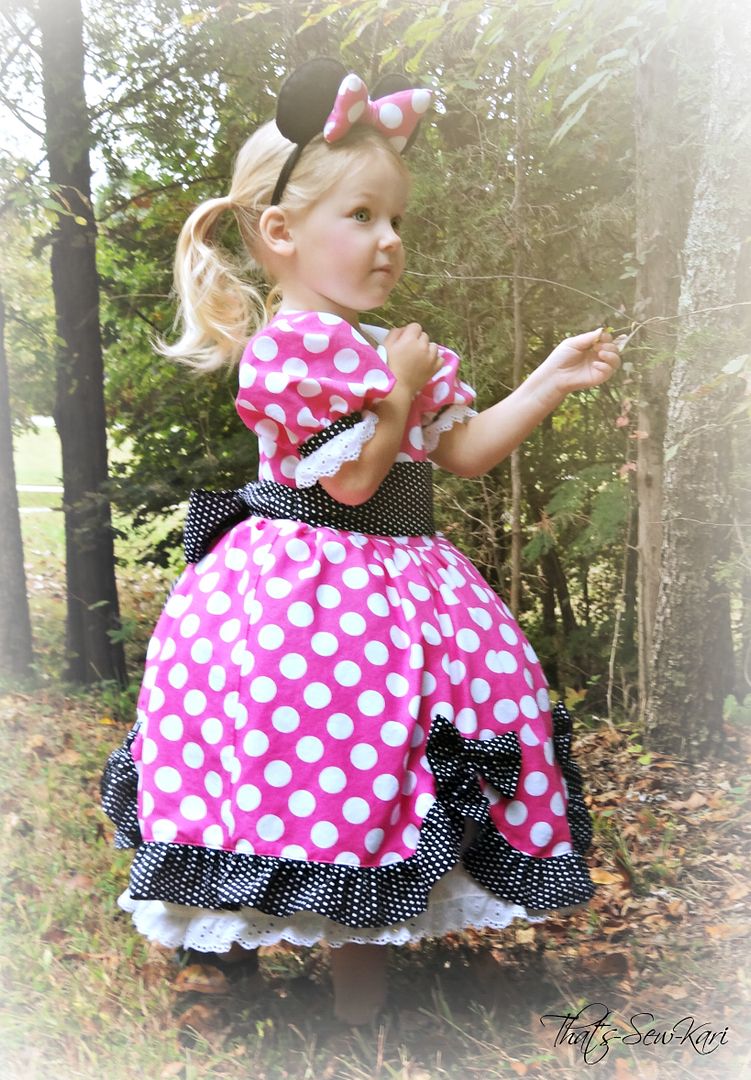
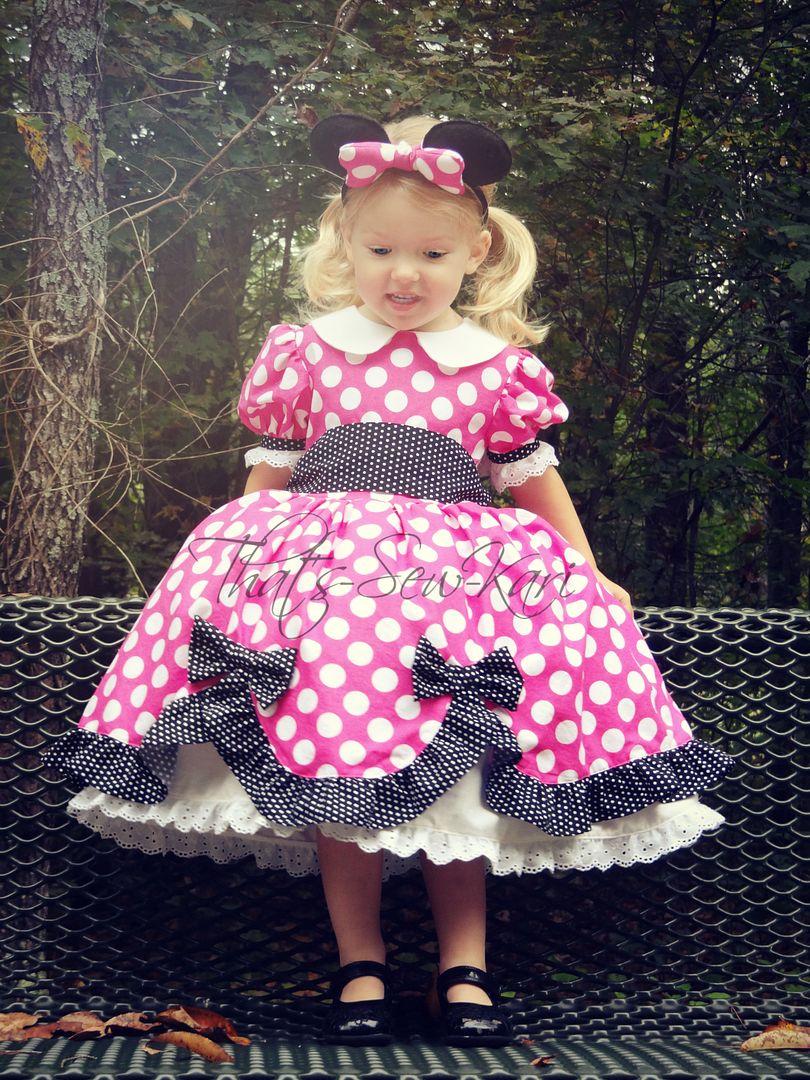
Fortunately for all of you, I couldn't just stop at a simple peter pan collar addition :) I thought and thought and thought.... and then the light bulb went on! I decided I wanted a Minnie Mouse head cutout in the back of my daughter's dress for a bit of unexpected awesomeness on the back of her dress. So, I set out to make this crazy idea happen (because I don't give up easily!). I practiced on a few muslin bodices first until I got it right. Here's how I did it (and FREE template HERE!). In order to fit the template along with the amount of snaps needed, I lengthened the bodice 1 inch from the original pattern. The space between her ears is the overlap of the back bodice in the original pattern - fate, I tell you!!


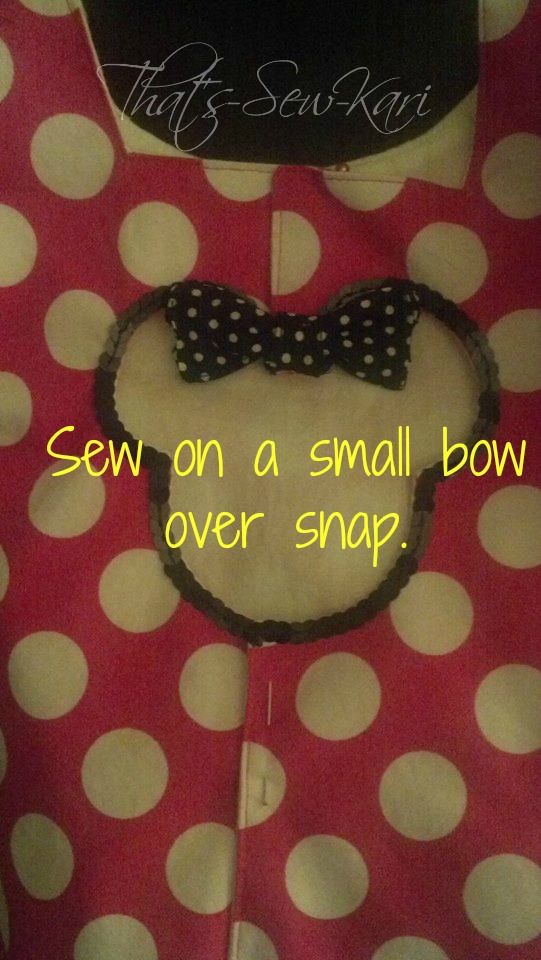
 You will want to make sure to put 2 snaps both above the cutout and below so that everything lays correctly.

To finish the Minnie's look, I chose an eyelet ruffle for my ruffled underskirt to mimic her eyelet-trimmed bloomers and carried the eyelet to the bottom of her sleeve cuffs. I used the large bow template in the pattern to create two bows to place on the front scallops.

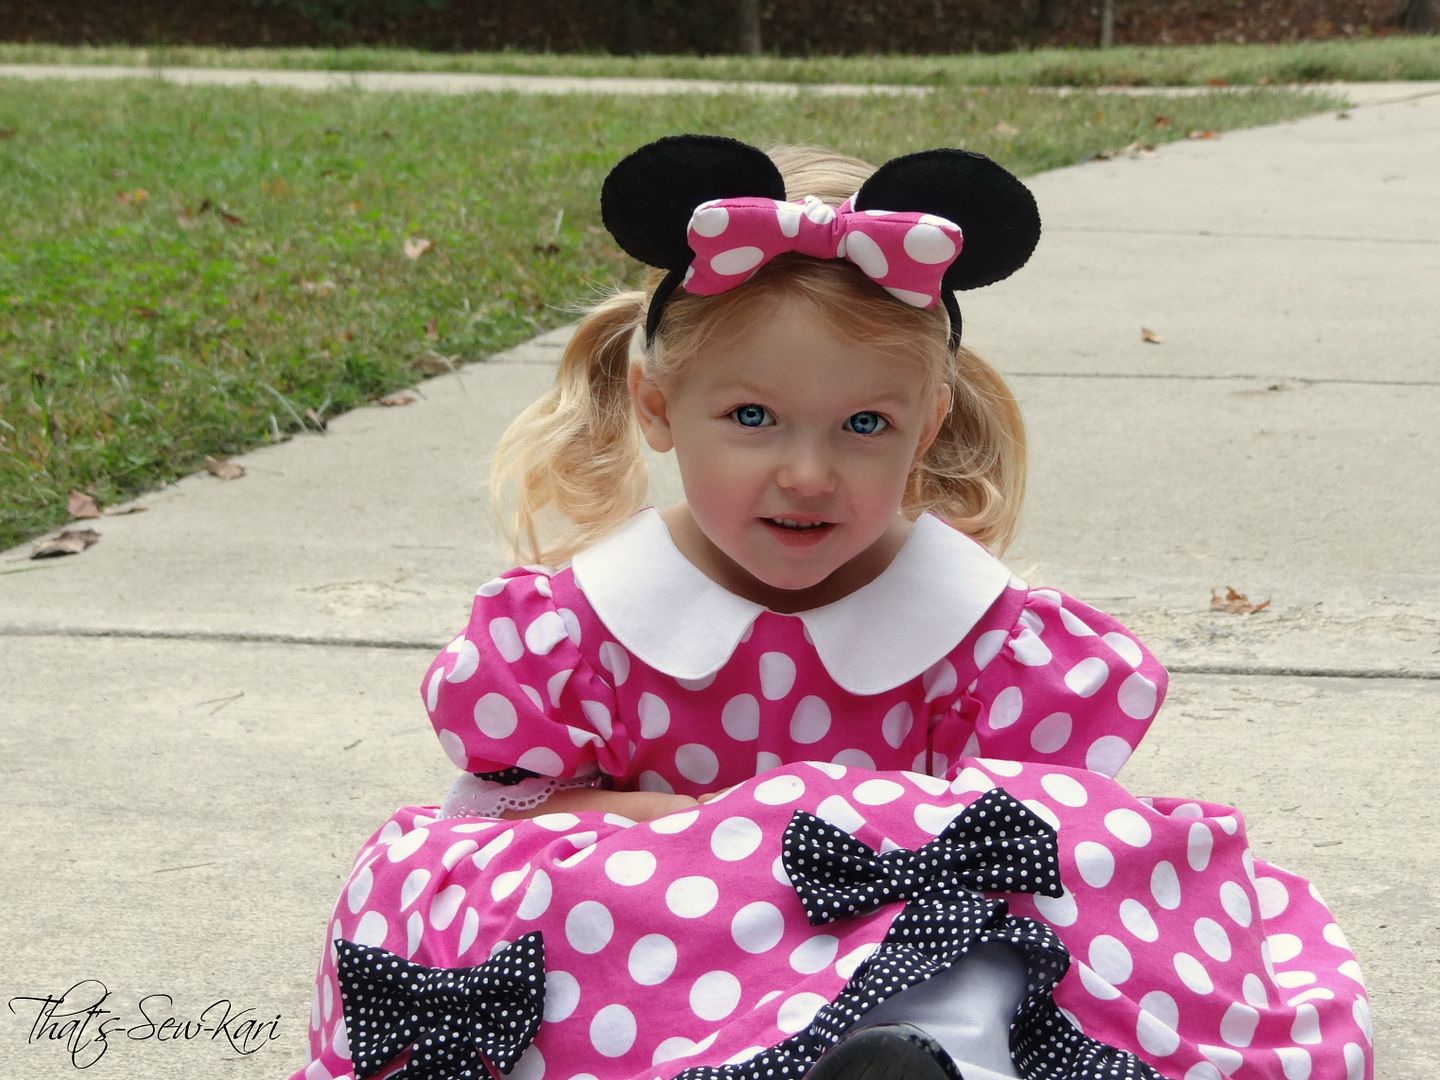
My daughter is also wearing the Pettiskirt Party by Foo Foo Threads as well as a shorter 'no-sew' tutu from last year's Halloween costume for maximum poof! I made the Minnie Mouse ears and headband last year since my daughter was also Minnie Mouse then. I used felt for the ears and stuffed them to make them stand up. I also stuffed the bow and hot glued them all onto a black headband and then hand-stitched them onto the headband for extra stability.
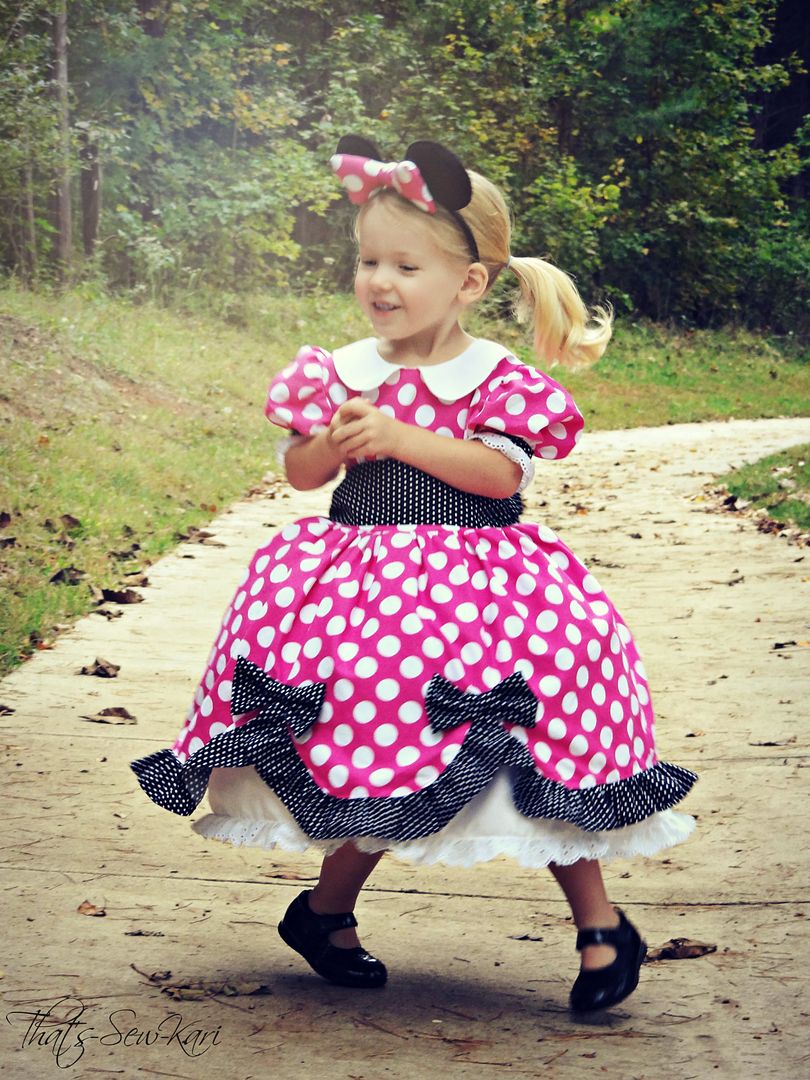
My 2 year old has been asking for her Minnie Dress for WEEKS!! Today, she got to go out for a photo shoot and she was in Minnie Mouse heaven. This girl dreams of Minnie Mouse every night, or so she tells me. I'm sure she would gladly wear this daily if I let her!


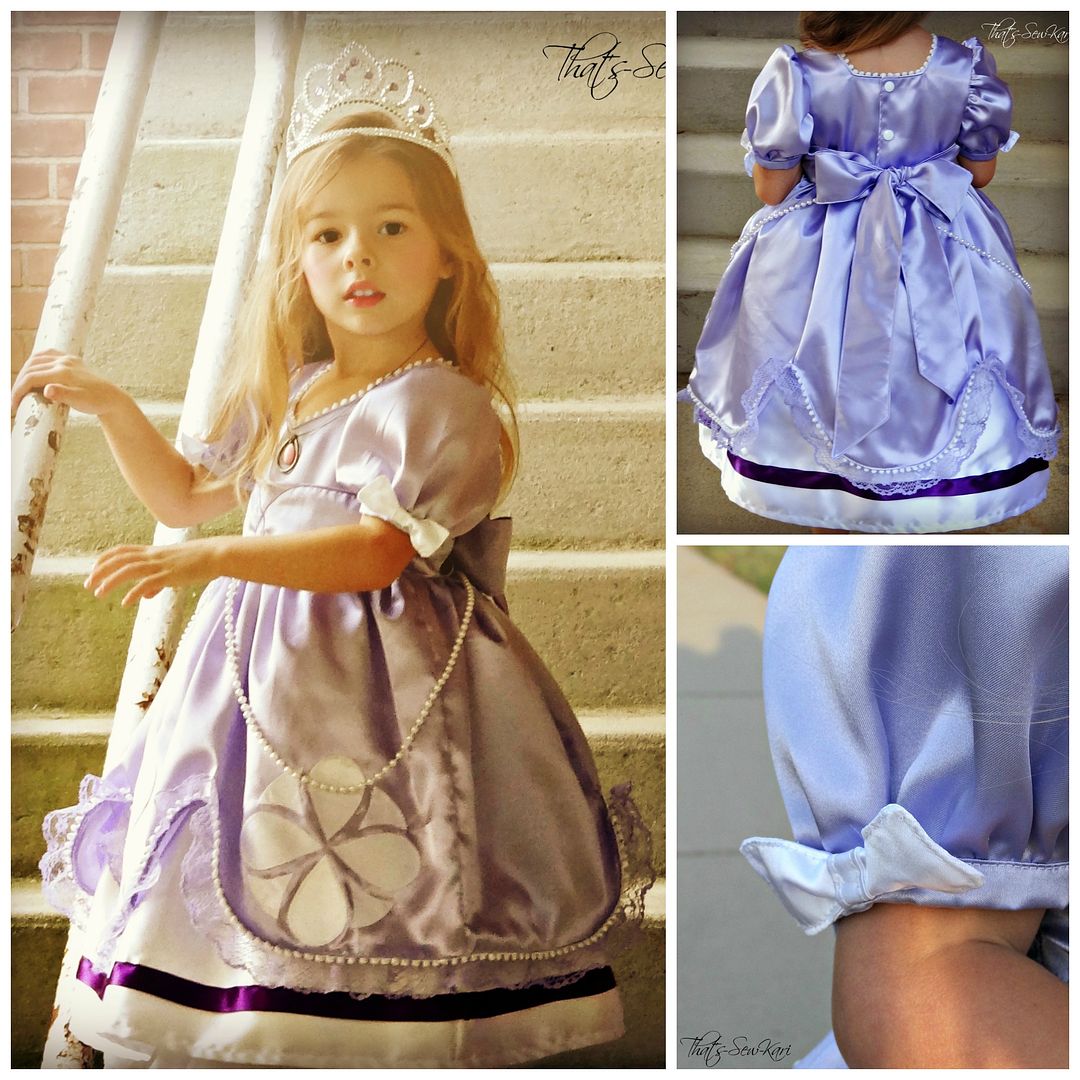
Oh, remember when I mentioned at the beginning how this was the third dress I've made using this pattern? Here are Sofia the First and Cinderella!

Well, that wraps it up!! Thanks to Pattern Revolution for having me take part in this series and also thanks to Candy Castle Patterns for a beautiful pattern! Head over to her pattern shop and show her some love!

First of all, this pattern has lots of options so chances are that the pattern contains what you need! There are 4 sleeve options, a slim or regular fit bodice, hemmed or ruffled underskirt and a paneled or non-paneled skirt. I've made 3 dresses so far!

Minnie Mouse likes to wear a sweet peter pan collar on her dresses and it wasn't an option in the pattern so I set out to draft my own! I wanted it to end at the shoulder seam so I would not have to alter the back.
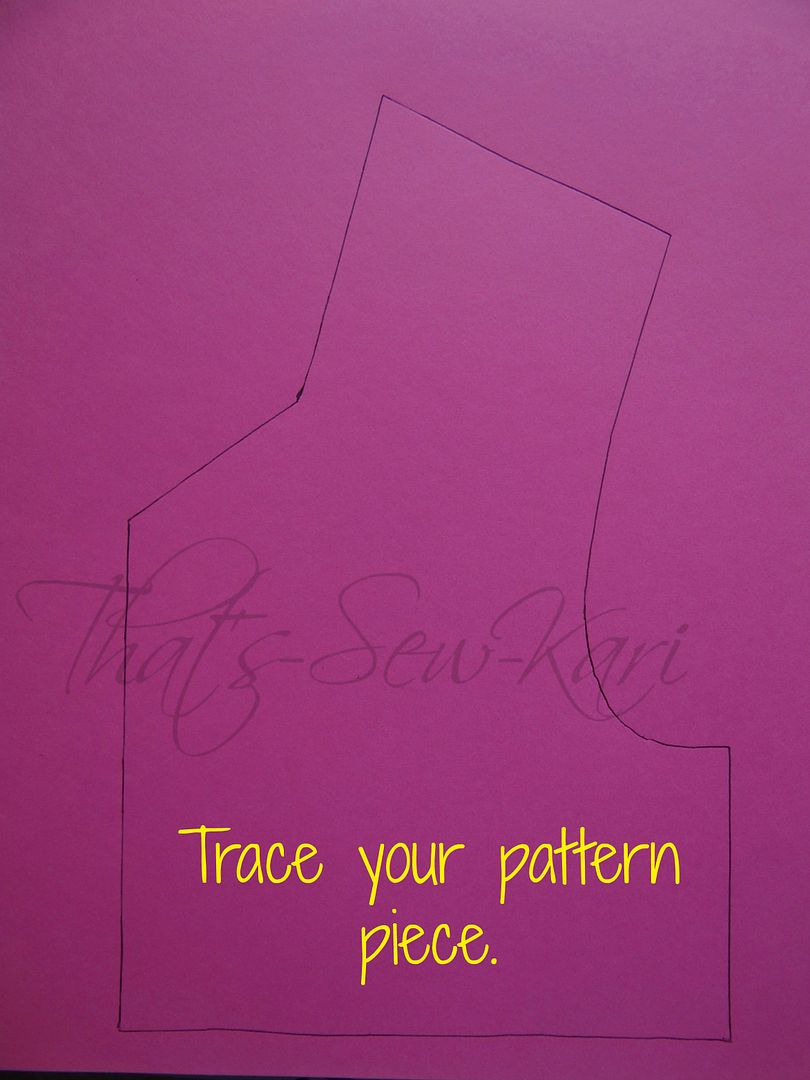
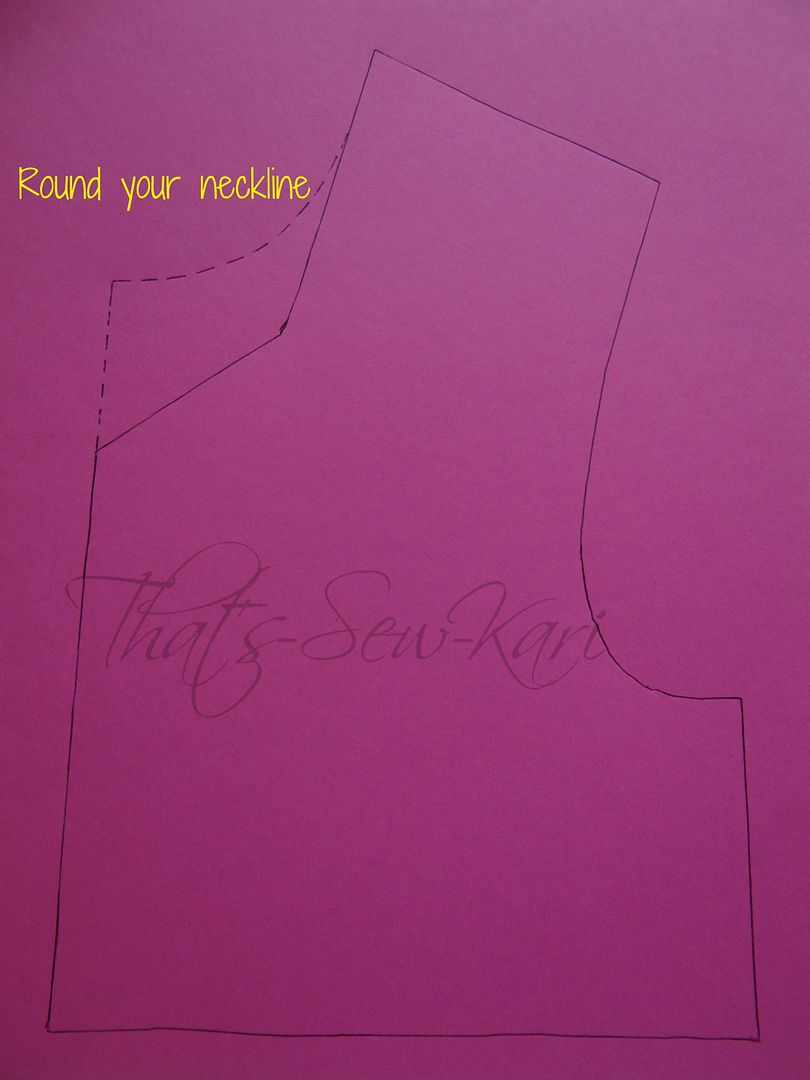
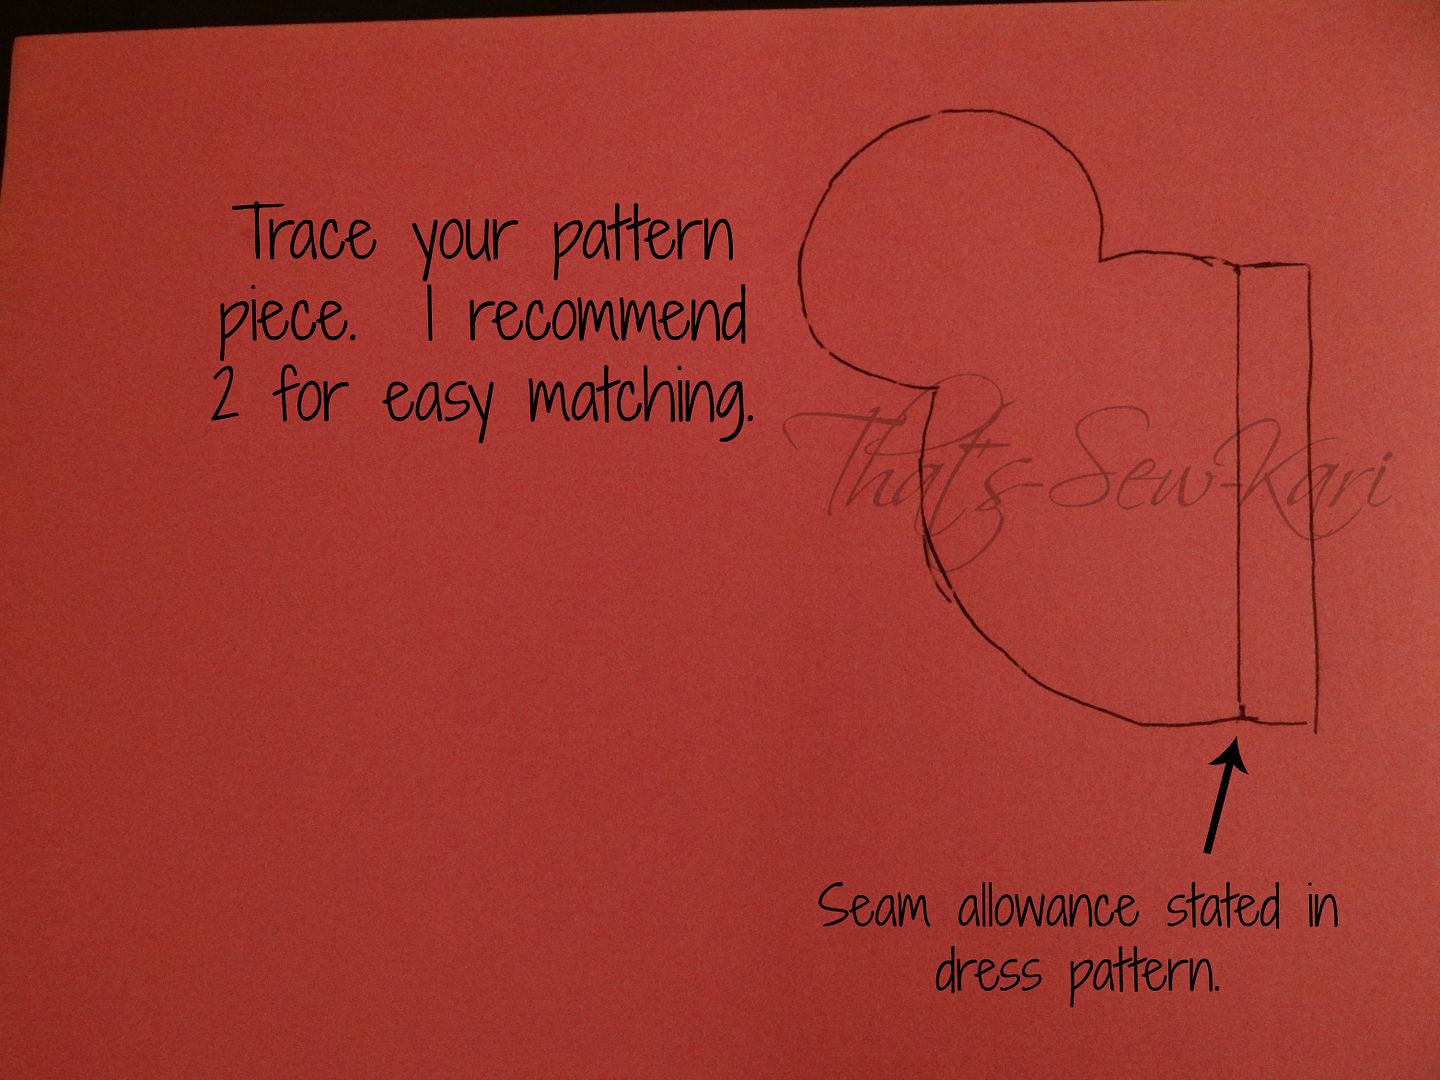
After I rounded my neckline, I drew the collar along the neckline and failed to take a picture... whoops! Below, is my retraced collar piece.
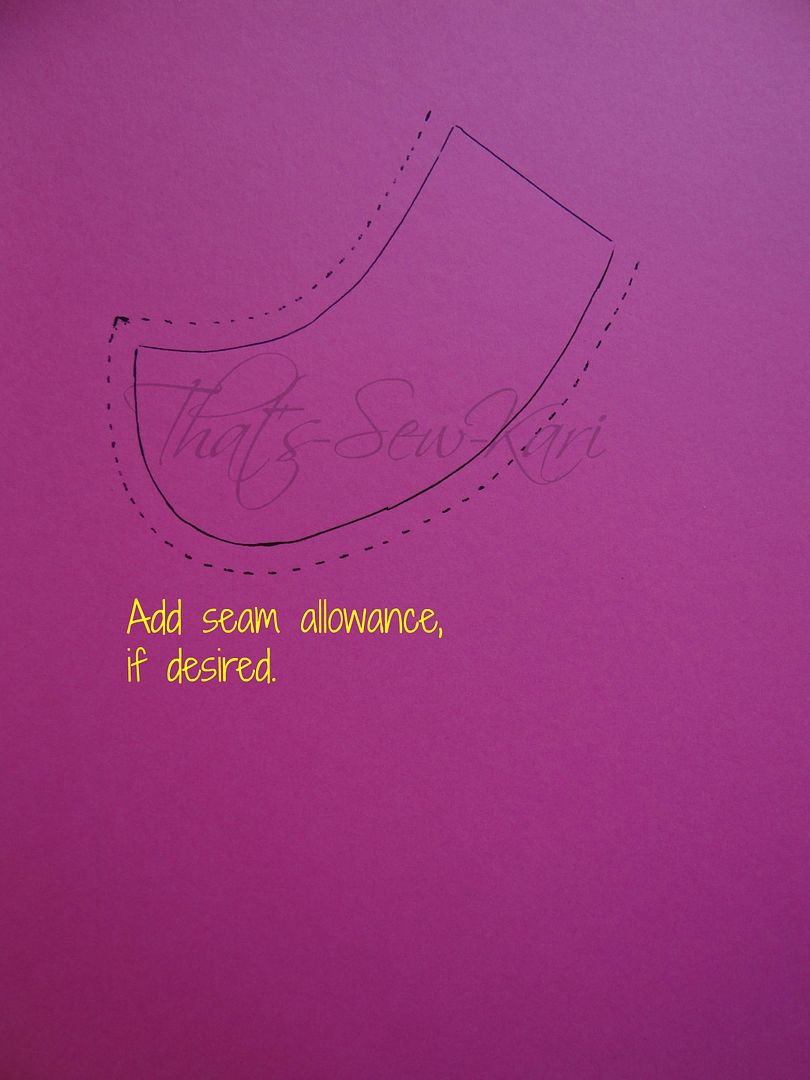
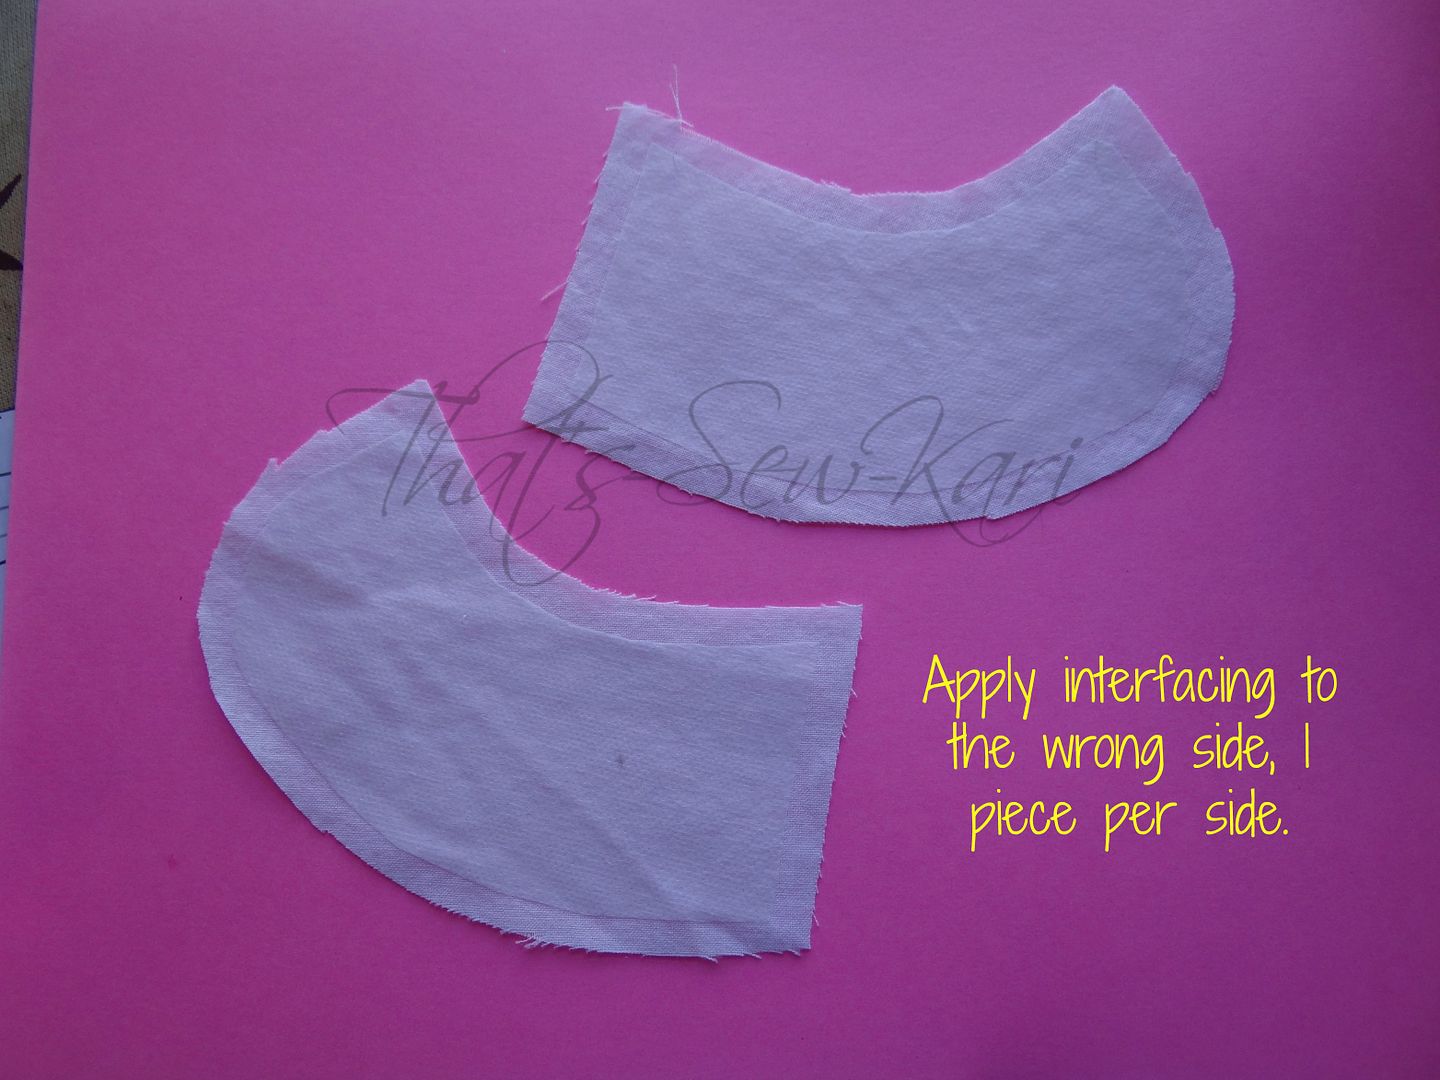
When you cut out your pieces, cut the interfacing without the added seam allowance to reduce bulk in the seams.
Other than the peter pan collar, Minnie Mouse dresses are easily recognizable simply by choosing the right fabric. Minnie likes either red or pink, but white polka dots are a must. My 2 year old was very adamant that she wear the "Pink" Minnie Mouse so I used a combination of pink/large white polka, black/small white polka, and white. (The red combination would be the same combo, but substitute the pink with red and add in some bright yellow! It really pops!) All of my fabrics and trim came from Hobby Lobby.
Fortunately for all of you, I couldn't just stop at a simple peter pan collar addition :) I thought and thought and thought.... and then the light bulb went on! I decided I wanted a Minnie Mouse head cutout in the back of my daughter's dress for a bit of unexpected awesomeness on the back of her dress. So, I set out to make this crazy idea happen (because I don't give up easily!). I practiced on a few muslin bodices first until I got it right. Here's how I did it (and FREE template HERE!). In order to fit the template along with the amount of snaps needed, I lengthened the bodice 1 inch from the original pattern. The space between her ears is the overlap of the back bodice in the original pattern - fate, I tell you!!

 |
| I've made this dress 1 size larger so that I can ensure it fits when her birthday rolls around since it's highly likely she'll want a Minnie Mouse birthday again! I'm ahead of the game! |
To finish the Minnie's look, I chose an eyelet ruffle for my ruffled underskirt to mimic her eyelet-trimmed bloomers and carried the eyelet to the bottom of her sleeve cuffs. I used the large bow template in the pattern to create two bows to place on the front scallops.
My daughter is also wearing the Pettiskirt Party by Foo Foo Threads as well as a shorter 'no-sew' tutu from last year's Halloween costume for maximum poof! I made the Minnie Mouse ears and headband last year since my daughter was also Minnie Mouse then. I used felt for the ears and stuffed them to make them stand up. I also stuffed the bow and hot glued them all onto a black headband and then hand-stitched them onto the headband for extra stability.
My 2 year old has been asking for her Minnie Dress for WEEKS!! Today, she got to go out for a photo shoot and she was in Minnie Mouse heaven. This girl dreams of Minnie Mouse every night, or so she tells me. I'm sure she would gladly wear this daily if I let her!
Oh, remember when I mentioned at the beginning how this was the third dress I've made using this pattern? Here are Sofia the First and Cinderella!
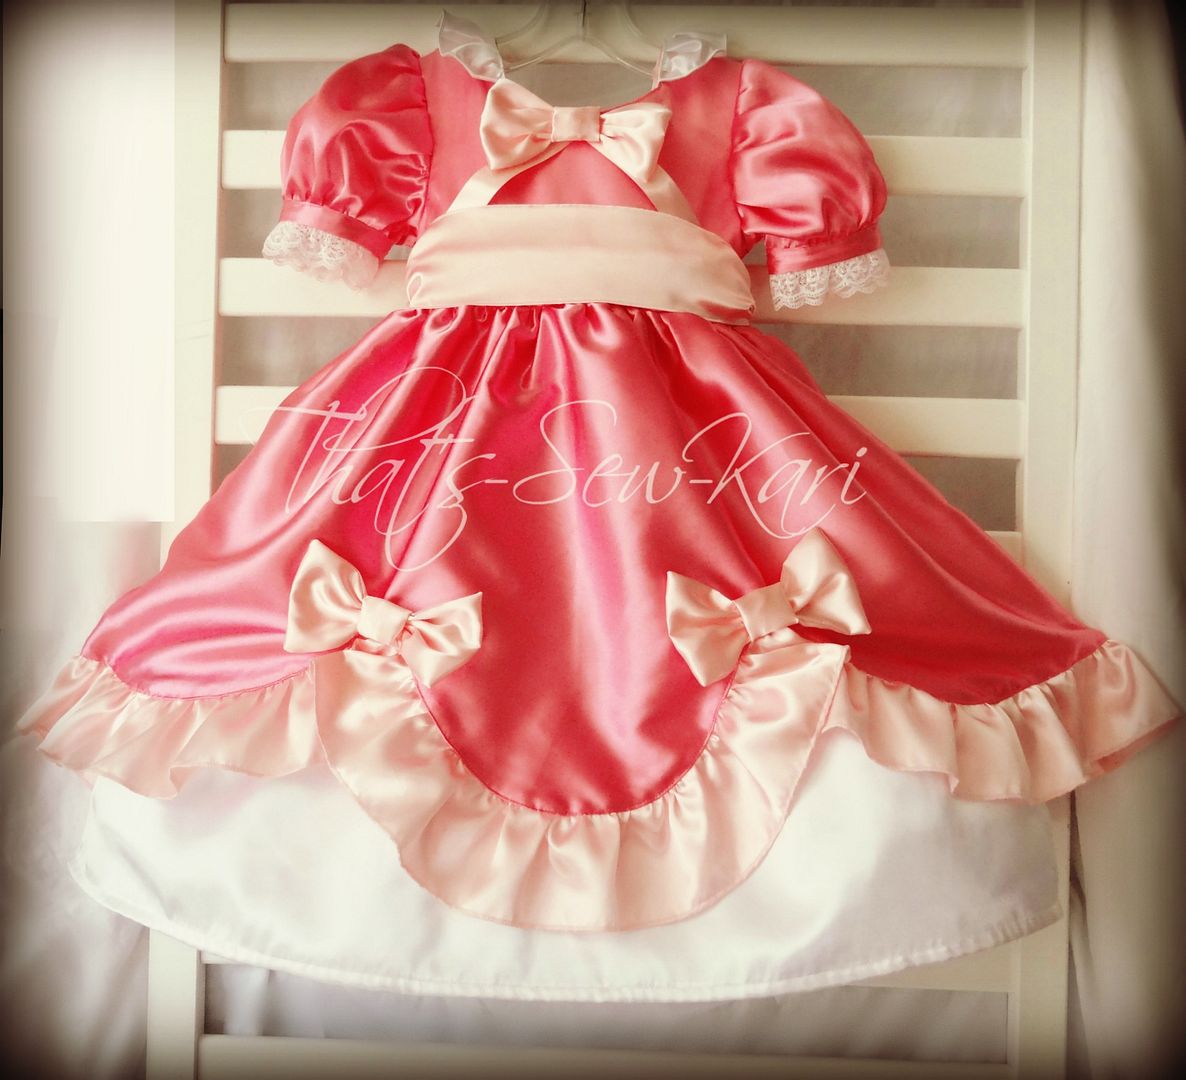 |
| Cinderella was created for a very special customer. What a lucky little girl!! |
Well, that wraps it up!! Thanks to Pattern Revolution for having me take part in this series and also thanks to Candy Castle Patterns for a beautiful pattern! Head over to her pattern shop and show her some love!


Eeeeek! I am sew excited to make this. I am starting tonight with the red polka dot print and yellow contrast for our trip in June to Disney World. Thank You Very Much!
ReplyDelete