This is a sponsored post written by me on behalf of Cricut for Cricut. All opinions are 100% mine.

Everyone needs a little JOY in their life! And Cricut is here to make it happen!!! This machine is small on size, but big on possibilities. It's the perfect machine to quickly and easily personalize anything with one cut and one color, in 15 minutes or less. It makes those little, everyday projects much easier. I already own a Cricut Explore Air 2 and a Cricut Maker, so I was curious if I really needed the Cricut Joy. Yes, yes, I do! And you do too!
What drew me to the JOY is the portability, the possibility of extra long cuts (yay, mat-free cutting for up to 20 ft repeated cut capability!), and the fact that you can craft anywhere (all you need is an outlet). I'm a preschool teacher and for years, I've wanted to label everything in my classroom, but by the time I got home, I never got around to designing all of the needed cuts. Next week, I return to set up my classroom and cannot wait to tote JOY and do all my creating right in my classroom. It's super tiny (check out the size comparison with a standard composition notebook) and there is an optional tote bag!! It's just so easy to move from place to place without needing a dedicated craft room!
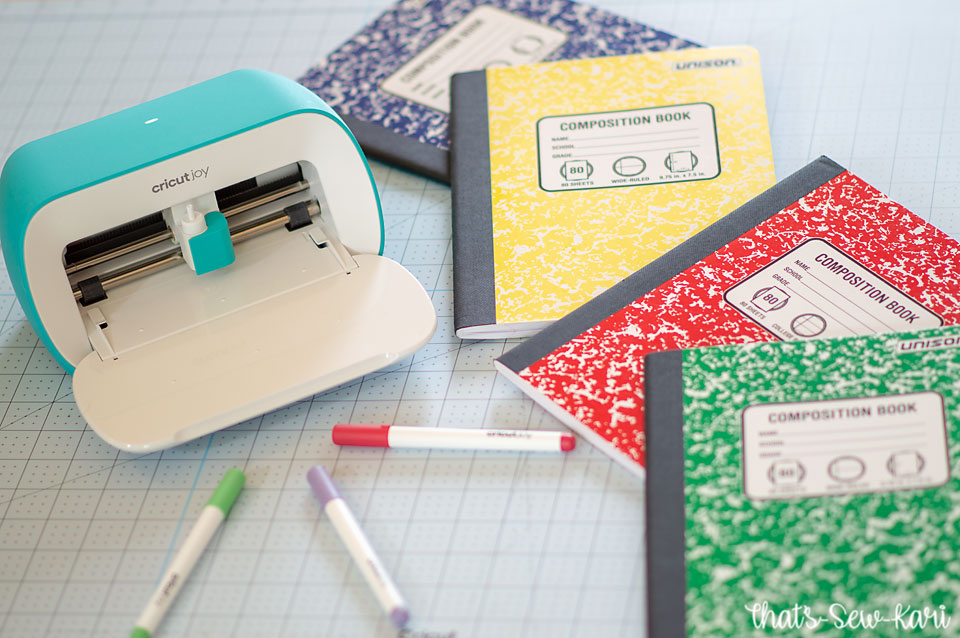
To get myself acquainted on my new machine, I came up with 3 simple projects that I cut in my living room with my phone (yay, for not being tied to my craft space and computer!) and tried out all three cutting materials: Iron-on, Paper, and Vinyl. I used the Writable Vinyl so I could test out the Joy Pens to check for smudging too!!
Project 1: Paper Tags {For Your Handmade Business}
I don't actually sew to sell, but lots of my friends do and sometimes I send out handmade gifts or just want my girls' handmade to feel a little extra special. This project is SUPER easy and takes just minutes.
- Step 1: Open up Design Space on your computer or phone. Access the editable tag HERE.
- Choose "Customize".

-
- Edit "Your Business Name" and "Care Instructions" and resize as needed.
- Select all layers and "Attach"
- Step 2: Click "Make It"
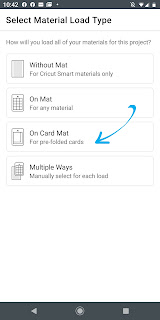
- Step 3: Choose your "Material Load Type" (I used cardstock from one of the card kits so I chose "Card Mat")
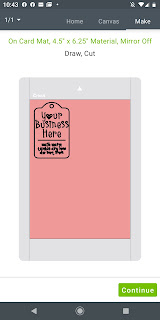
- Step 4: Check your preview screen -- everything should be on the tag. Click "Continue".
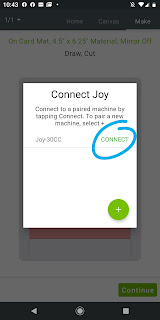
- Step 5: Connect your Joy by choosing the green "Connect" next to your Joy machine's name.(Make sure your Joy is plugged in and front cover open)
- Step 6: Choose your Cricut Material.
- Step 7: Load Material and Tool as instructed on screen and press "GO".
- Step 8: Change Tool as instructed. Press "GO".
- Step 9: Choose "Unload" on screen, remove from mat. You're done!
Project 2: Notebook Labels
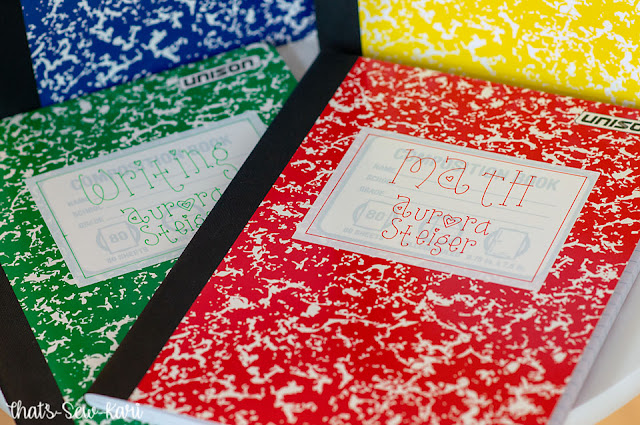
- Step 1: Open up Design Space on your computer or phone. Access the editable labels HERE
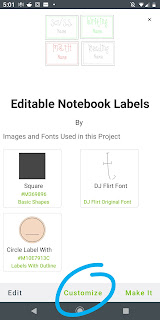
- Choose "Customize".
-
- Edit "Name" and/or "Subjects" and resize as needed. An alternative circle label is a hidden layer. Unhide to use.
- Select all layers for each label and "Attach". Repeat with the remaining labels.
- Step 2: Click "Make It"
- Step 3: Choose your "Material Load Type" (I chose "without mat" since I was using the Smart Labels)
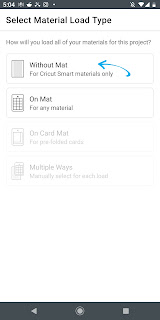
- Step 4: Check your preview screen -- everything should be on each label. Click "Continue".
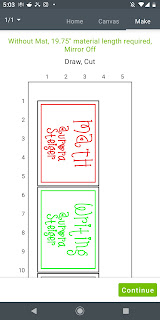
- Step 5: Connect your Joy by choosing the green "Connect" next to your Joy machine's name. (Make sure your Joy is plugged in and front cover open)

- Step 6: Choose your Cricut Material.
- Step 7: Load Material and Tool instructed on screen and press "GO".
- Step 7: Change Tools as instructed. Press "GO".
- Step 8: Choose "Unload" on screen, peel label and stick on notebook. You're done!
- Tip: To avoid bubbles on larger layers, apply from one side slowly until it's all applied.

Project 3: Personalized Spirit Wear
- Step 1: Open up Design Space on your computer or phone. Access the project HERE
- Choose "Customize".
- Resize as needed.
- Step 2: Click "Make It"
- Step 3: Choose your "Material Load Type" (I chose without mat since I was using the Smart Iron On)

- Step 4: Check your preview screen -- Make sure you turn on "Mirror Image". Click "Continue".
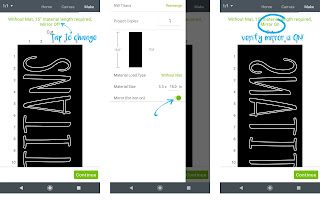
- Step 5: Connect your Joy by choosing the green "Connect" next to your Joy machine's name. (Make sure your Joy is plugged in and front cover open)
- Step 6: Choose your Cricut Material. (I used the Smart Iron On Glitter)
- Step 7: Load Material (shiny side down for Iron-on!) and Tool as instructed on screen and press "GO".
- Step 8: Choose "Unload" on screen, weed iron-on and apply on project using your Easy Press. You're done!




Be First to Post Comment !
Post a Comment