Image Slider

BLOG TOUR: Ellie Inspired Summer 2015


Ah, summertime!!!!  This year is our first official year of "summer break".  I love summer -- from the relaxing days without a schedule to the sweet little dresses designed to keep my girls as cool as possible in this humid NC heat.

What better way to kick off the summer than with participating in the Ellie Inspired Summer Blog Tour!  I've gotten the chance to participate in the last several Ellie Inspired blog tours, but this one is special.  This tour is sponsored by Riley Blake Designs -- eeks!!!!  I adore their fabric!!


So then comes the question.... which came first?  The fabric or the pattern?

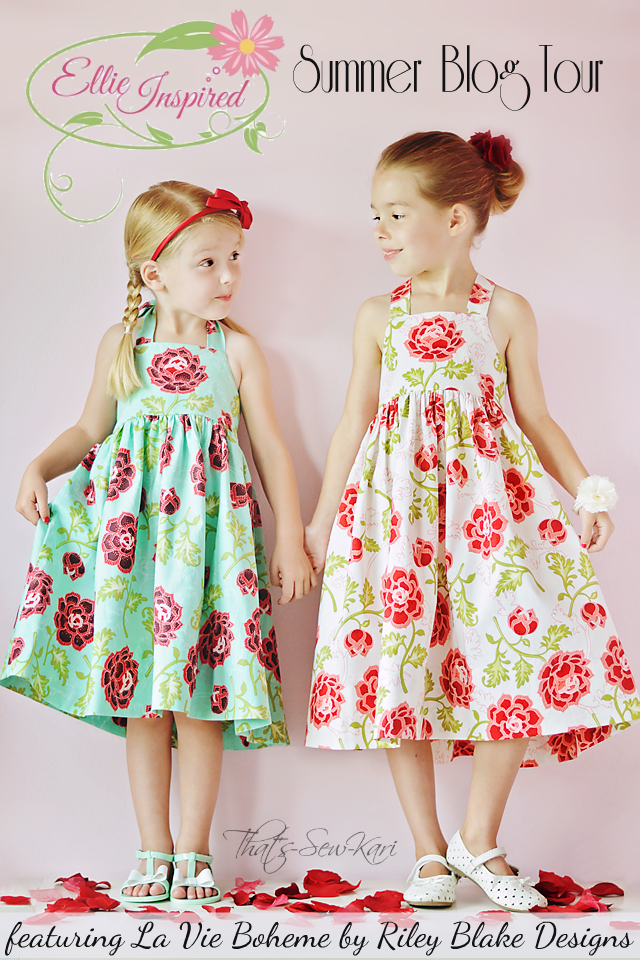
I actually picked out the pattern first.  This is the Dixie Dress -- a sweet. summer frock that can be worn as a halter or criss-cross ties.  My girls love to wear dresses. especially in the hot, hot summer so I knew this would be a perfect choice.  I actually had this pattern in my stash ... hoard... er, files since the first blog tour, but somehow never got around to sewing it up.

Next came fabric!!  After speaking with the rep from Riley Blake (Hi, Julia!) and getting the list of the possible fabrics, I spent hours mulling over my decision.  Yep, I'm that indecisive.  Haha.  I had a few choices at the top of the list that were fun and whimsical (like the Sunglasses fabric or the Unicorns  -- don't tell my 6 yr old I passed those up!), but I thought I take a little fancier approach.  I kept coming back to this fabric line - La Vie Boheme and I just loved the gorgeous flowers.  It also had colorways that would compliment each girl so they could coordinate, but not be an exact copy.  I chose TEAL for my 4 year old and CREAM for my 6 year old.


I have to admit though, the teal colorway caught my eye first.  My blue-eyed blondie looks fabulous in this color!
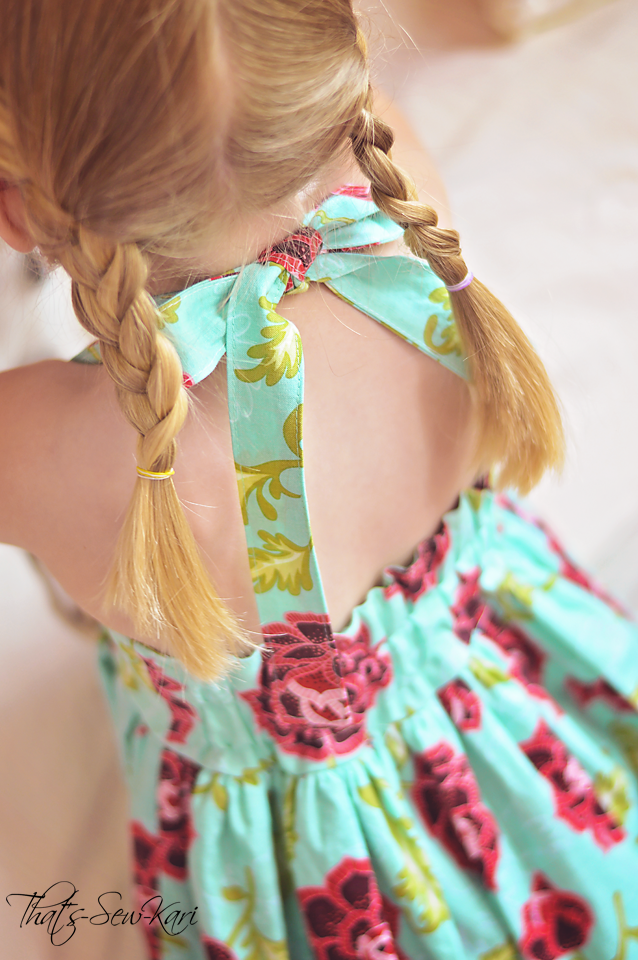

I wanted to showcase the two different styles of ties.  This is the halter version.


And here is the criss-cross back.  At the current time, they are just tacked in with safety pins as she'll likely wear it more as a halter, but I wanted to show you both possibilities.  If you want to use this style (and permanently sewn), you'll need to have the child present during sewing so you know at what length you need to fasten the straps.
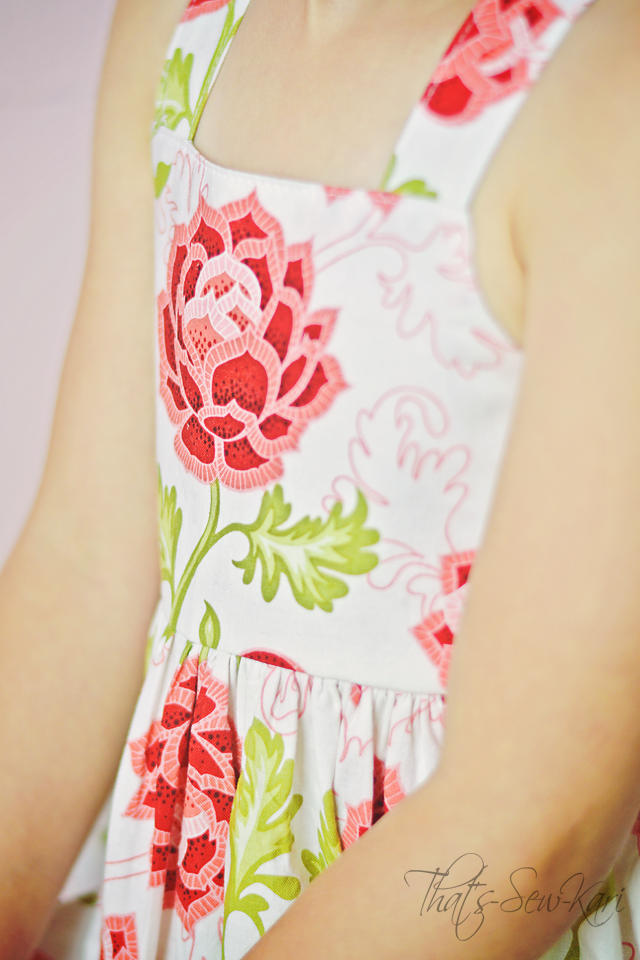

This bodice is perfect to showcase a large print or an embroidery design.
______________________________

If you've been following along for the past couple years, you've heard me talk about mixing sizes due to both of my daughters having very slim measurements for their ages.  Height-wise they are fairly average (my oldest is on the low end for her age).   This pattern contains a finished measurements chart that includes ease.  This means it will be a couple inches (typically - for woven) larger than your child's chest measurement.   This pattern has elastic in the back bodice.  Note:  The finished measurement is measured with the elastic fully stretched (so please take this into consideration).

I've sewn several dresses from Ellie Inspired for my youngest (normally a size 2 width), but when looking at the pattern piece, it looked a bit narrow at the top to me.  So I decided to try a size 4.  After bribing my 4 year old with chocolate chips for a fitting, the 4 was not quite as wide across the chest as I'd prefer, but not scandalous.  Depending on how I situated the bodice, it was either high on her neck or low under the arms, but I really didn't want to start over.  So I increased the SA across the top of the chest (essentially lowering it by 1").  I  had also tried the original bodice on my 6 year old and determined it would be perfect if I added a 1/2" in width to the center to widen the chest coverage.

After talking with Laura of EI, it was determined that my file I was sent last spring was the wrong file....  I am glad that I followed up my sizing concerns though, with the designer instead of simply thinking (and telling everyone) that the sizing is way off.  (NOTE: I have received the alternate copy and it is 1" wider in the bodice :)  )

Even my girls were shocked... haha 
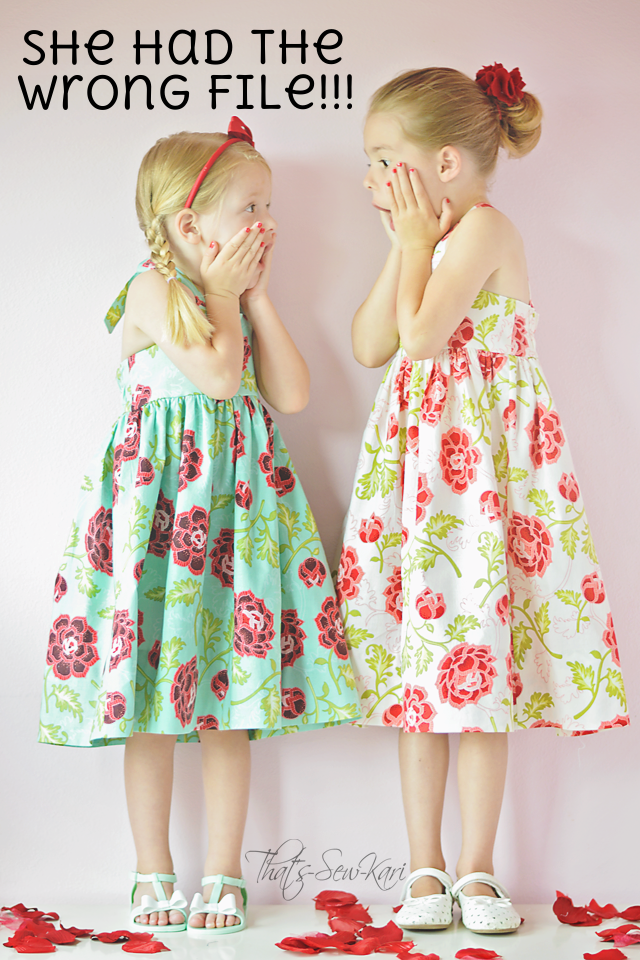
The length was spot on though!  Couldn't have gotten this more perfect!

One of my favorite things about this pattern is the deep 4" blind-hem.  It gives the skirt great structure at the bottom and the blind-hem (or handstitched) is a perfect when you don't want your hem stitching to show.   If you've not yet mastered (or tried) the blind-hem, it's actually mind blowing once you wrap your brain around how you position the fabric.  It seriously makes you want to blind-hem ALL.THE.THINGS!

It's always a contest... LOL

I am so glad I went with my gut and chose the La Vie Boheme line.  I decided against using any coordinating prints as accents because I knew the main print would shine on its own.  I was also very happy to find a flower that I could fussy cut to take center stage on each bodice.  Thank you so much for this gorgeous fabric, Riley Blake!!!!  I hope you love the result as much as I do.

Important Links:


Thanks so much for stopping by!

Sew Coordinated Sewing Kit

{GUEST DESIGNER}

---------

June 2015 Kit


I am so excited that I was chosen to play Guest Designer this month for Sew Coordinated -- a monthly subscription sewing kit (sign up HERE) brought to you by Mama Made and Beautiful Fabrics.  As you can see, my kit was full of lots of fun and cheerful fabric that I was able to make each of my daughters the dress of their choosing and a matching headband!  I spent the better part of a day carefully laying out my pattern pieces and choosing the best layout to maximize the fabric without altering or compromising any pattern pieces.  I also divvied up the 5 included prints between the girls to best suit their personalities and coloring.  This way, they could coordinate (see what I did there?) without being identical.

... and I was literally left with mere scraps from the 3.5 yards included in my kit!


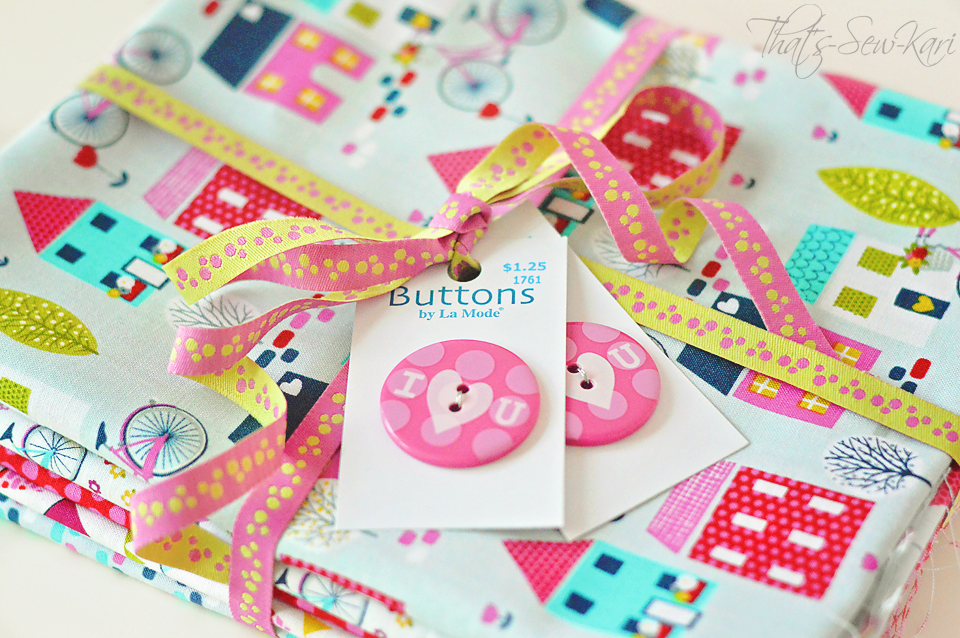
I'd say I used this kit about as well as it could be.  How about a prettier picture of the fabrics?

*NOTE: Kit is not packaged this way -- staged for photograph

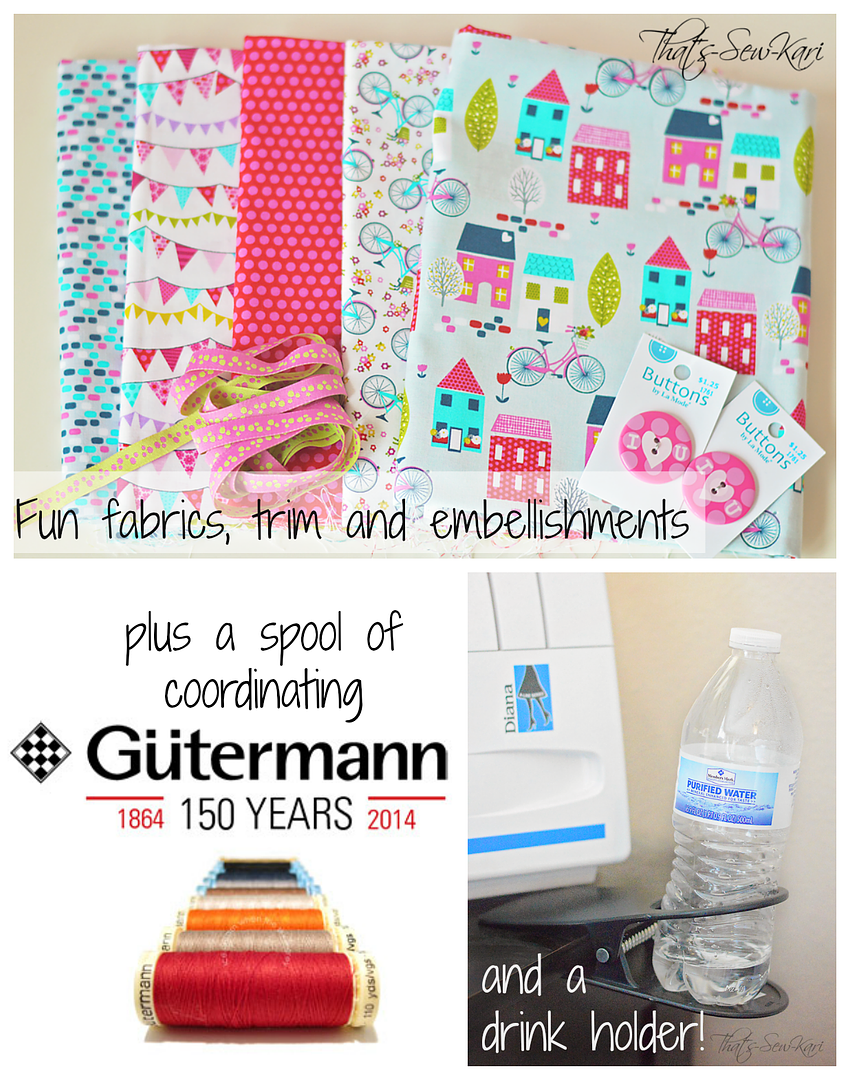
Just look at these gorgeous, fun fabrics by Studio E Fabrics.  This is the Around Town by Small Factory line.  Also included in the kit are 2 buttons by La Moda, fun double-sided ribbon, thread (not photographed), and a clip-on drink holder for my sewing room!


Content details:

  • 1 yard Around Town by Small Factory -- #2941-99  (Houses)
  • 1 yard Around Town by Small Factory -- #2944-01 (Bicycles)
  • 1/2 yard Around Town by Small Factory -- #2945-28 (Dots)
  • 1/2 yard Around Town by Small Factory -- #2942-01 (Pennants)
  • 1/2 yard Around Town by Small Factory -- #2943-90 (Bricks)
  • 2 yards of double-sided pink/lime dot ribbon by Renaissance Ribbons
  • 1 spool of coordinating Gutermann Thread 
  • Clip-on drink holder
_______________________

Here's how I used it all!


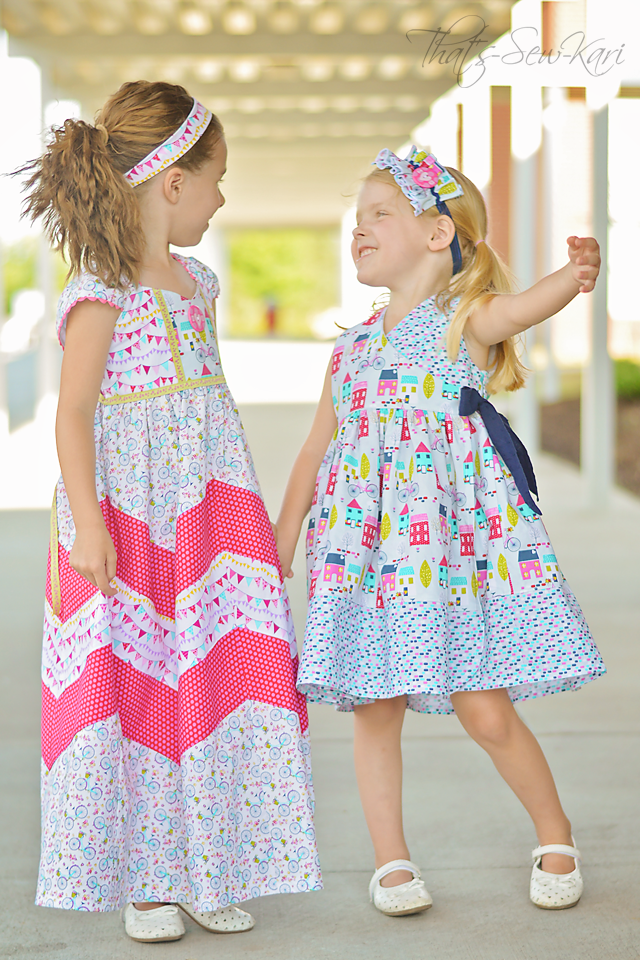
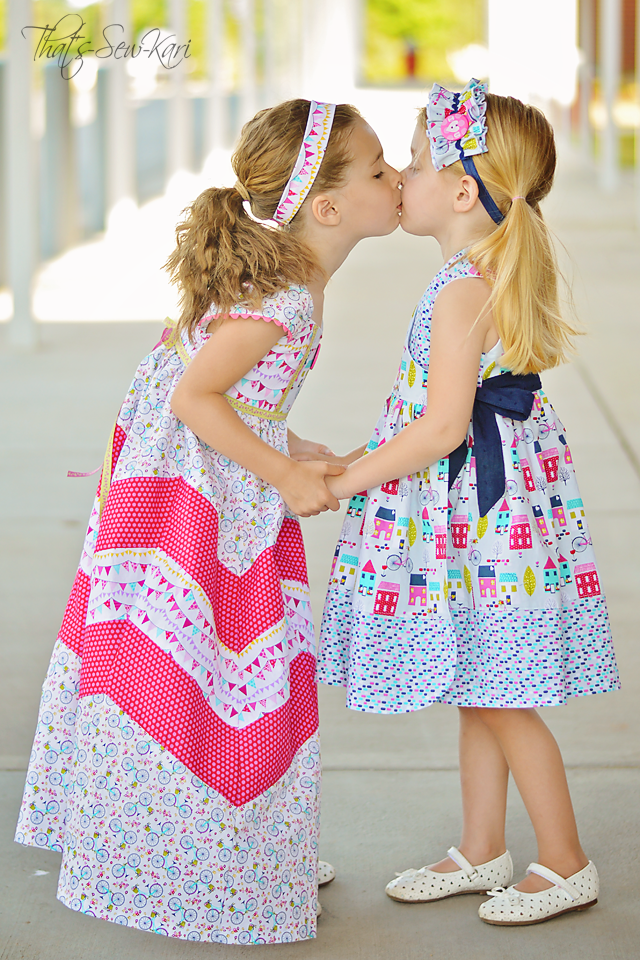
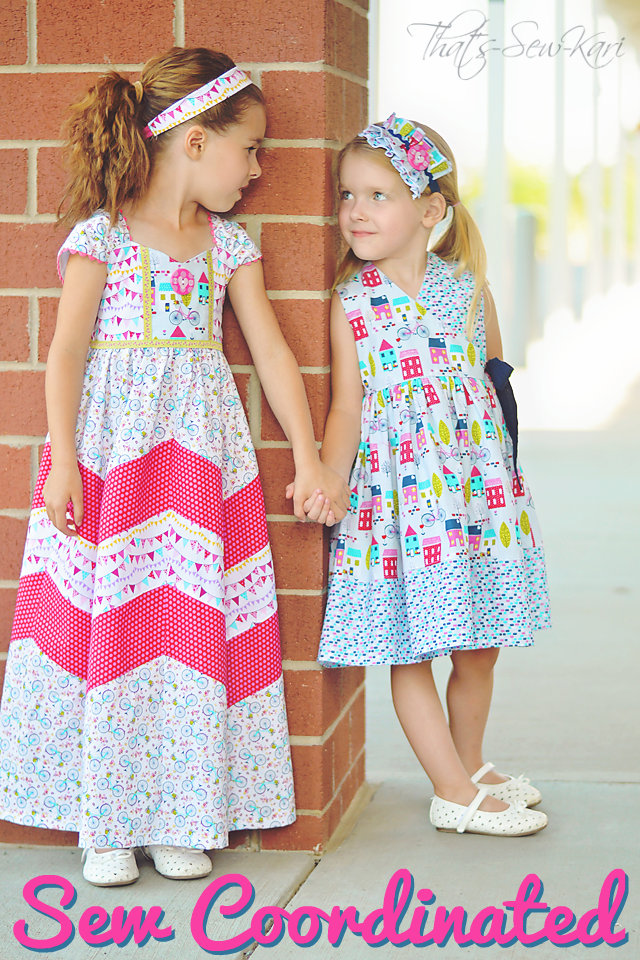
My 6 year old has been begging me for a maxi dress.  I used the Annabelle Dress by Violette Fields Threads to fulfill her request.  Its chevron-pieced skirt was perfect for showcasing several prints.  Although she's 6, she's small for her age so I made her the size 4.  It's a good thing she's not any taller because the size 4 was the biggest I could squeeze out the Bicycle fabric.


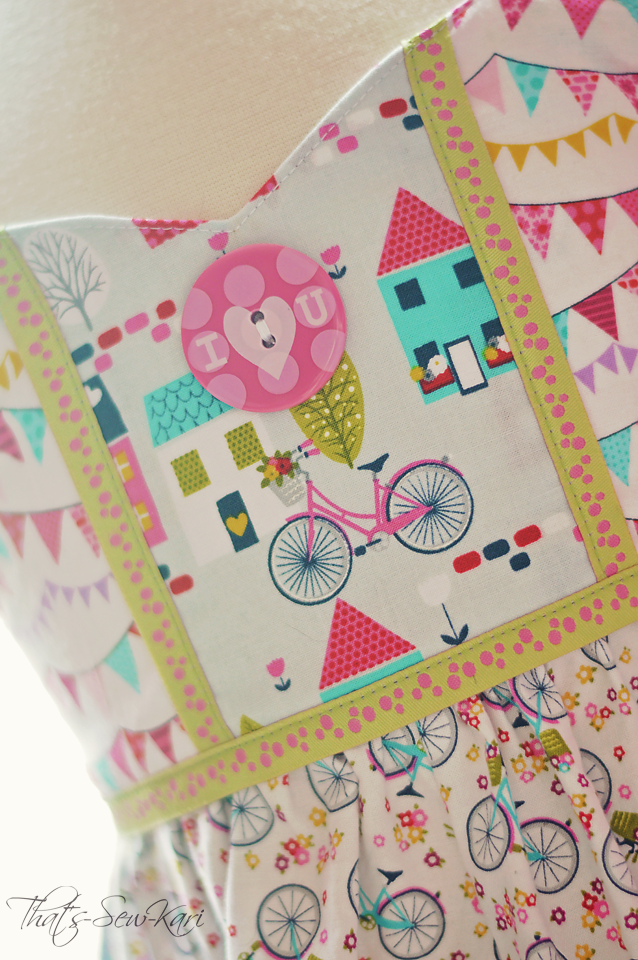
I put the ribbon to good use as bodice detailing and a sash.  One of the buttons takes center stage at the top of the bodice.  I used 3 main prints in the Annabelle.  I used the Bicycle, Dots, and Pennants.  For the center of the bodice, I added a small section of the Houses.   A smidge of ric rac peeks out from her sleeves to bring the hot pink upward.  Lastly, I used a small scrap of the Pennants and a bit of hot pink FOE (fold-over-elastic) for a matching headband!


LOVE is a complete understatement for her feelings on this dress!  I chose these 3 prints for her because pink is her favorite color and being a brunette, these colors compliment her.


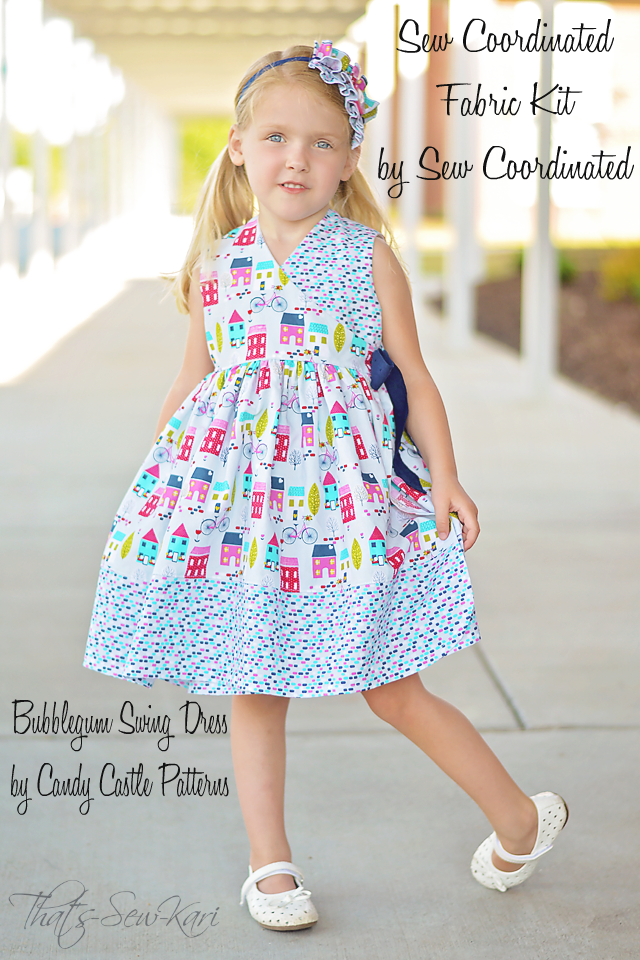
My 4 year old loves her twirly dresses.  I had her "go shopping" in her closet to show me what style dress she wanted me to sew.  She came back with the Bubblegum Swing Dress by Candy Castle Patterns which is an add-on to the ever-popular Bubblegum Dress.  The add-on changes the original a-line skirt to a super-twirly skirt.  Her original Bubblegum Swing is getting a bit small on her so it was time to sew up the next size.


For this dress, I chose the Houses fabric and used the Bricks as accent.  She's blonde and blue-eyed and looks fabulous in turquoises and blues.  I made a small change to the pattern and used the width of the sash from the Peppermint Swirl Dress for my wrap-around ties for a bit bigger of a statement.  For this, I chose a navy dotted swiss in my remnant box to bring out the navy of some of the rooftops and the navy in the Bricks.  I used the Sweet Grace Ruffled Headband from Snickerdoodle Stew for One Thimble (Issue 5) for her headband.  It was the perfect place to showcase her La Moda button!


~~~ Best Sisters Forever ~~~


Thank you so much, Sew Coordinated for letting me join in the fun this month!  My girls love their dresses and being sew coordinated!  I love the fact that the kit comes with plenty of fabric that neither girl gets left out.   I'm excited to see what patterns everyone else chooses to sew with their kits!

Meanwhile, I be at my {new} machine, staying hydrated now that I don't have to worry about my drink getting in the way on my sewing table.

Seriously, sign up!  You won't be disappointed!

Look below for Frequently Asked Questions!


Sew Coordinated FAQ:


  • What is Sew Coordinated? 
Sew Coordinated is a monthly kit club! Each month, there will be a brand new kit debuting with coordinating fabrics, trims, and other goodies!These kits are guaranteed to be priced lower than if you would buy all the products separately at retail prices. I am SO excited at what I have to bring you!
  • How much does it cost? 
Sew Coordinated costs $50/month shipped domestically. It will ship in a flat rate padded envelope with free delivery confirmation and insurance. If you are international, it will be $45/month + the cost of a flat rate envelope to you. If you are a member of Mama Made and Beautiful (my fabric retail shop), I am happy to include it with one of your packages!
  • How does it work? 
You can purchase Sew Coordinated as a membership subscription or on a monthly basis. If you choose to purchase on a monthly basis, you do run the risk of the kits being sold out. If you purchase a subscription, you are guaranteed the kit. Subscriptions run for a 6 month time period.
  • What is the cost of being a Sew Coordinated kit club member? 
To become a Sew Coordinated kit club member, you will be charged an initial $10 membership fee. You will be required to pay this fee within 24 hours. After paying the $10 fee, I will send you a link to subscribe to 6 months of Sew Coordinated. You will be automatically billed $50/month for the next 6 months starting immediately.
  • Why is it worth it to become a kit club member?? 
---- You will be guaranteed to get a kit! The first few months of the kit have already been purchased and I only have what I have so if you become a kit club member, you are guaranteed to get the kit during your subscription period! Your kits will come before anyone purchasing month by month!
---- You will get an extra half yard of coordinating solid fabric in your kit every month! The total retail value of this is around $30 for a 6 month subscription!
---- You will have first dibs at all sales, extra kit offerings, and insider info!
---- Because Sew Coordinated is going to be the next big thing and you want in!! There will only be a limited number of kit club subscriptions and once they are filled, you will be added to a waiting list for a subscription!


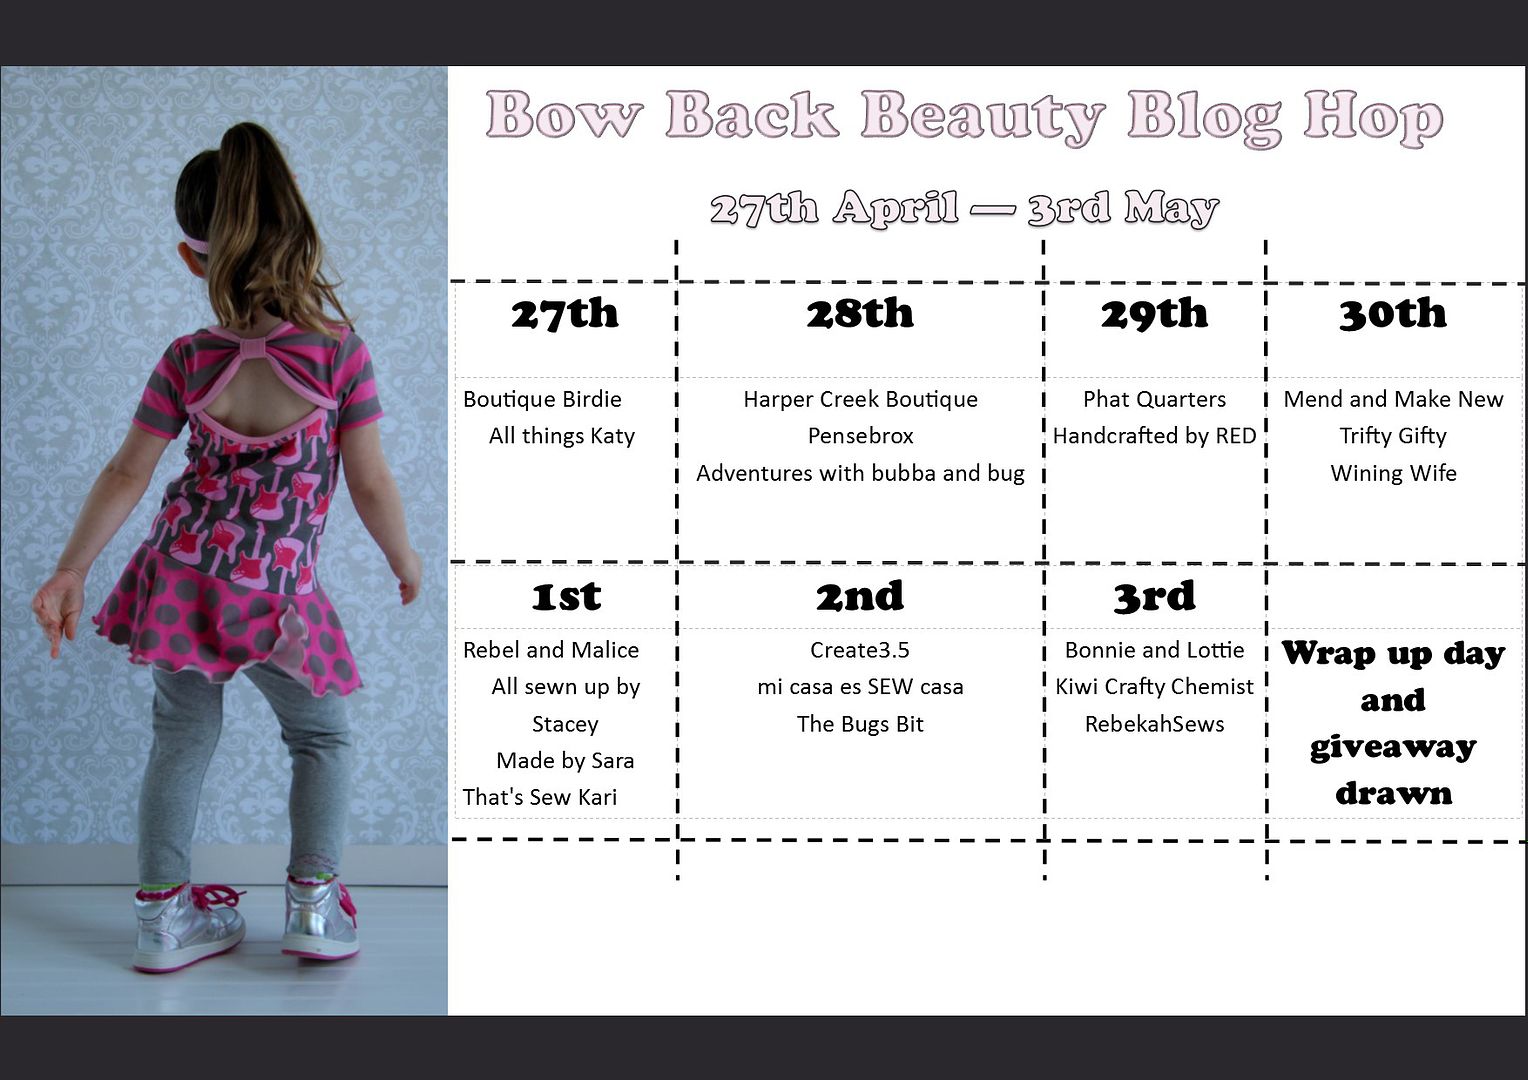
PATTERN TOUR: Bow Back Beauty by Little Kiwis Closet


I am so excited to be on Blog Hop with Little Kiwis Closet -- sharing my take on the Bow Back Beauty and I'm not talking about my daughter (see what I did there?! Haha).


The Bow Back Beauty is a jam-packed top/dress pattern that you could honestly outfit an entire gaggle of girls ranging in ages newborn through 12 without repeating the same choices.


Here's a run-down of what's included:
  • Sizes NB - 12y
  • 2 Bodice Lengths: Natural Waist and Hip Length 
  • 2 Back Options: Bow or Plain
  • Onesie Option (though 4y): Plain, Bow, or Added Skirt
  • 4 Sleeve Lengths: Sleeveless, Short, Short with Cuff, Long Sleeve
  • 5 Skirt Options: Peplum, Dress, Hi-lo, Double Peplum, Peplum + Skirt
  • Pages to Print: 44 total (TIP: Follow the included print chart to print only the pages you need)
  • Tutorial Style: Thorough instructions, broken into steps with actual color photos - easy to follow
  • Charts included: Fabric (metric and imperial). Printing guide. Sizing chart, Binding cutting chart (metric and imperial)
  • Designed for KNIT ONLY


Here are the options I chose to sew:

  • Bodice - Hip Length
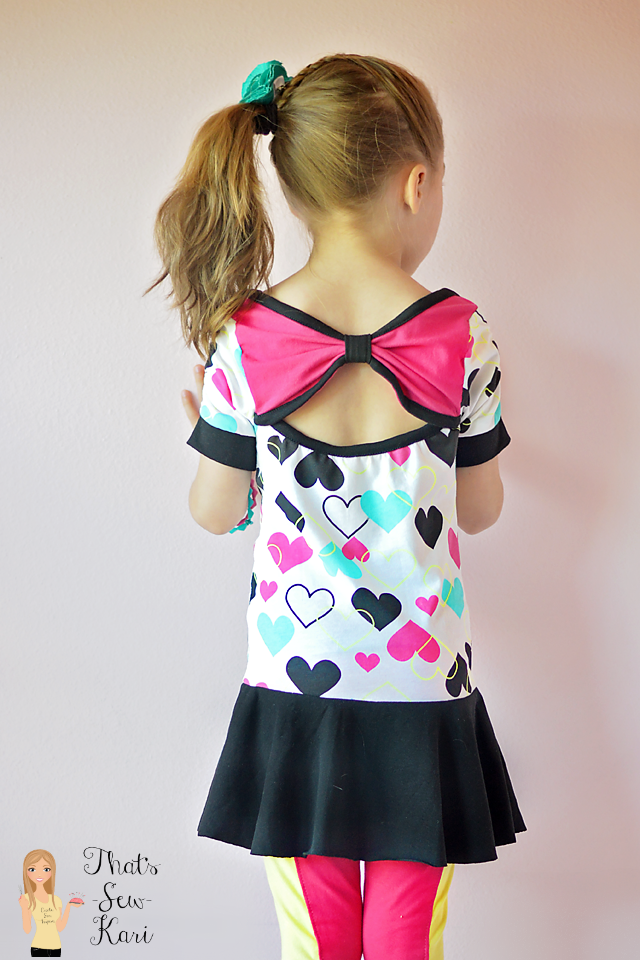
  • Back - BOW (of course ;) )
  • Sleeve - Short with Cuff
  • Skirt - Peplum

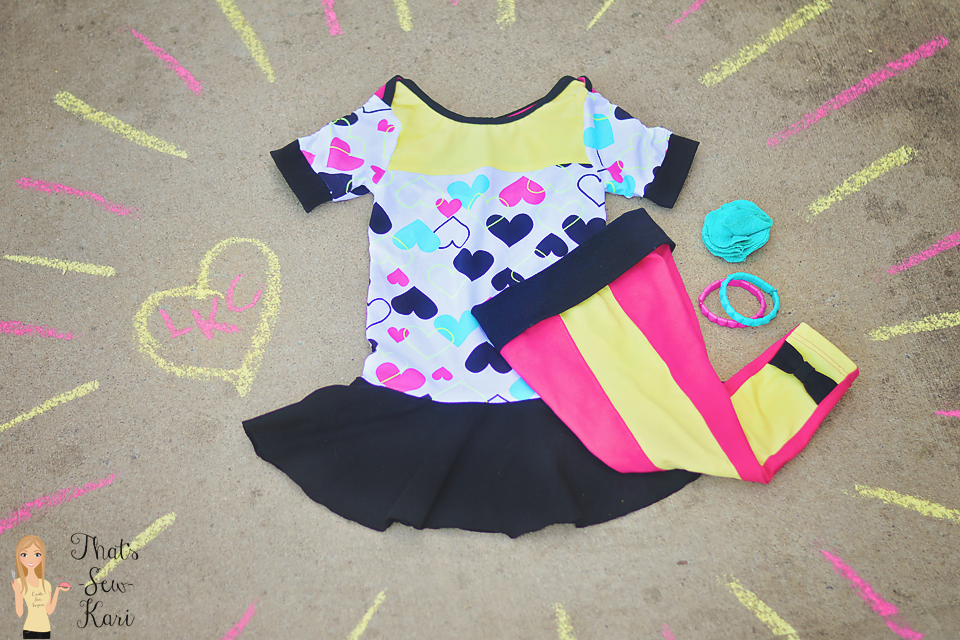
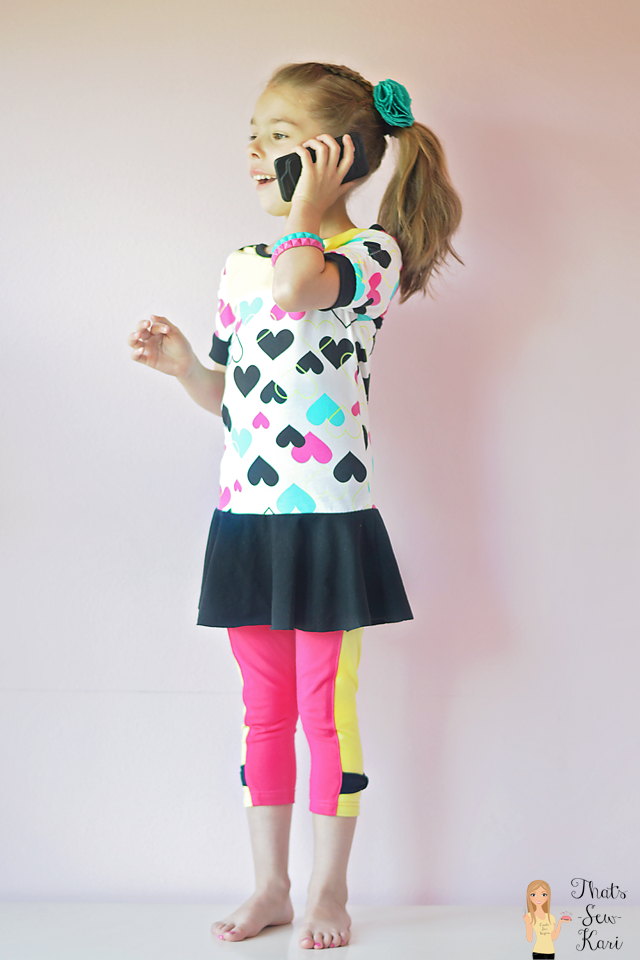
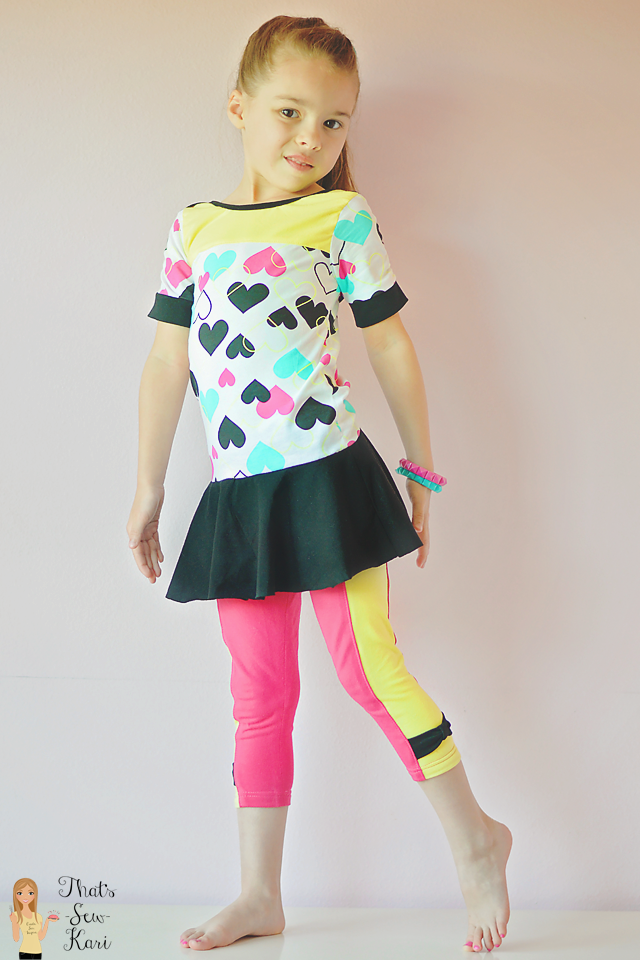
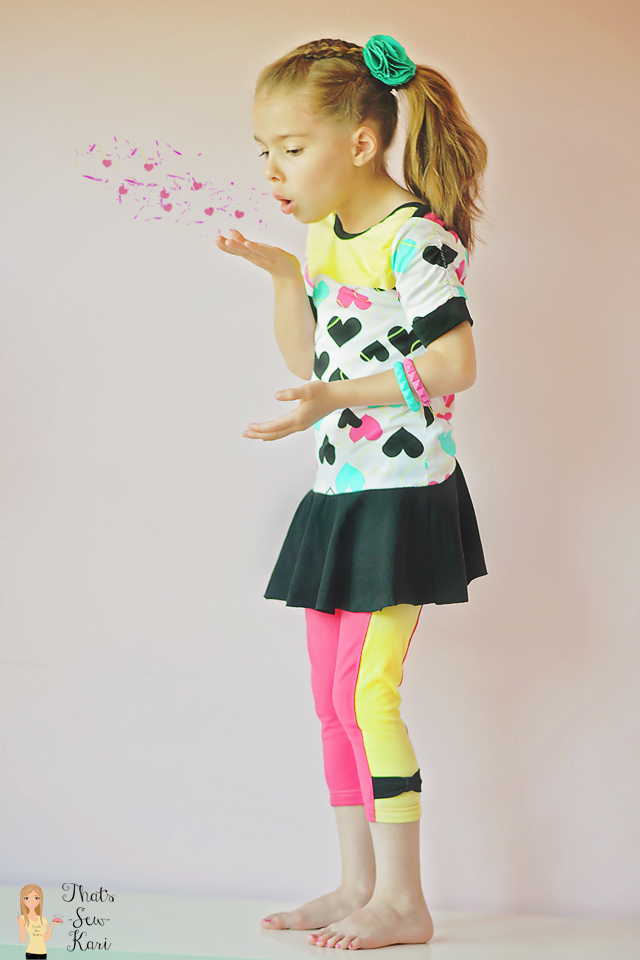
My daughter is in Kindergarten and as much I wanted to sew her a sleeveless version, she would not be allowed to wear it to school as it would not follow dress code.  I figured the short sleeve with a cuff would get the most wear year round.  This outfit is actually made from 4 different women's XL tank tops from my local Walmart.  I was shopping one day and saw the hearts tank top and knew it was perfect for my daughter!

I decided to pair the Skinny Legs Leggings also by Little Kiwis Closet (reviewed HERE) with the Bow Back Beauty to complete the outfit.  Because I was upcycling tank tops, I didn't have the height needed to add the ruched panel so I modified it to a non-ruched one and added a little bow at the bottom for extra detail.


My daughter is very slim for her age (age 6) and actually measures about a size 2 in her chest (she's a whopping 35 lbs fully clothed...LOL).  Because of her height, I opted to sew her the size 4 straight and not worry about slimming each piece for her chest.  It's a tad loose, but I think the fit is very comfortable.


I'd like to think that this colorblocking was on purpose, but I realized after I cut out the front from my Walmart tank, that the imprinted sizing tag was smack dab at the top the of the neck -- whoops!  Don't cut at 1am ;)  But, colorblocking saves lots of cutting mishaps!


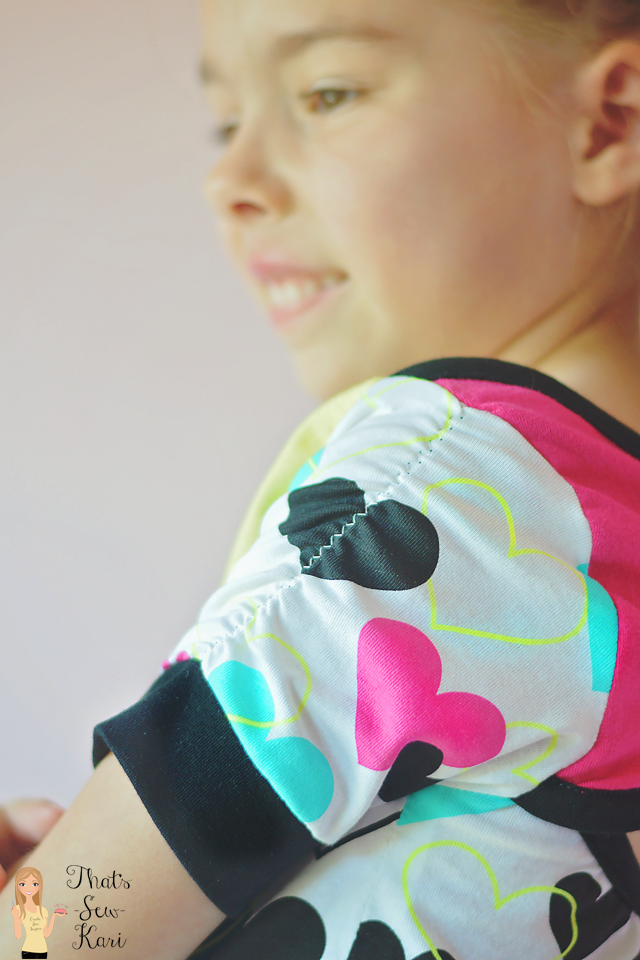
I also added some ruching (with clear elastic) to her sleeves just because I love how it looks (not included in the pattern).

_____________________________________


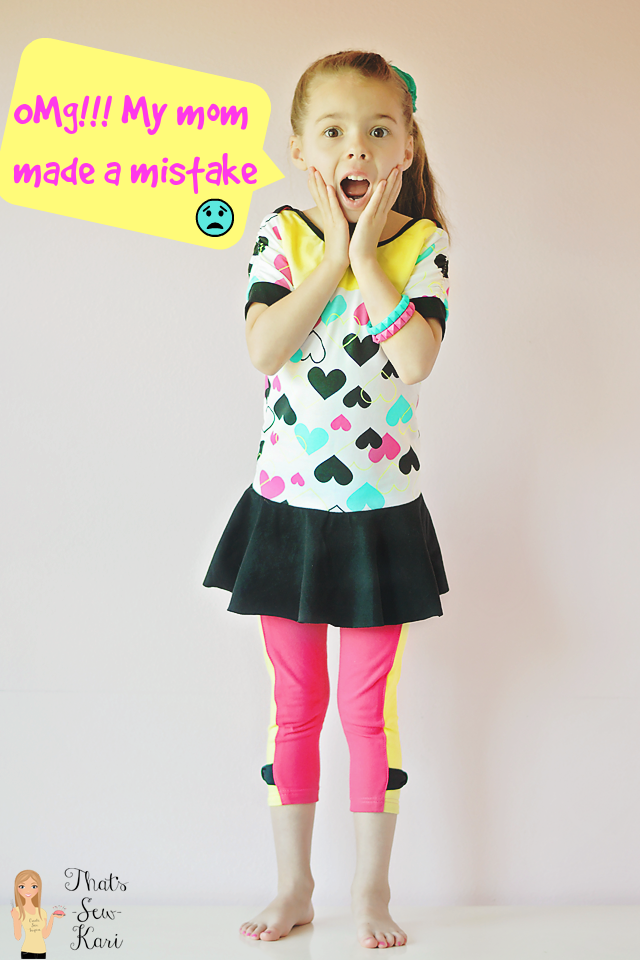
BREAKING NEWS: While I was in the midst of typing this post, I realized that I have actually made a mistake in construction.  ACK!!!! The horror!!!


So I'm going to take my mistake and turn it into a teachable moment so you make sure you do NOT make the same mistake.  I blame my mistake on late night sewing, coupled with trying to read the instructions on my tiny phone (in order to give my computer a break).  

In step 3, I did not overlap my bow and front bodice all the way at the shoulder.  I completely missed the fact that the bow piece had a mark as well so my neck is wider than it should be.  While the end result doesn't look horrible, it was not intended and I feel terrible that I made such a big mistake.

So, that explains why my bow is looser :)  I can't wait to sew another one -- properly.


My daughter clearly loves her new outfit ... mistakes and all.  Of course, in her eyes, it's perfect because I made it for her!

P.S. In case you were wondering, I left my skirt unhemmed :)

Important Links: 
Bow Back Beauty Pattern
(Discounted for the duration of this tour - no code needed)

Join other LKC fans for help and inspiration


How about a chance to win a copy of this pattern? 

Enter below and make a wish.... you may just be the lucky winner!


Please visit the rest of the stops for more inspiration!


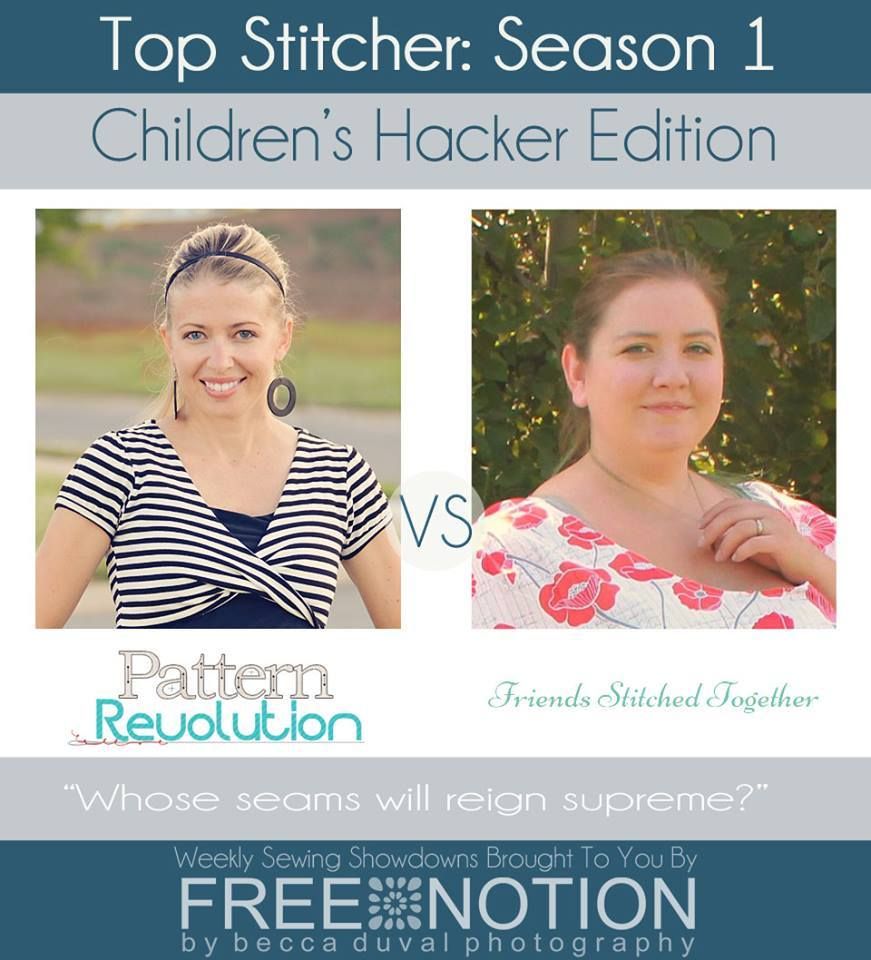
TOP STITCHER: Season 1 -- April Showers Bring May Flowers


Yay!!! I am so excited to share my Top Stitcher: Season 1 entry with you today!!  I love hacking patterns to get exactly what I want and most of the time, it's pretty painless.

This was not one of those painless times.

But, as Tim Gunn (Project Runway) would say - Make it work.  As the deadline was looming, I was actually near tears -- I had no outfit and everything I was trying was ending in disaster.  For real.

Broken needles, needle pricks, losing pieces. sooooo much seam ripping.... you name it, I likely experienced it. HA!

But I foraged through and here I am.  So let's dive in!

If you missed it, I was given a prompt by the series founder (Becca DuVal of Free Notion) which gave us a foundation to build upon.

Prompt: April Showers

"April Showers bring May flowers" - but why wait a month for sunshine and blooming gardens to look fabulous?? Your child will be the most fashionable puddle-jumper there is when you hack two or more apparel* patterns to create a full rainy day ensemble. *non-outerwear patterns only - let's really challenge ourselves! 

Remember! As a Hacker contestant, your objective is to find the untapped potential in a pattern, and use it as your blank canvas to paint your masterpiece upon.


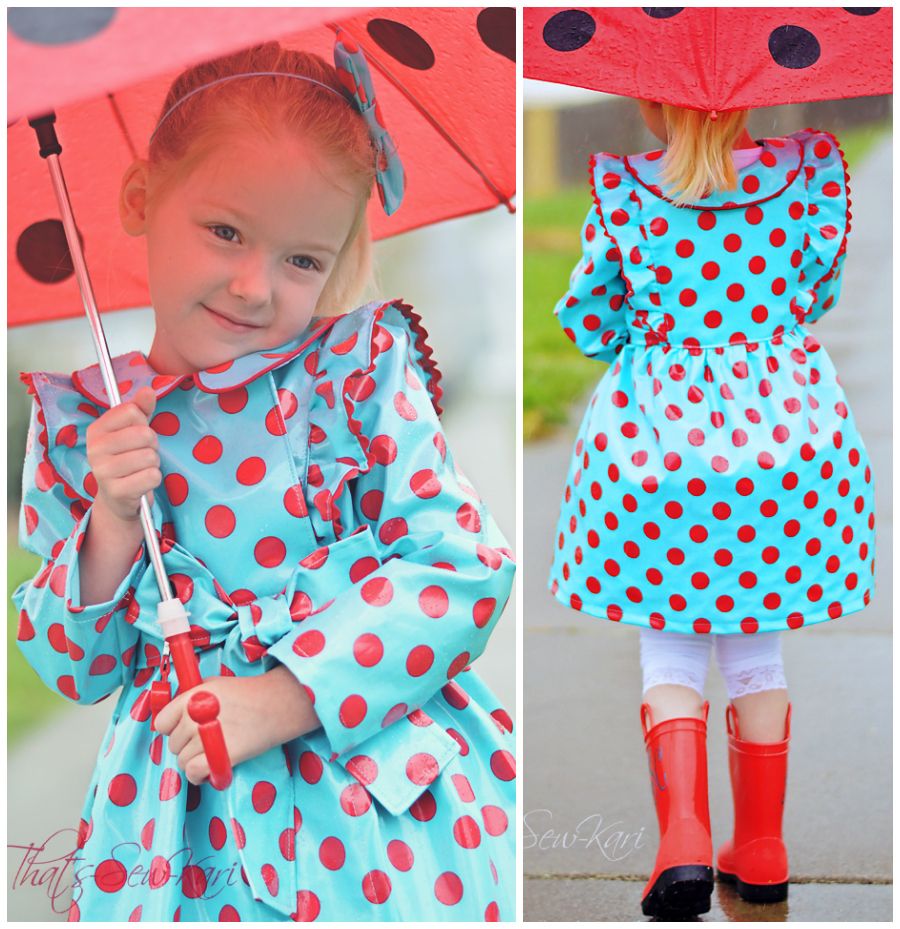
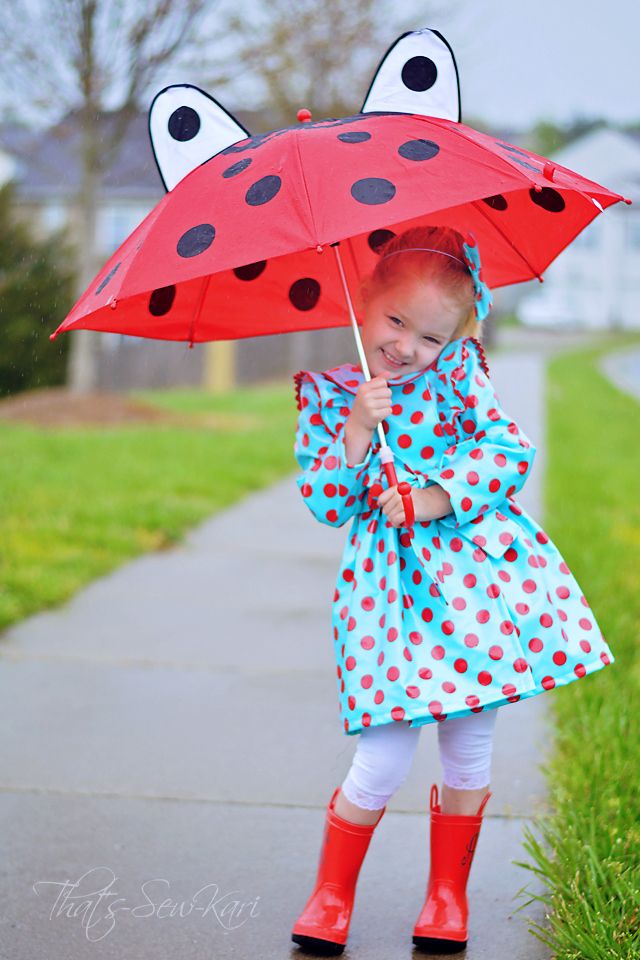
 This coat, surprisingly, came together exactly how I envisioned it.  Two years ago, I had the notion I'd sew the girls raincoats .. lol (I was apparently extremely confident/gung ho as a brand new seamstress) and well, there sat the laminate, rolled up, in a box, in the corner of my bedroom.  The laminate (Michael Miller Wide Laminate Quarter Dot Aqua) is sadly out of print. but finally got used!!!

Since I couldn't use any outerwear patterns, I had to get creative.  As I was perusing Pinterest, I came across this doll and knew that I had to make this coat!!  The structure of it, reminded me of both the Georgia Vintage (Cottage Mama) and Best Dressed Girl (Little Lizard King).


From the Georgia Vintage, I used the bodice, bodice overlay and the collar (in a size 3 which is larger than she measures, but a coat is meant to be a bit oversized).  Of course, I had to alter the pieces a bit -- I eliminated the buttons in the back and added an additional bodice overlay in its place.  I had to create an overlap in the front.  It's currently about a 2" overlap, but I purposely left the buttons off the the coat can grow with my daughter or if she has extra layers on in the fall.  As she gets bigger, I can lessen the overlap as needed.  I also rounded the collar a bit on the end so I could trim it in piping and also added a portion in the back so it would be one piece.

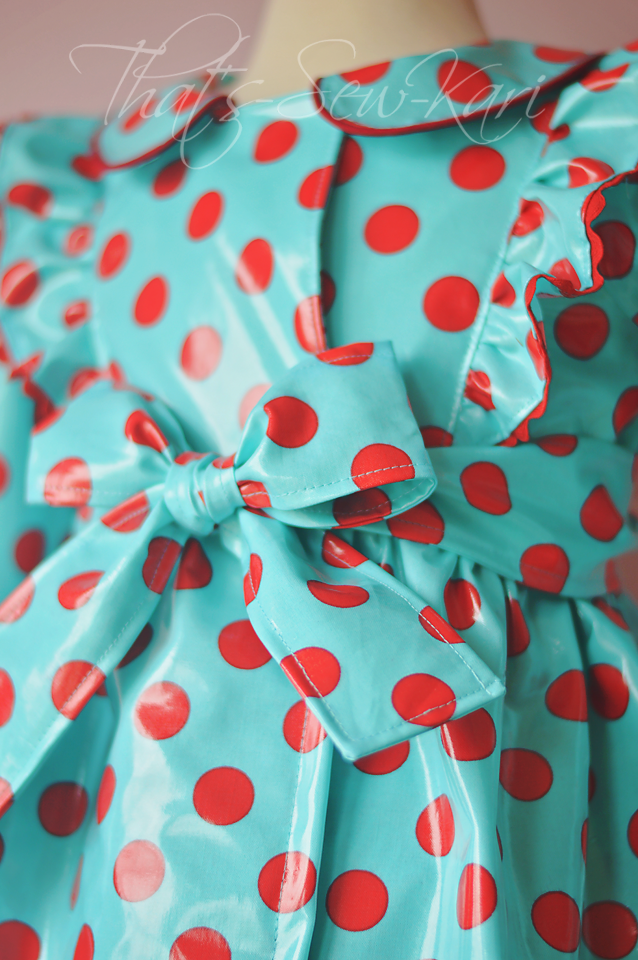
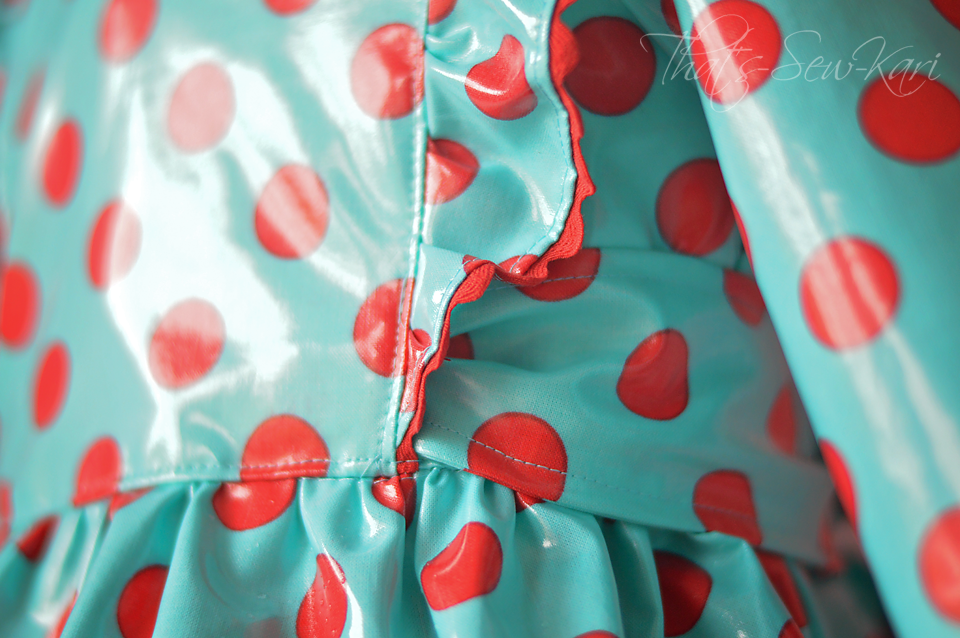
From the Best Dressed Girl, I needed sleeves, of course and the bodice ruffle and center side sashes were perfect!  I did widen the sleeves just slightly because I wanted them to be slightly loose with a slight gather right at the cap.  I sewed the belt right into the seams in the back where the ruffle comes down toward the waist.

Belt sewn into the ruffle seams

Of course, I had to add some details.... am I right?!


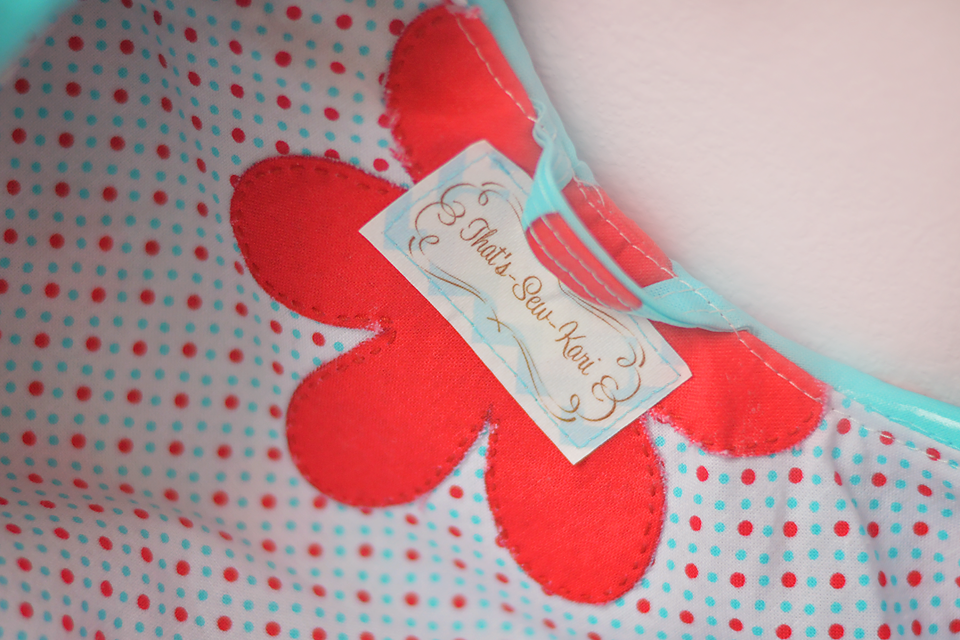
My daughter hangs her coat up at preschool so I added a little hanging loop.  I also added in my shop label and hand sewed an appliqued daisy (looks a bit nicer than her last name written quickly in Sharpie.)

I opted to line only the bodice portion.  In the week leading up to this, we had temps in the 80s already and I knew a fully lined coat would get super hot.


My plan for this portion of my entry didn't start out like this..... at all.  But, my original concept was not panning out, despite many hours of double row topstitching, ripping out stitches, etc.   The problem was, the "May Flowers" portion was this OOP Michael Miller Plain Jane Lil Daisy which I had originally ordered to make myself a purse.  Like a ninny, I ordered just 1/2 yard (2 years ago) and I had already cut into it for my original outfit.

In the end, I ended up hacking the Girls Ruffle Flip Skirt by Pattern Emporium (part of my original plan) and the Everyday Play Skirt by Little Lizard King.

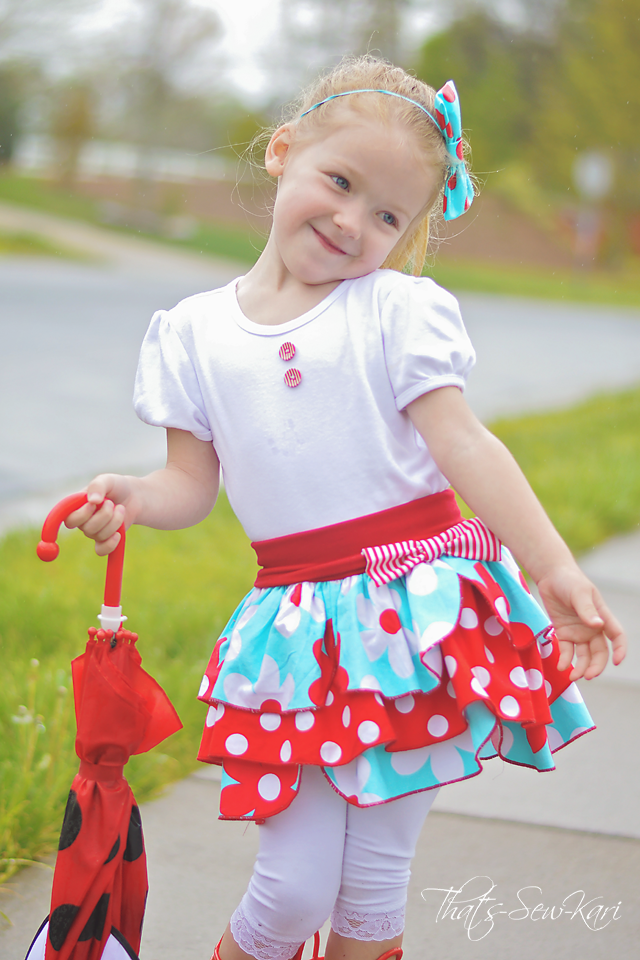
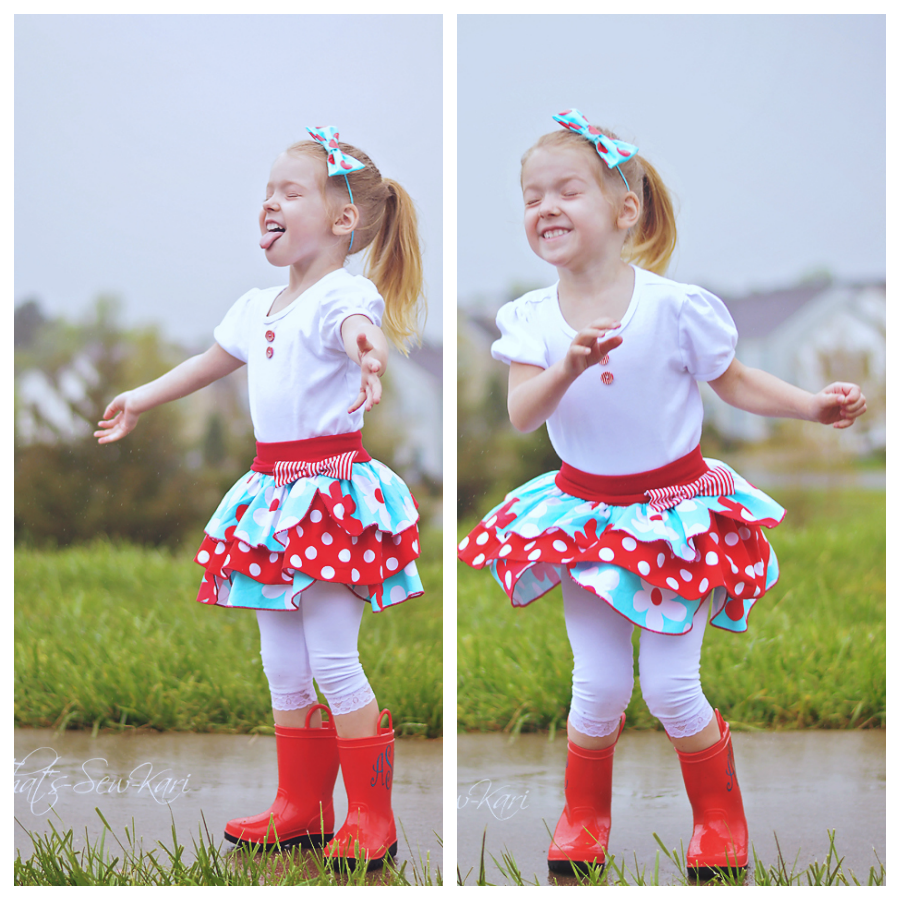
I originally had just the top two tiers (using the tiers from the Girls Ruffle Flip Skirt), but added a 3rd tier with my leftover scraps to add length..  I also lengthened the waist of the Everyday Play Skirt and then folded it over in styling.  To add to the flower theme, I added cutouts to the aqua layers to mimic daisy petals.  Gathering 3 layers onto a knit waistband proved to be a bit of a challenge... especially when you realized halfway through attaching that I was sewing it inside out.  Whoops!

First time I actually let her play in the rain.... too bad she didn't enjoy herself. HA!

I had plans to also sew a tee, refashion an umbrella, add matching undies.... you know, the whole nine yards but sadly spent so much time working on my original plan that I ran out of time.  So,  in order to make the deadline, I grabbed a pair of leggings and a plain white tee, added a couple matching buttons and called it complete.  I also sewed up a couple of quick bows included in the Candy Castle Princess Dress Pattern.

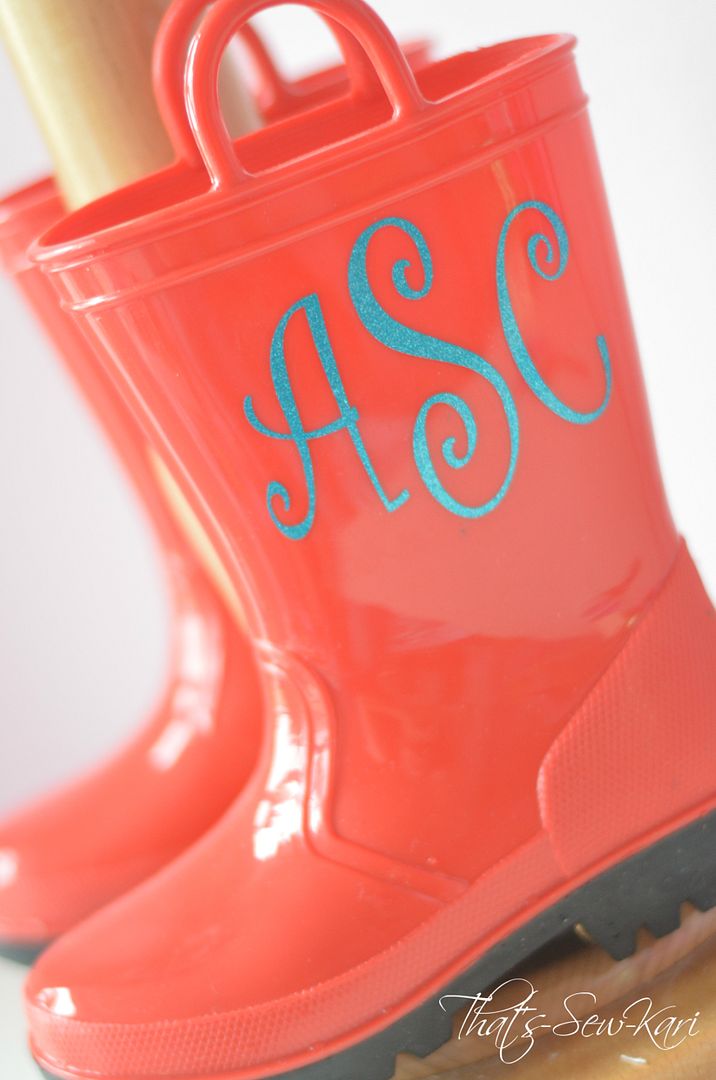
No rain outfit is complete without an umbrella and rain boots.  I found an adorable ladybug umbrella at our local children's resale shop and scored boots from KMart for a great price.  I ordered vinyl monograms in an aqua glitter from Etsy (CaitlynMcDuffie's shop) --- so adorable.  Mother Nature smiled down on me and gave me rain exactly long enough for a photo shoot!


If you haven't yet, please, stop over at Pattern Revolution and score my entry -- it's a star-rating system (5 stars is the highest you can earn) and is evaluated in Technique, Creativity and Presentation.  While you're there, check out my competitor Amy's look!!!


Leave a comment and tell me which part is your favorite!

Thanks for stopping by!!!


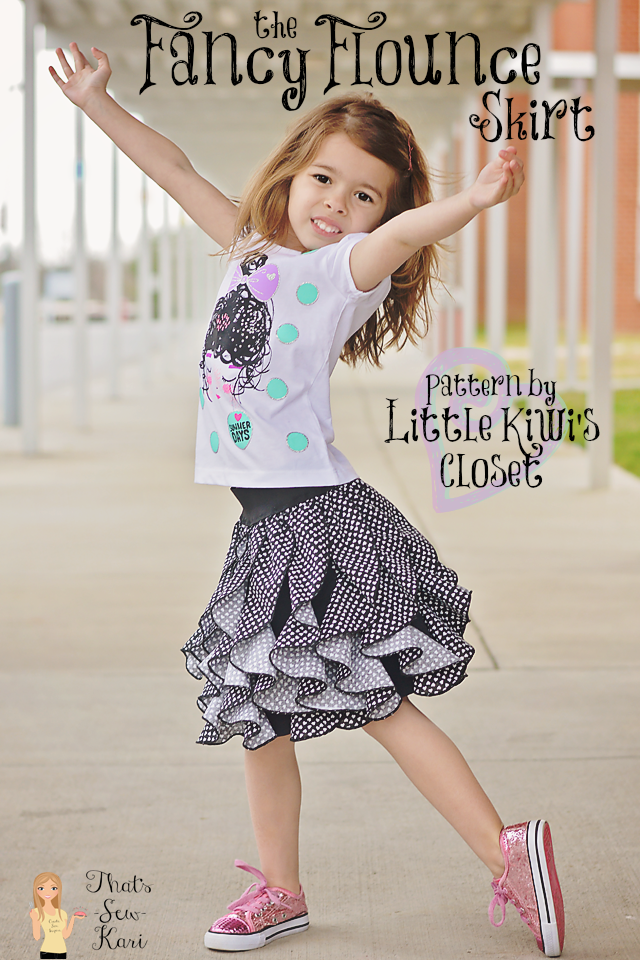
PATTERN REVIEW: The Fancy Flounce Skirt by Little Kiwi's Closet


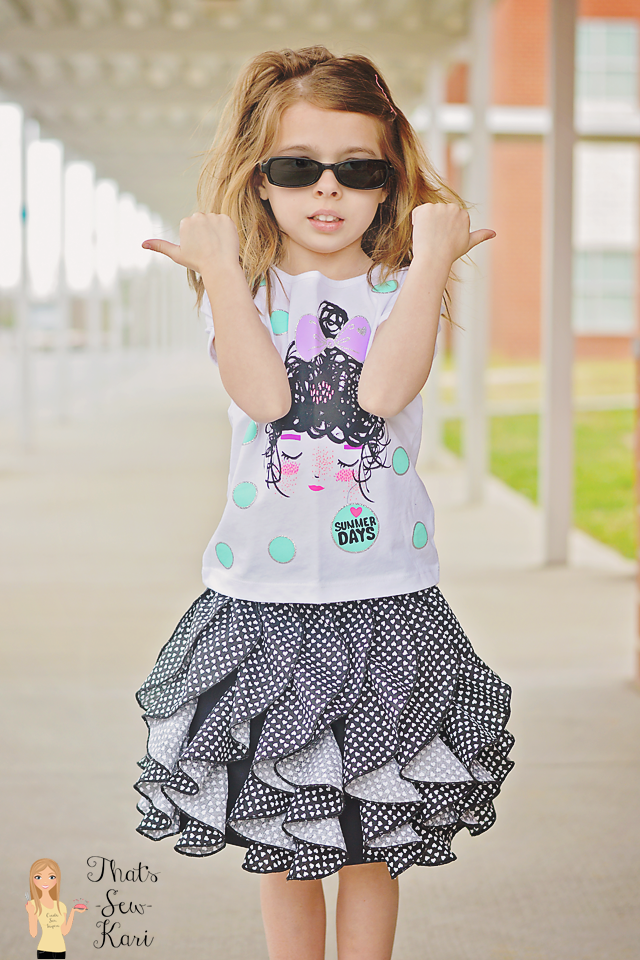
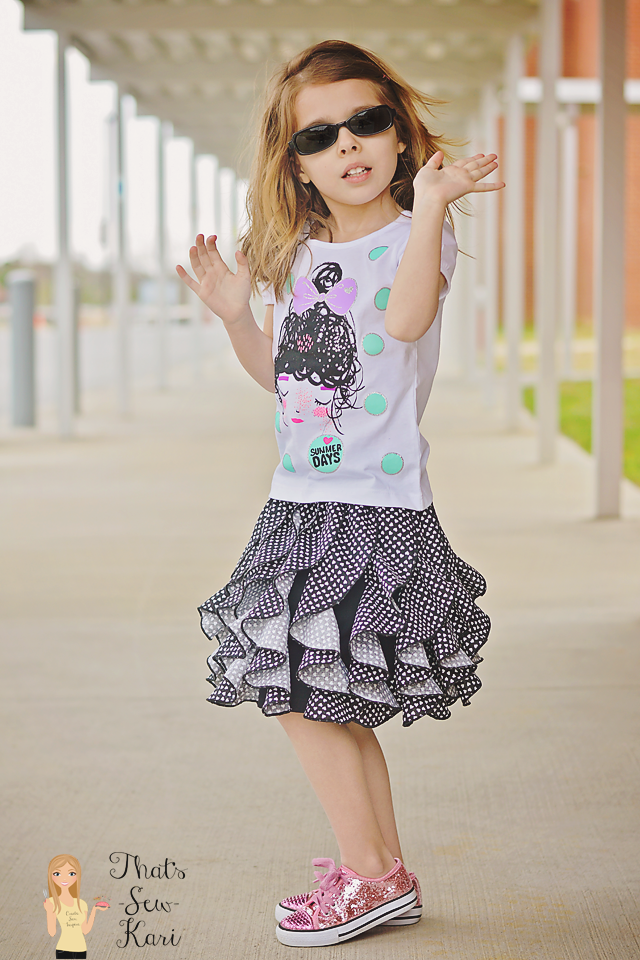
By now, you may know both of my daughters are completely skirt-obsessed, and I have to admit, I love making them!  When I got the opportunity to review the Fancy Flounce Skirt by Little Kiwi's Closet, I couldn't resist!  I knew my daughters would love it and I just had to see how it was made.

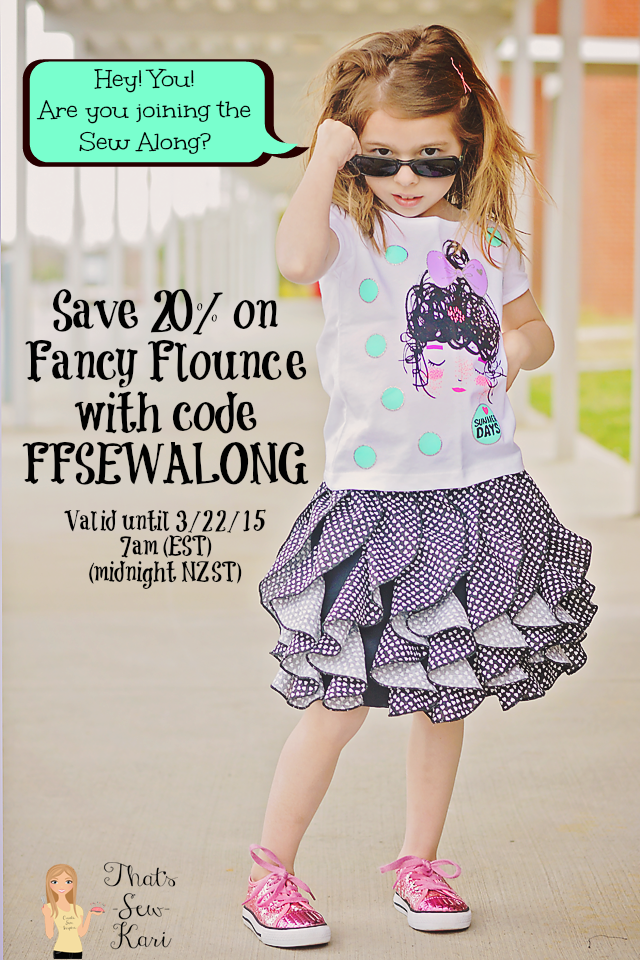
The Fancy Flounce is quite flouncy -- 16 to be exact!  It's a super fun skirt with an elastic/knit waistband that swishes when you walk .  And construction is easier than you think!


Pattern Details
  • Sizes 6/12m - 12 Girls
  • Pattern pieces: 2 pieces, nested in size categories to reduce pages, minimal color ink usage
  • Tutorial style: Step-by-step with real color photos --- very easy to follow along!
  • Charts/diagrams included: Yardage, pattern layout/print guide, sizing chart, cutting chart (waistband and lining), cutting layout diagram
  • Pattern level: Adventurous beginner
  • REQUIRED: Serger with rolled hem feature

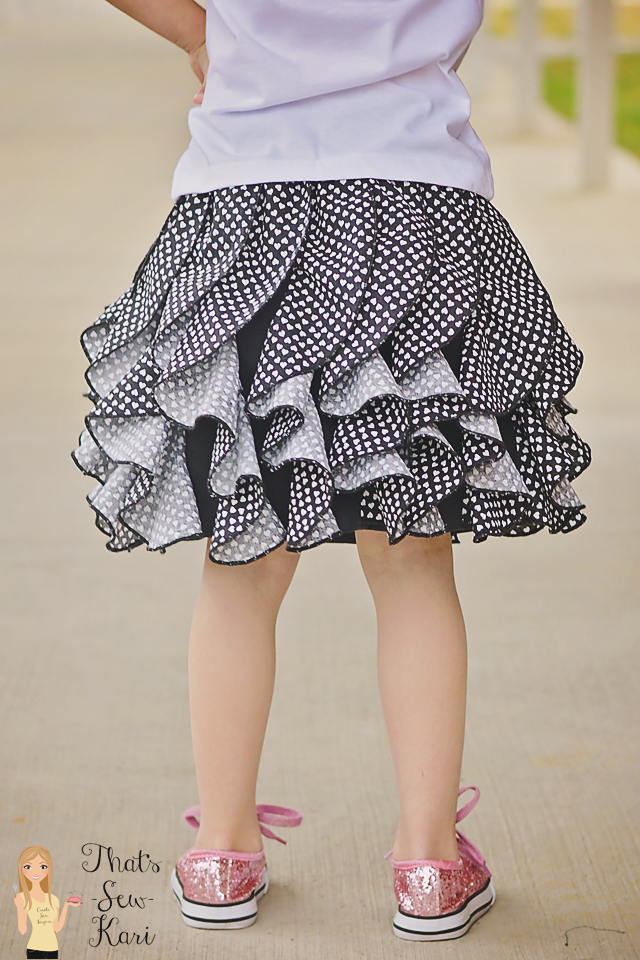
The back looks just like the front.

As I mentioned above, construction is easier than you think.  It honestly, gets a bit rhythmic as you repeat a few processes 16 times!  This skirt has been on my to-do list for a few weeks now and honestly, seemed kind of daunting.  But this morning, with my looming deadline of this post, it was crunch time!  Yep, I cut this skirt out this morning, sewed it up, and was ready for pictures after school all while keeping my 4 year old entertained (which is no easy task... haha). So I cut, I roll hemmed, and I connected 16 times in a row and before I knew it, I was ready to cut my lining!  Although her waist measurement put her in a size 2 (she almost 6... but sooooo slim), I opted for the wide elastic waist option for sizes 5 and up.

There are a few tips/recommendations I have: 1) I'd use the same fabric for both the flounces and connector pieces. (Sorry, I'm OCD..LOL)  2) I'd use fabric that is yarn-dyed so it's the same color on the backside. (again, OCD)  3) I found it easier to hug the curve on the rolled hem if I kept my knife engaged. 4) I starched my flounces and connector pieces and I think it made them stiffer than intended so skip the starch!

Overall, it was faster than I thought to make this skirt, my daughter loves it and can't wait to wear it to school tomorrow. The tutorial was super easy to follow too!  If it's cold where you live, it'd be adorable over the Skinny Legs Leggings (reviewed HERE)  


Guess what?!  There just so happens to be a Sew Along starting up for the Fancy Flounce Skirt in the Little Kiwi's Closet Pattern Group.  It starts the 22nd and runs through the 28th -- join the group for full details!!  And snag the code above to save 20%, of course.

Important links


See ya!!


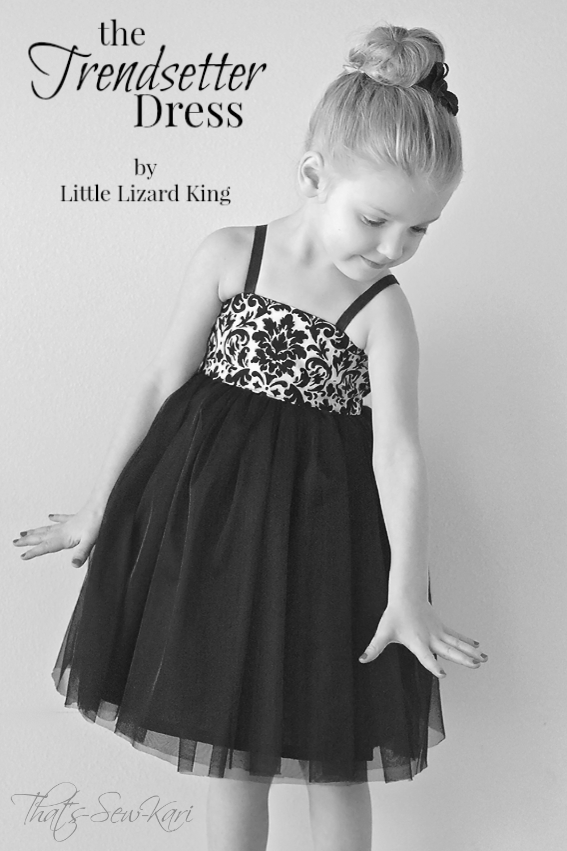
PATTERN TEST: The Trendsetter Dress by Little Lizard King

Bodice: Simple | Straps: Straight | Skirt: Fancy with Lining

Swoon.

Have you ever looked at a pattern and known exactly which fabrics you'd use -- within mere seconds of seeing it?  Picking fabrics usually takes me f-o-r-e-v-e-r until I saw...

 The Trendsetter Dress by Little Lizard King

I mean, really, this bodice was practically screaming for the scraps of my black and white damask, leftover from my Jenny Dress by Sis Boom (read about it here)!

Bodice: Simple | Straps: Straight | Skirt: Fancy with Lining

Pattern Details:

  • Sizes 6m - 8, plus doll-sized!
  • Bodice Options: Gathered or Simple
  • Strap Options: Straight, Straight with Flutters or Criss Cross
  • Skirt Options: Fancy with Underskirt & Lace, Fancy with Lining, Simple with Underskirt, Simple
  • Pattern Pieces: NONE to print, all cuts are in measurement charts
  • Tutorial Style: Easy to follow, step-by-step directions with real photos
  • Charts included: Size/Finished Measurements, Yardage, and Cutting Charts
  • Pattern Level: Beginner


Bodice: Simple | Straps: Straight | Skirt: Fancy with Lining

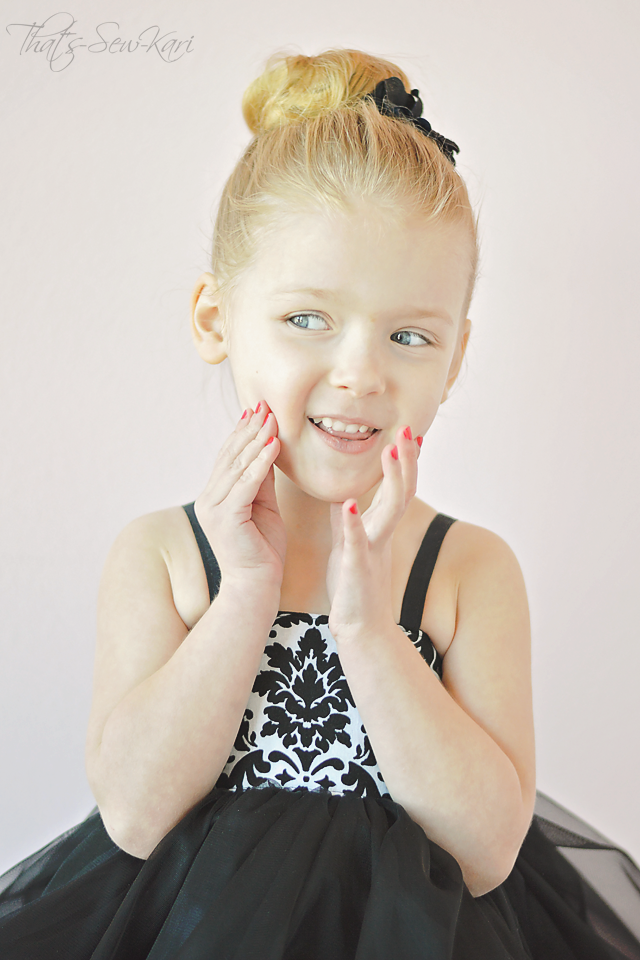
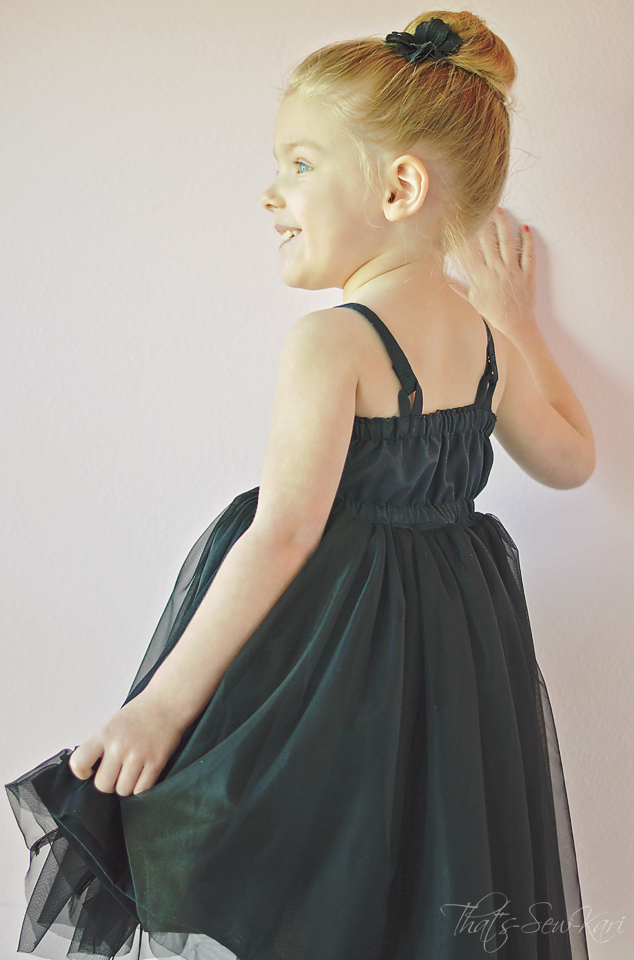
Every little girl needs a fancy dress "just because", right?  Haha!  She had fun getting all dolled up, including a little manicure while her big sis was at school.

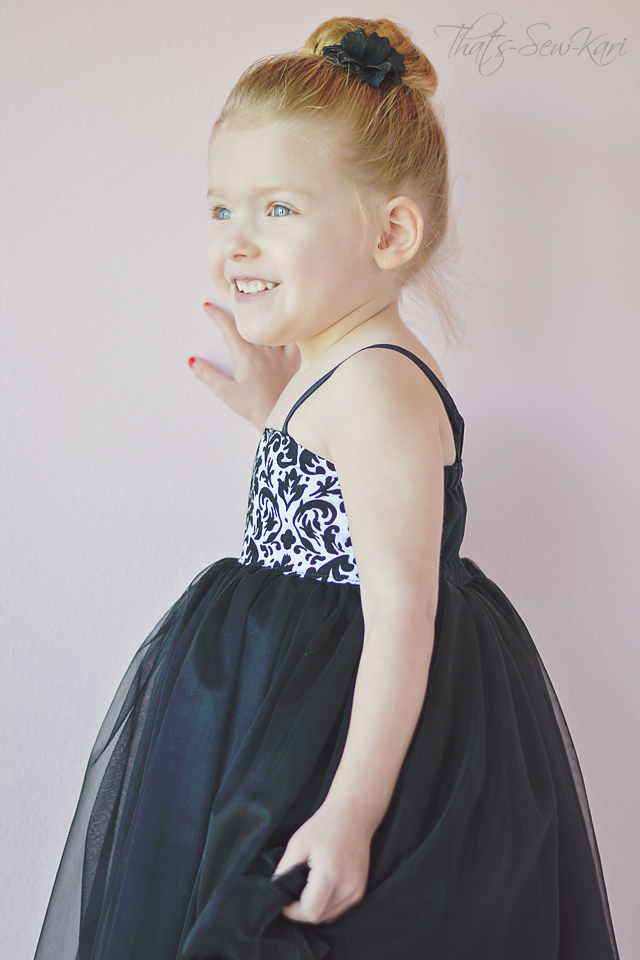
This pattern has so many options, but along with my fabric choice, I had a vision.  I knew I wanted to showcase the print of the damask on the bodice so I carefully "fussy cut" the front, paying close attention to seam allowances so my print would be centered just right.  Because the back is elasticized, I opted for a solid black back.  The straps are looped in the back and close with a small sewn snap.  The skirt portion is the Fancy with Lining option with two layers of nylon chiffon and has an underskirt of black quilter's cotton.

Bodice: Simple | Straps: Straight | Skirt: Fancy with Lining

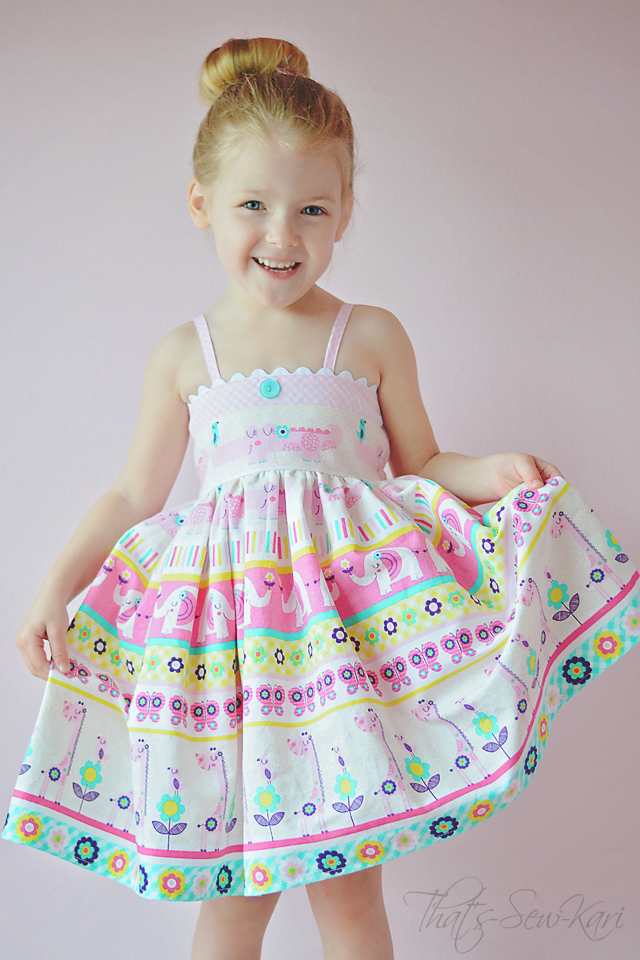
But, with a simple switch of fabrics, the swoon-worthy party dress is now a sweet and simple frock perfect for backyard tea parties and playdates in the park!

Bodice: Simple | Straps: Straight | Skirt: Simple

If you didn't catch it, I adore the simple bodice because it allows me to showcase my fabric, such as this adorable little pink alligator.  I also opted to use the simple straps as they are more car seat friendly, in my opinion.

Bodice: Simple | Straps: Straight | Skirt: Simple

For added details, I sewed a tiny white button on the outside of the strap where the snap is sewn underneath, ric rac at the top of the front bodice and a turquoise button to add a pop of color against the light pink gingham. I also cut the pink gingham for the front bodice on the bias for a bit of visual interest.


Seriously, this pattern is FAB!!  You will not be disappointed... pinkie promise!!

Important links: 
*Don't forget about the Buy 4, Get the 5th Pattern FREE (equal or lesser value) deal!

Join us: LLK Cafe
Join the rest of the LLK Fans and show off your creations, ask questions, and hear about new releases!


Custom Post Signature

Custom Post  Signature